How to… Bring Nature Into Your Home This Christmas

Christmas for me, alongside being all about family, friendship and feeling grateful, is deep rooted in nature. This is not unusual though, as people have been taking direction from nature during mid-winter celebrations for thousands of years. From the Romans decorating their homes with greenery to the Victorian Christmas tree, from pagans to Christians, the inspiration for how Christmas looks today has often come from the world outside our doors. For me, every year during December, I also bring nature into my home in the form of plant life. But why and how?

Plants and Christmas

During the winter and Christmas period, it’s popular for evergreens to be brought into our homes to be used as decorations. This practice has been observed for thousands of years, evolving but often holding the same symbolism and meaning. Evergreens are a traditional symbol of everlasting life due to their longevity, and were worshipped by pagans as symbols of immortality and everlasting light, being used to ward off illness and evil spirits. The bright natural colours of evergreens have also long provided inspiration for many, and still do during the cold, dark days of winter. They are a symbol of celebration and remind us that the days of spring will return in time.

Some Christmas examples include:

Mistletoe – A long history in Britain from being sacred to the druids and warding off evil spirits during the Middle Ages to symbolising healing, shelter and fertility. It was once banned from Christian churches due to its pagan links. The Victorians gave the plant its modern tradition of being hung in a doorway to kiss under, though the exact reason why we do this is still unknown.

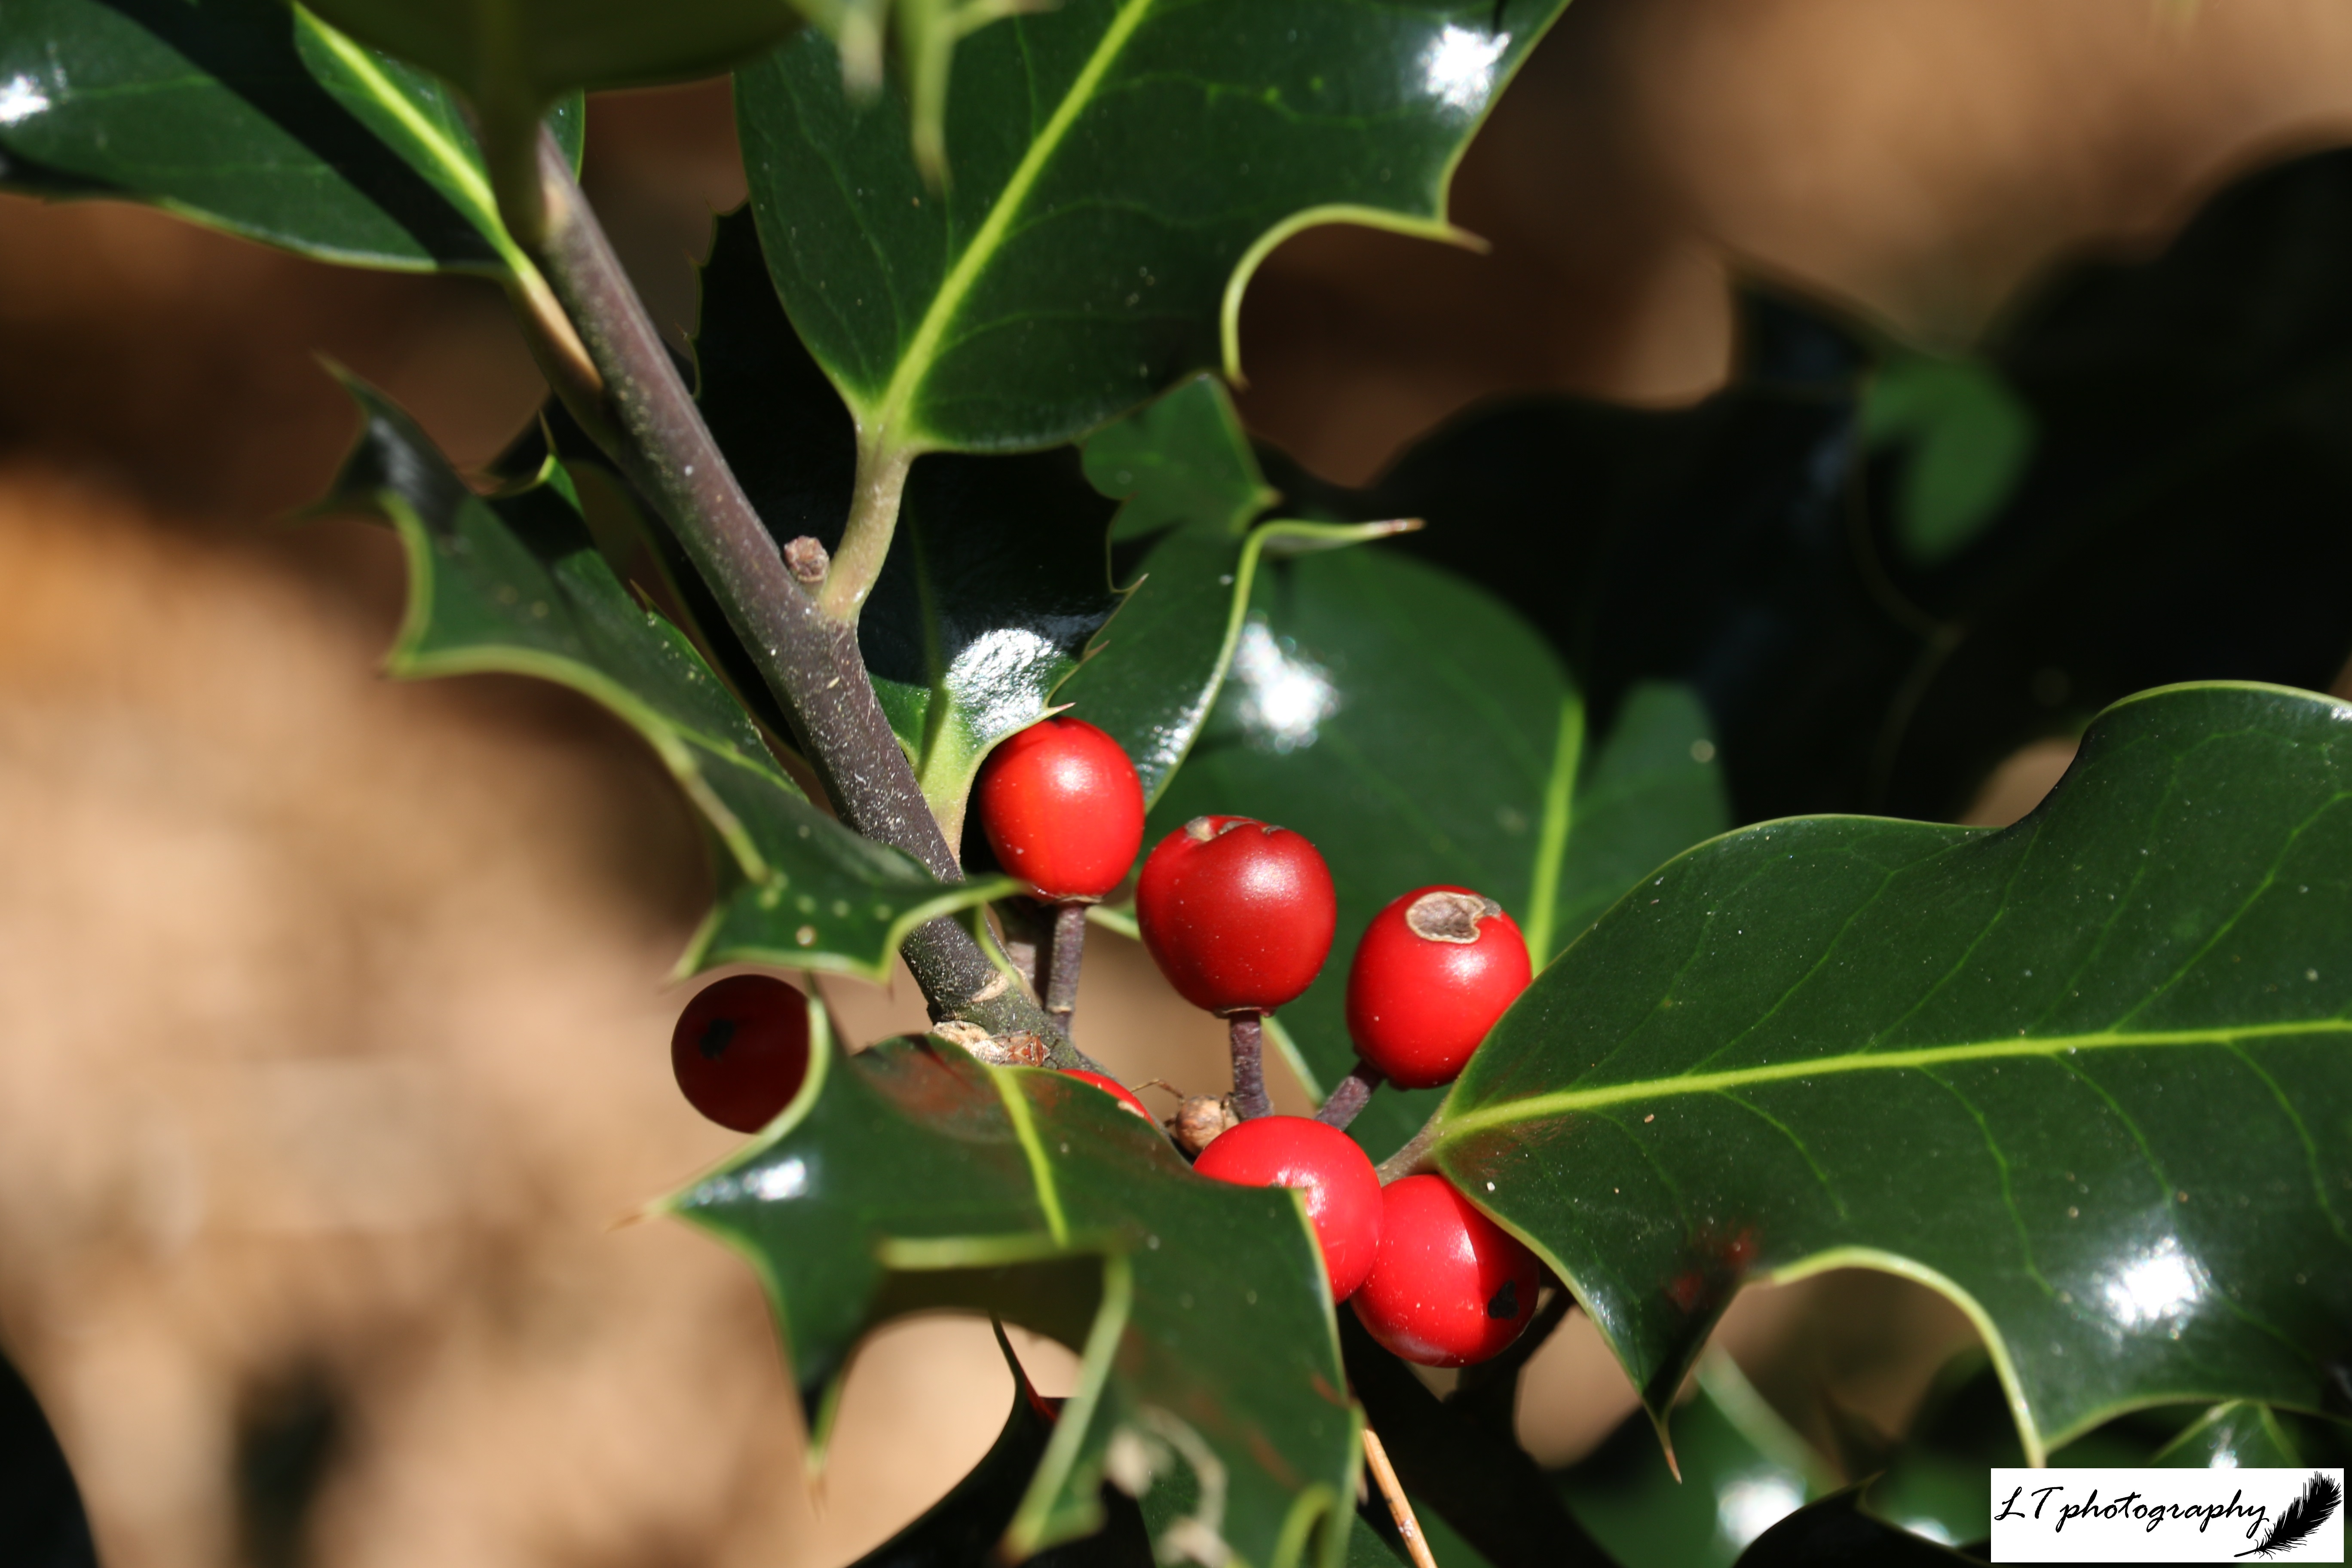
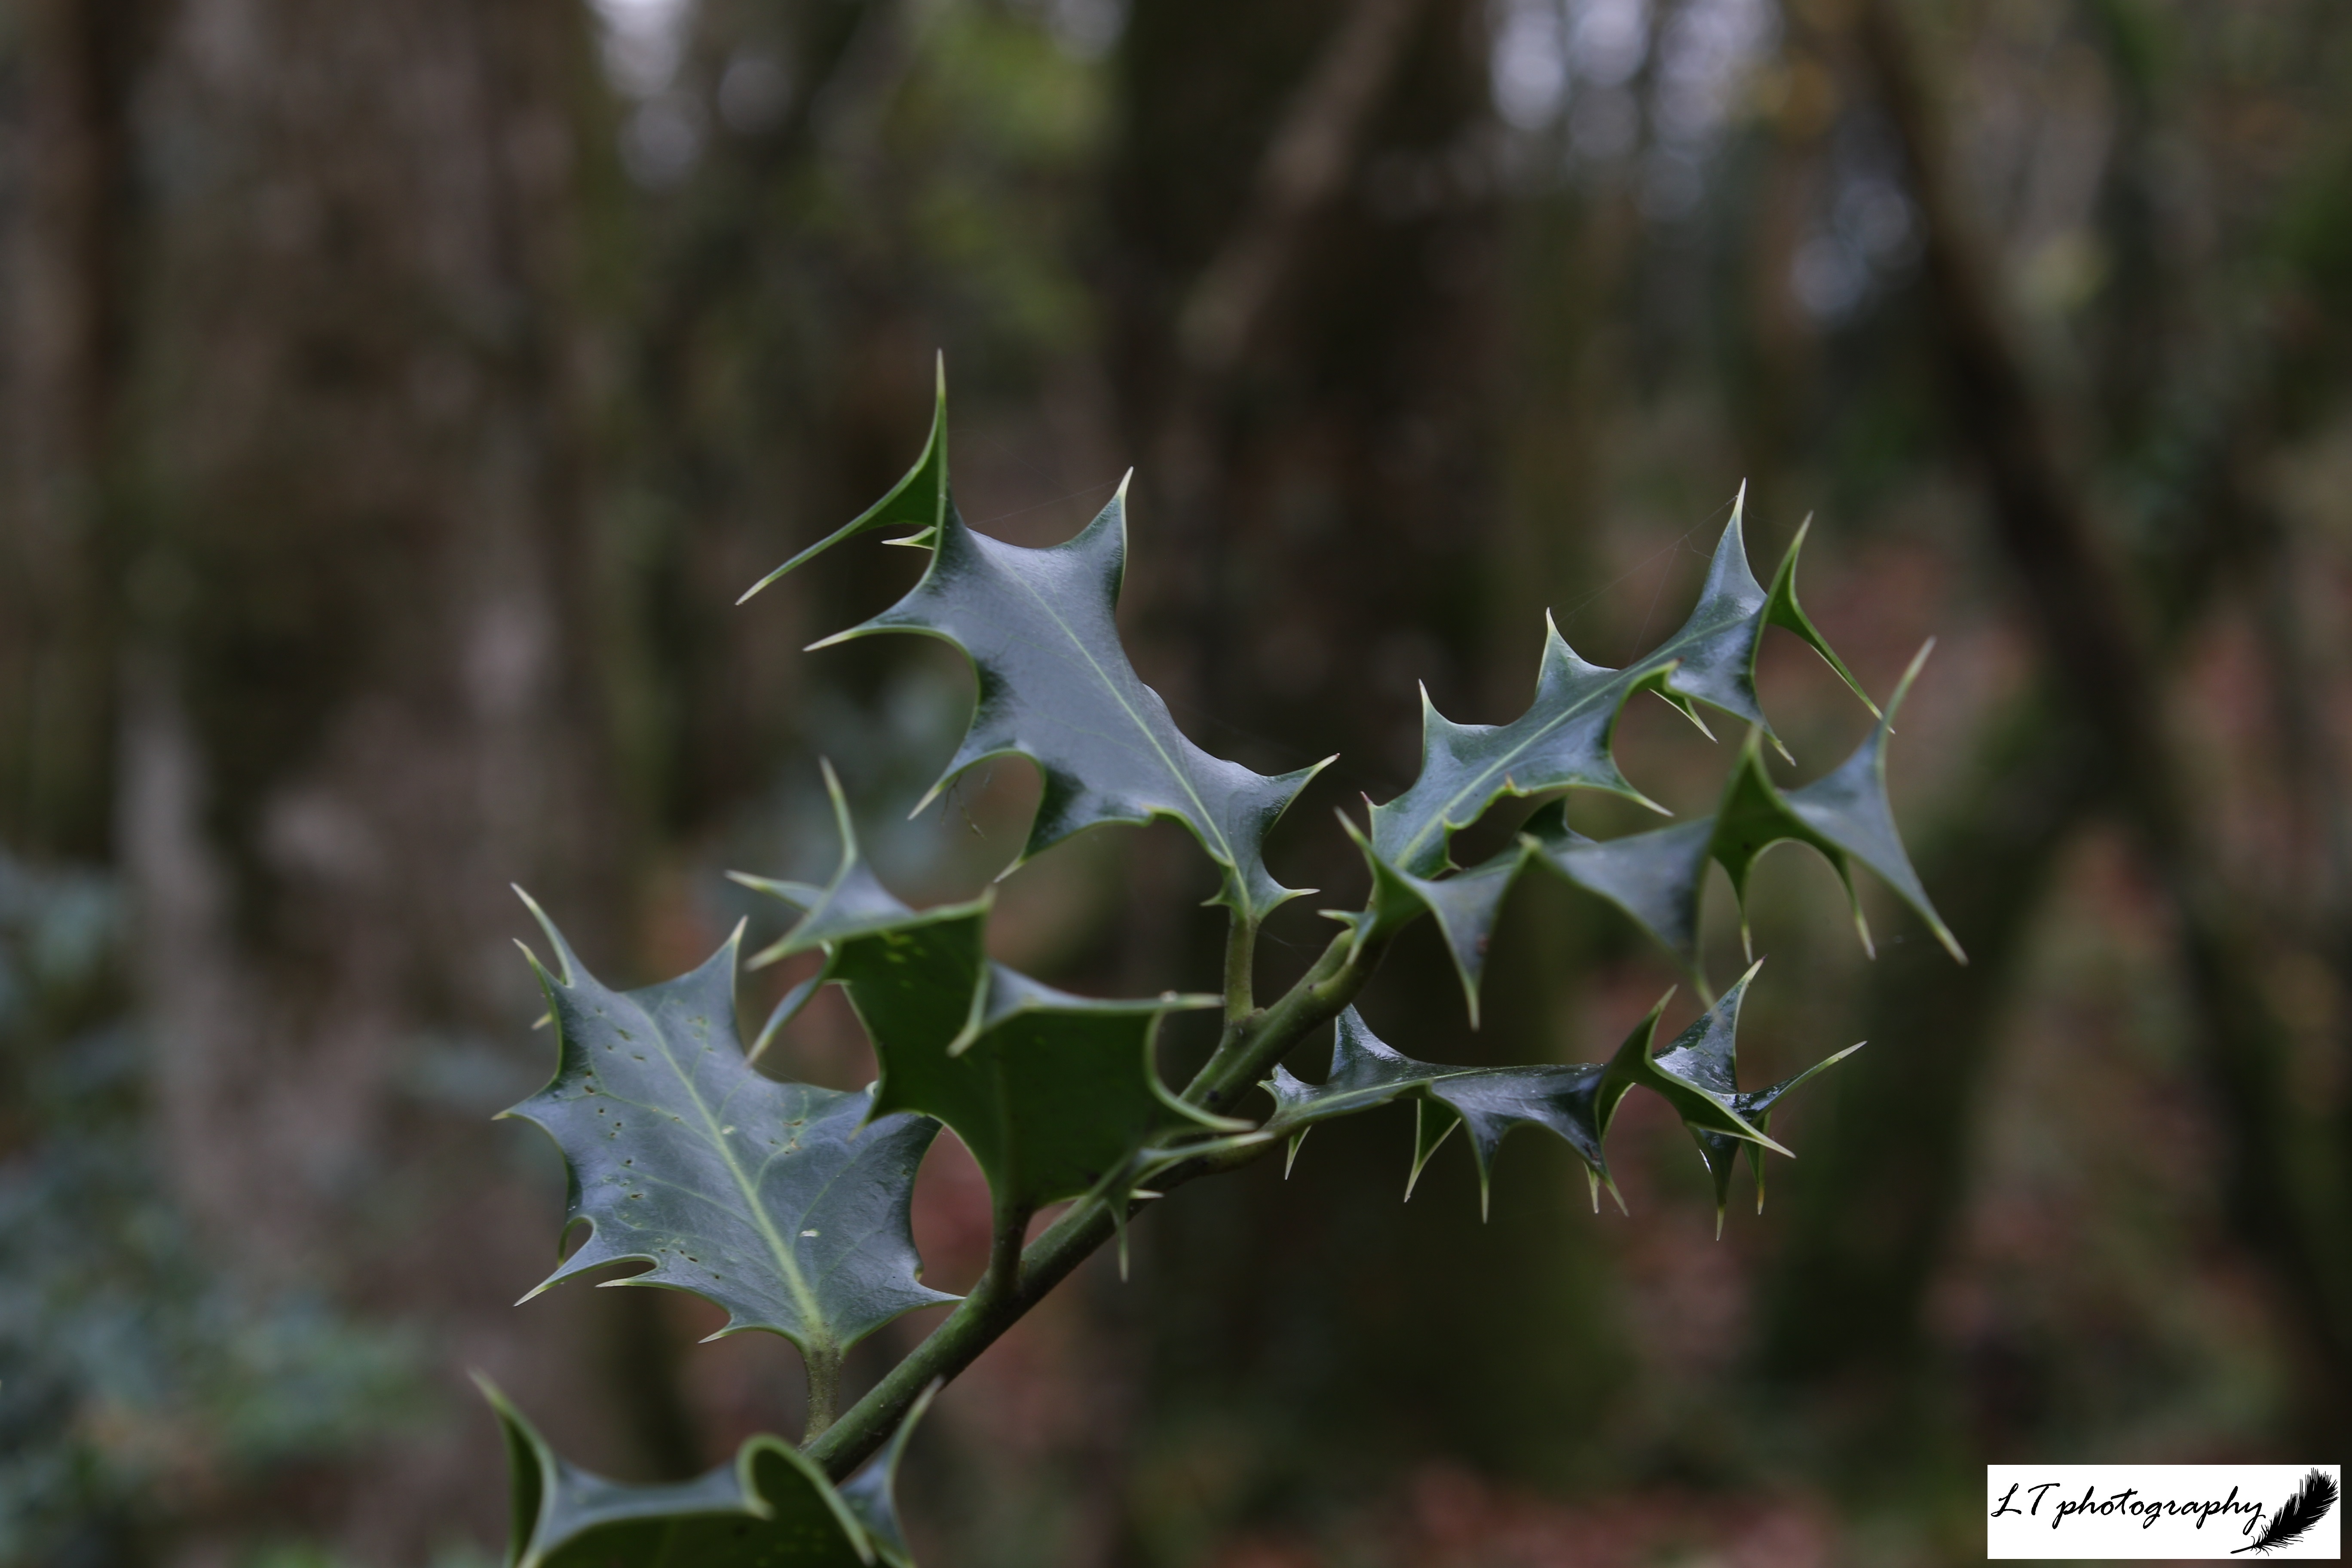
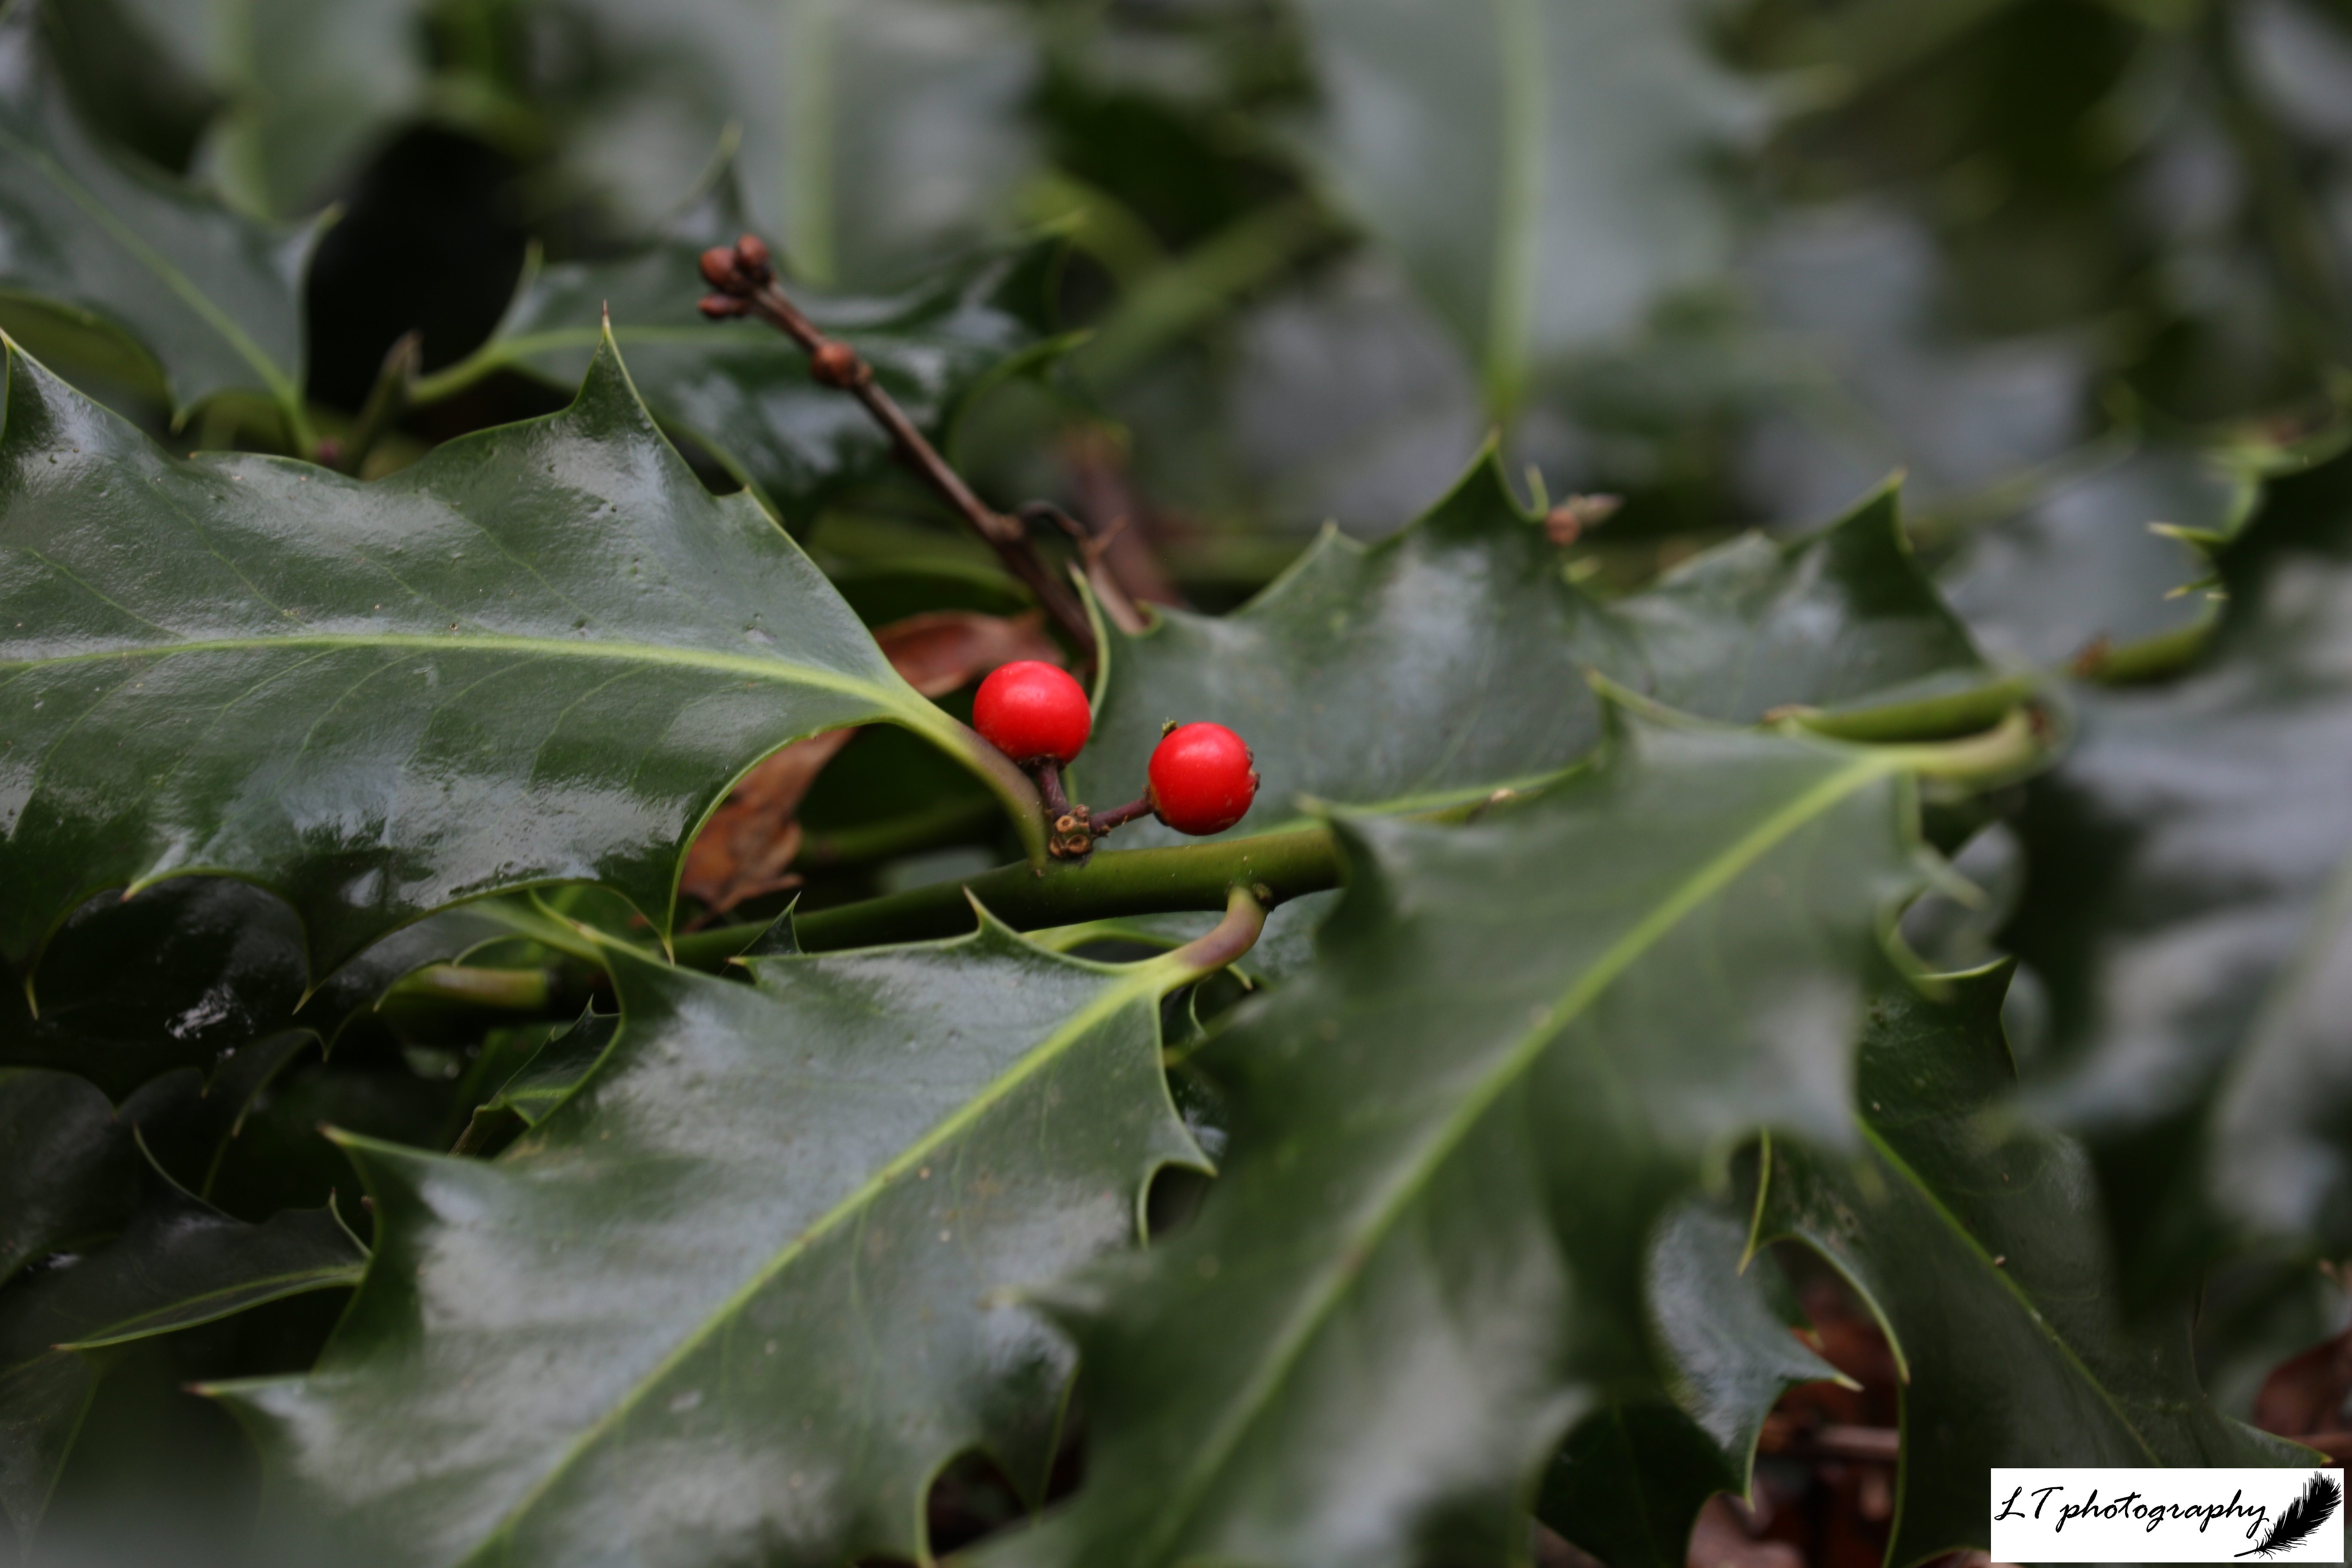
Holly – Long associated with fertility, protection and eternal life in Britain, due to being able to withstand harsh conditions. It was originally brought into people’s homes to ward off witches and malevolent spirits during the dark months, before being adopted by the Church to symbolise Jesus’ sacrifice (prickles= thorns and berries= spilt blood).

Poinsettas – Native to Mexico and brought over from America, the flowers have become a meaningful symbol of Christmas. Their star shape is thought to symbolise the Star of Bethlehem, and the colours either purity or the spilt blood of Christ. For some, Poinsettas also symbolise new life.

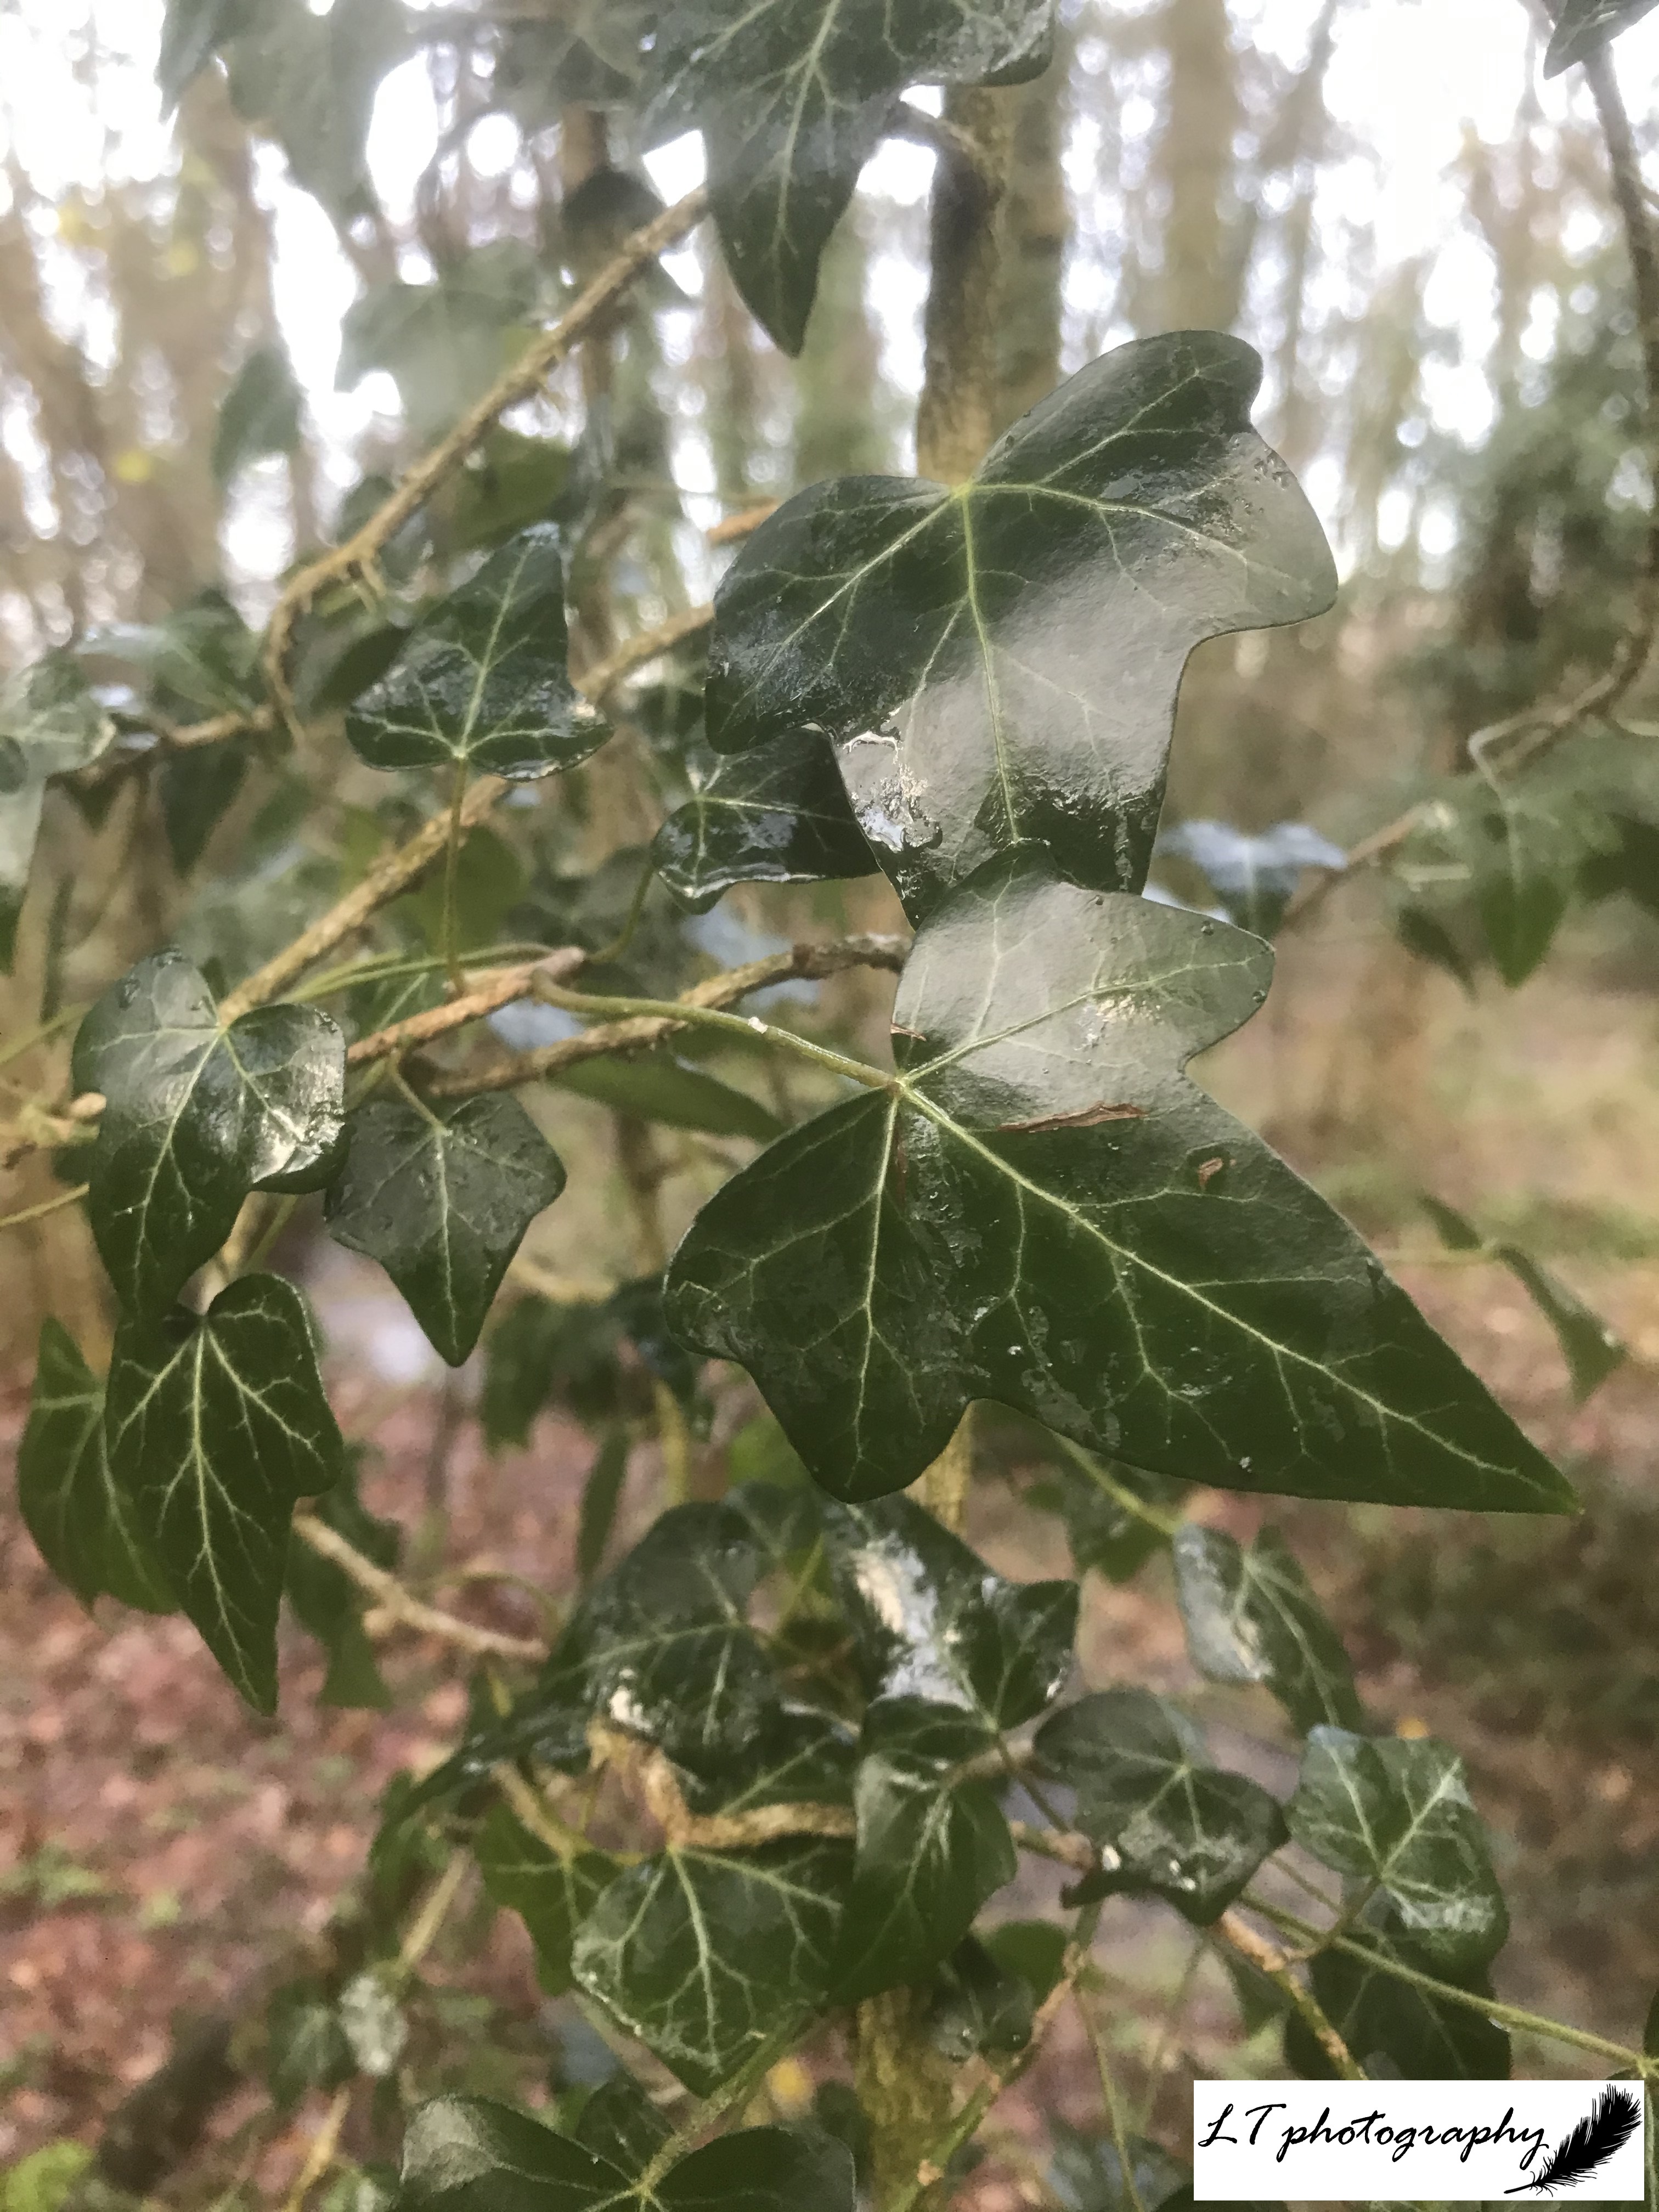
Ivy – Symbolises everlasting life, resurrection, rebirth, and the coming of spring. During Christmas time, Ivy is closely associated with Holly, being once considered a female plant whereas Holly was the matching male plant. It was said that whichever of these two species was brought into the house first during the winter, would predict whether a man or woman would be in charge of the house for the next year. Now popular at Christmas, Ivy was once banished from homes by the Christian church due to its ability to grow in the shade, giving it associations with secrecy and debauchery.

How to make your own Christmas decorations

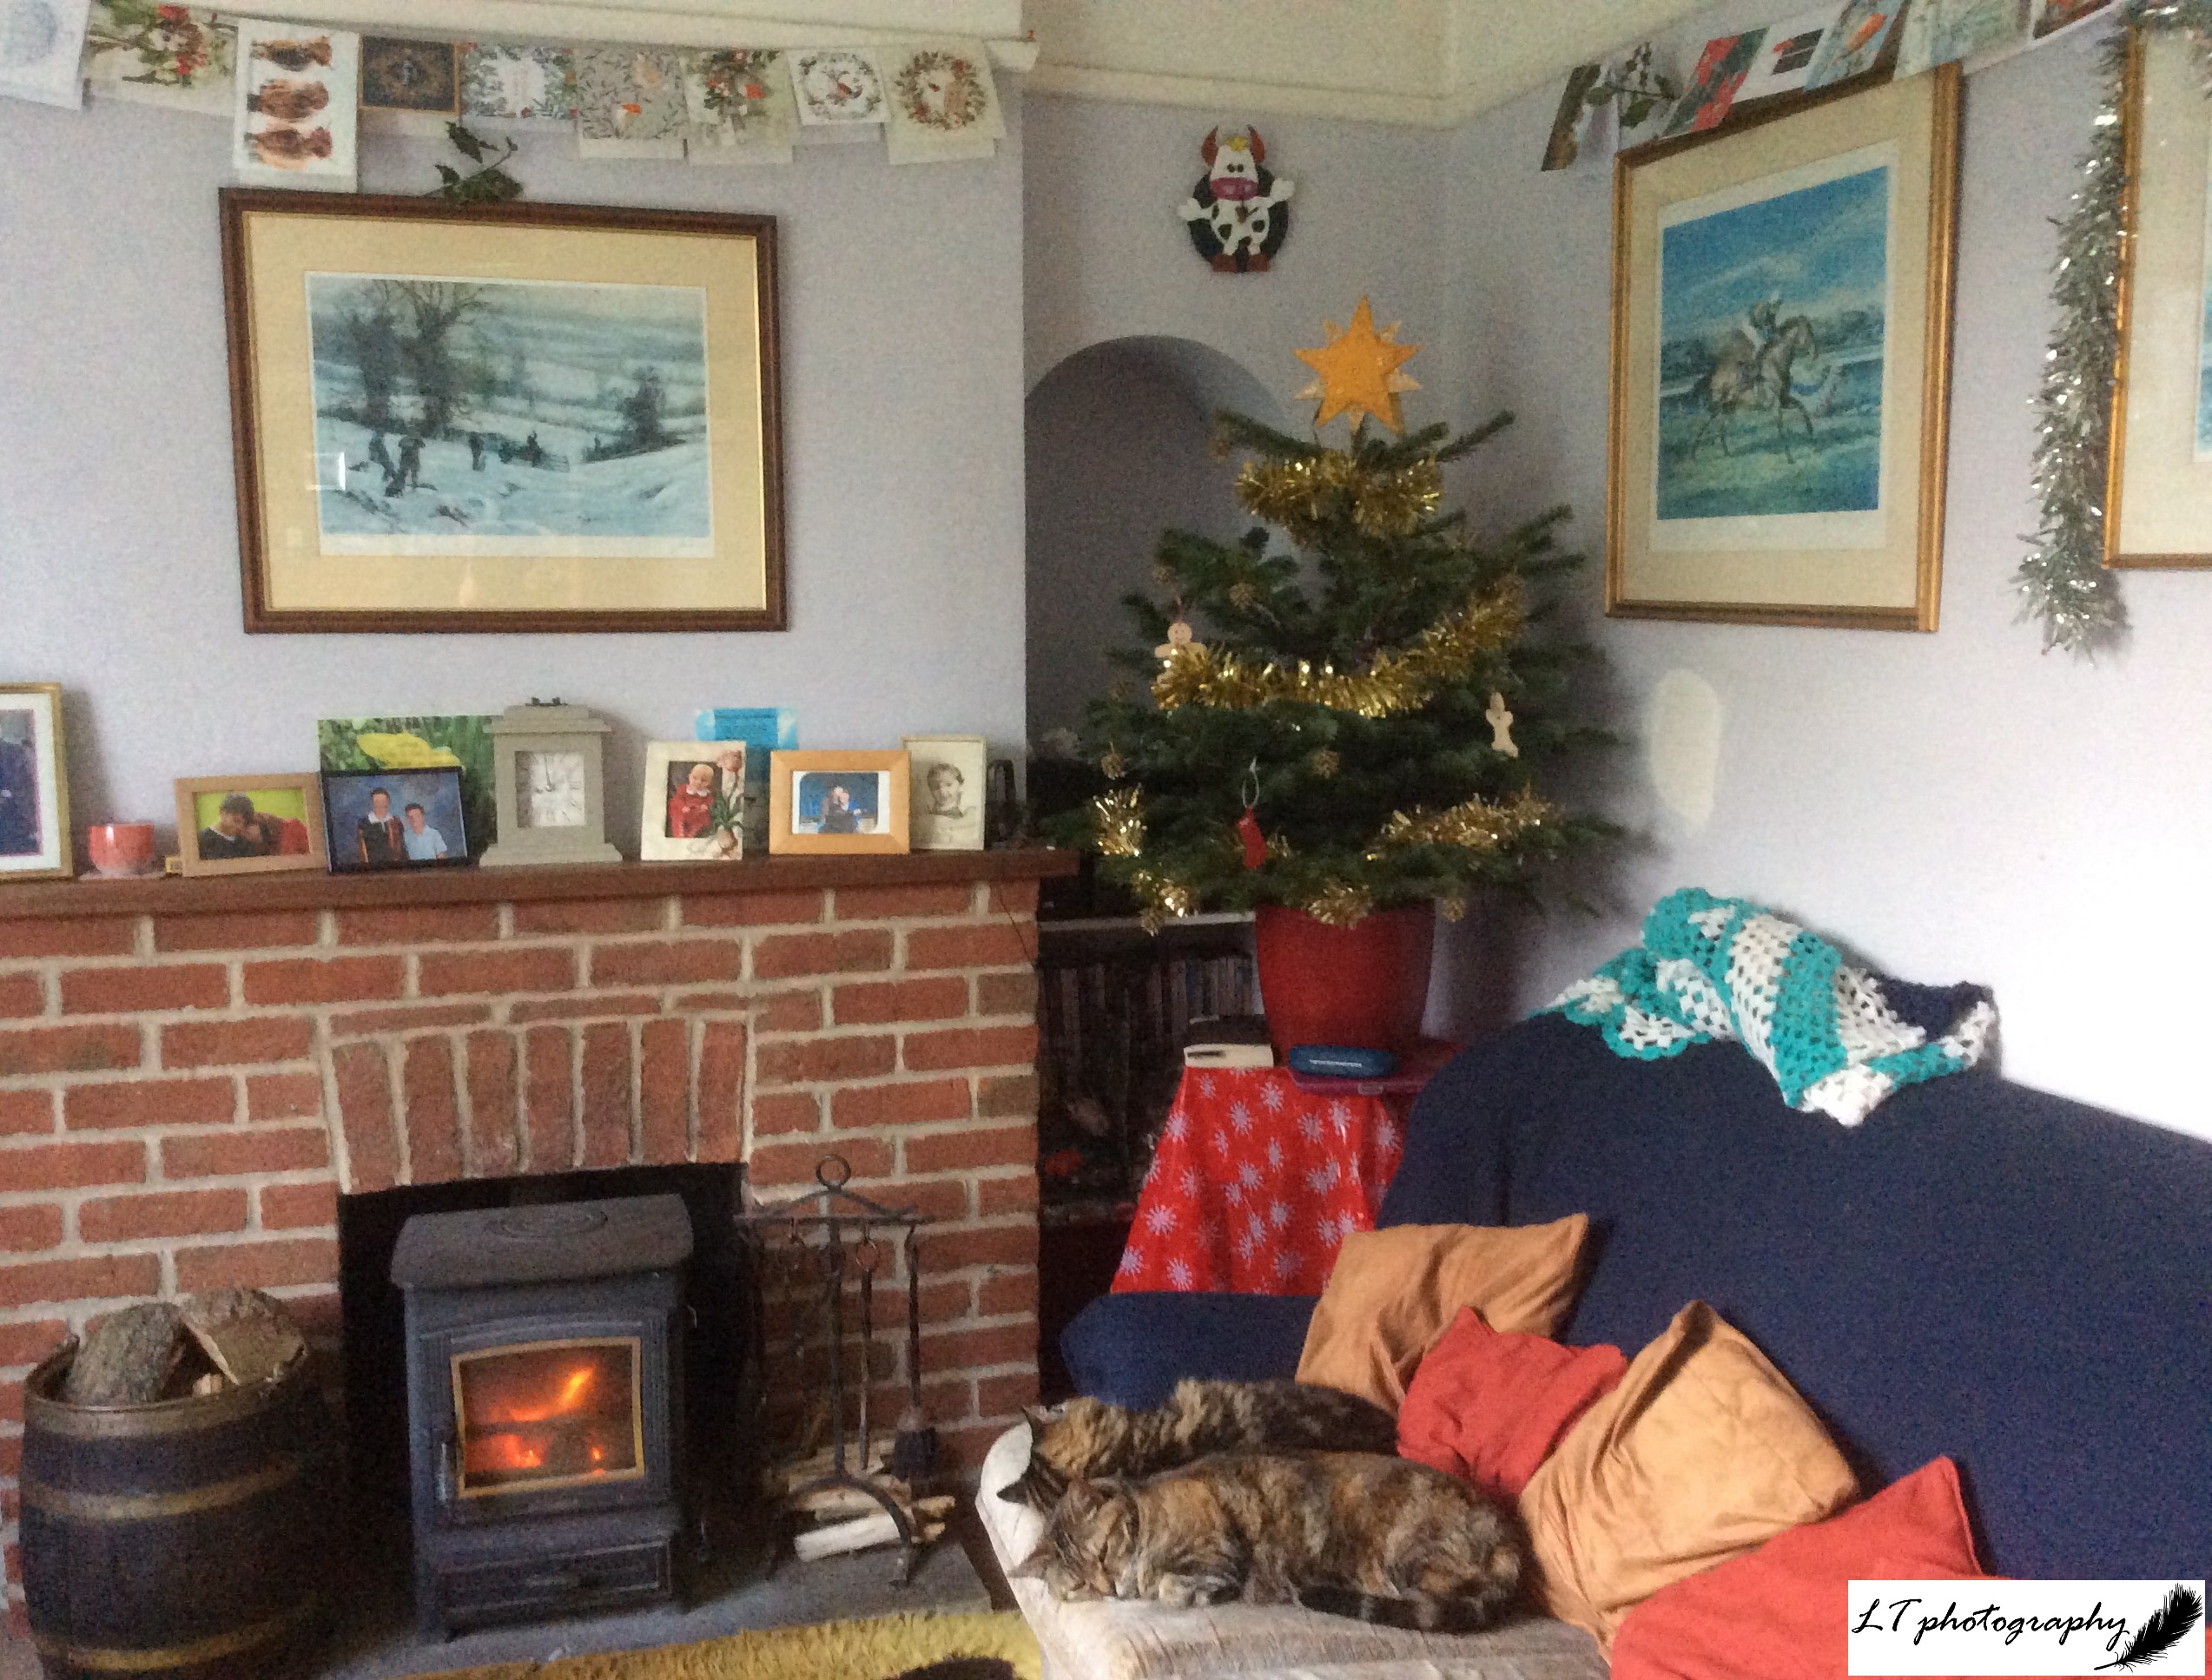
Bringing nature into your home is a great way to brighten things up and add a bit of colour to your Christmas festivities. Though it is understandable if you feel daunted by the prospect of turning your hand to making your very own decorations for the first time, such as a wreath or centrepiece, it is actually a simple and a great way to create decorations personal to you. Using natural materials can be a fun and easy way to do this, so why not try something new and have a go! For a little inspiration and some tips, here are some of the decorations that I put together for my family home each year, including this year.

Popularly Used Species

  • Holly – With and without berries
  • Ivy
  • Rose hips
  • Teasels – Some sprayed with non-toxic paint

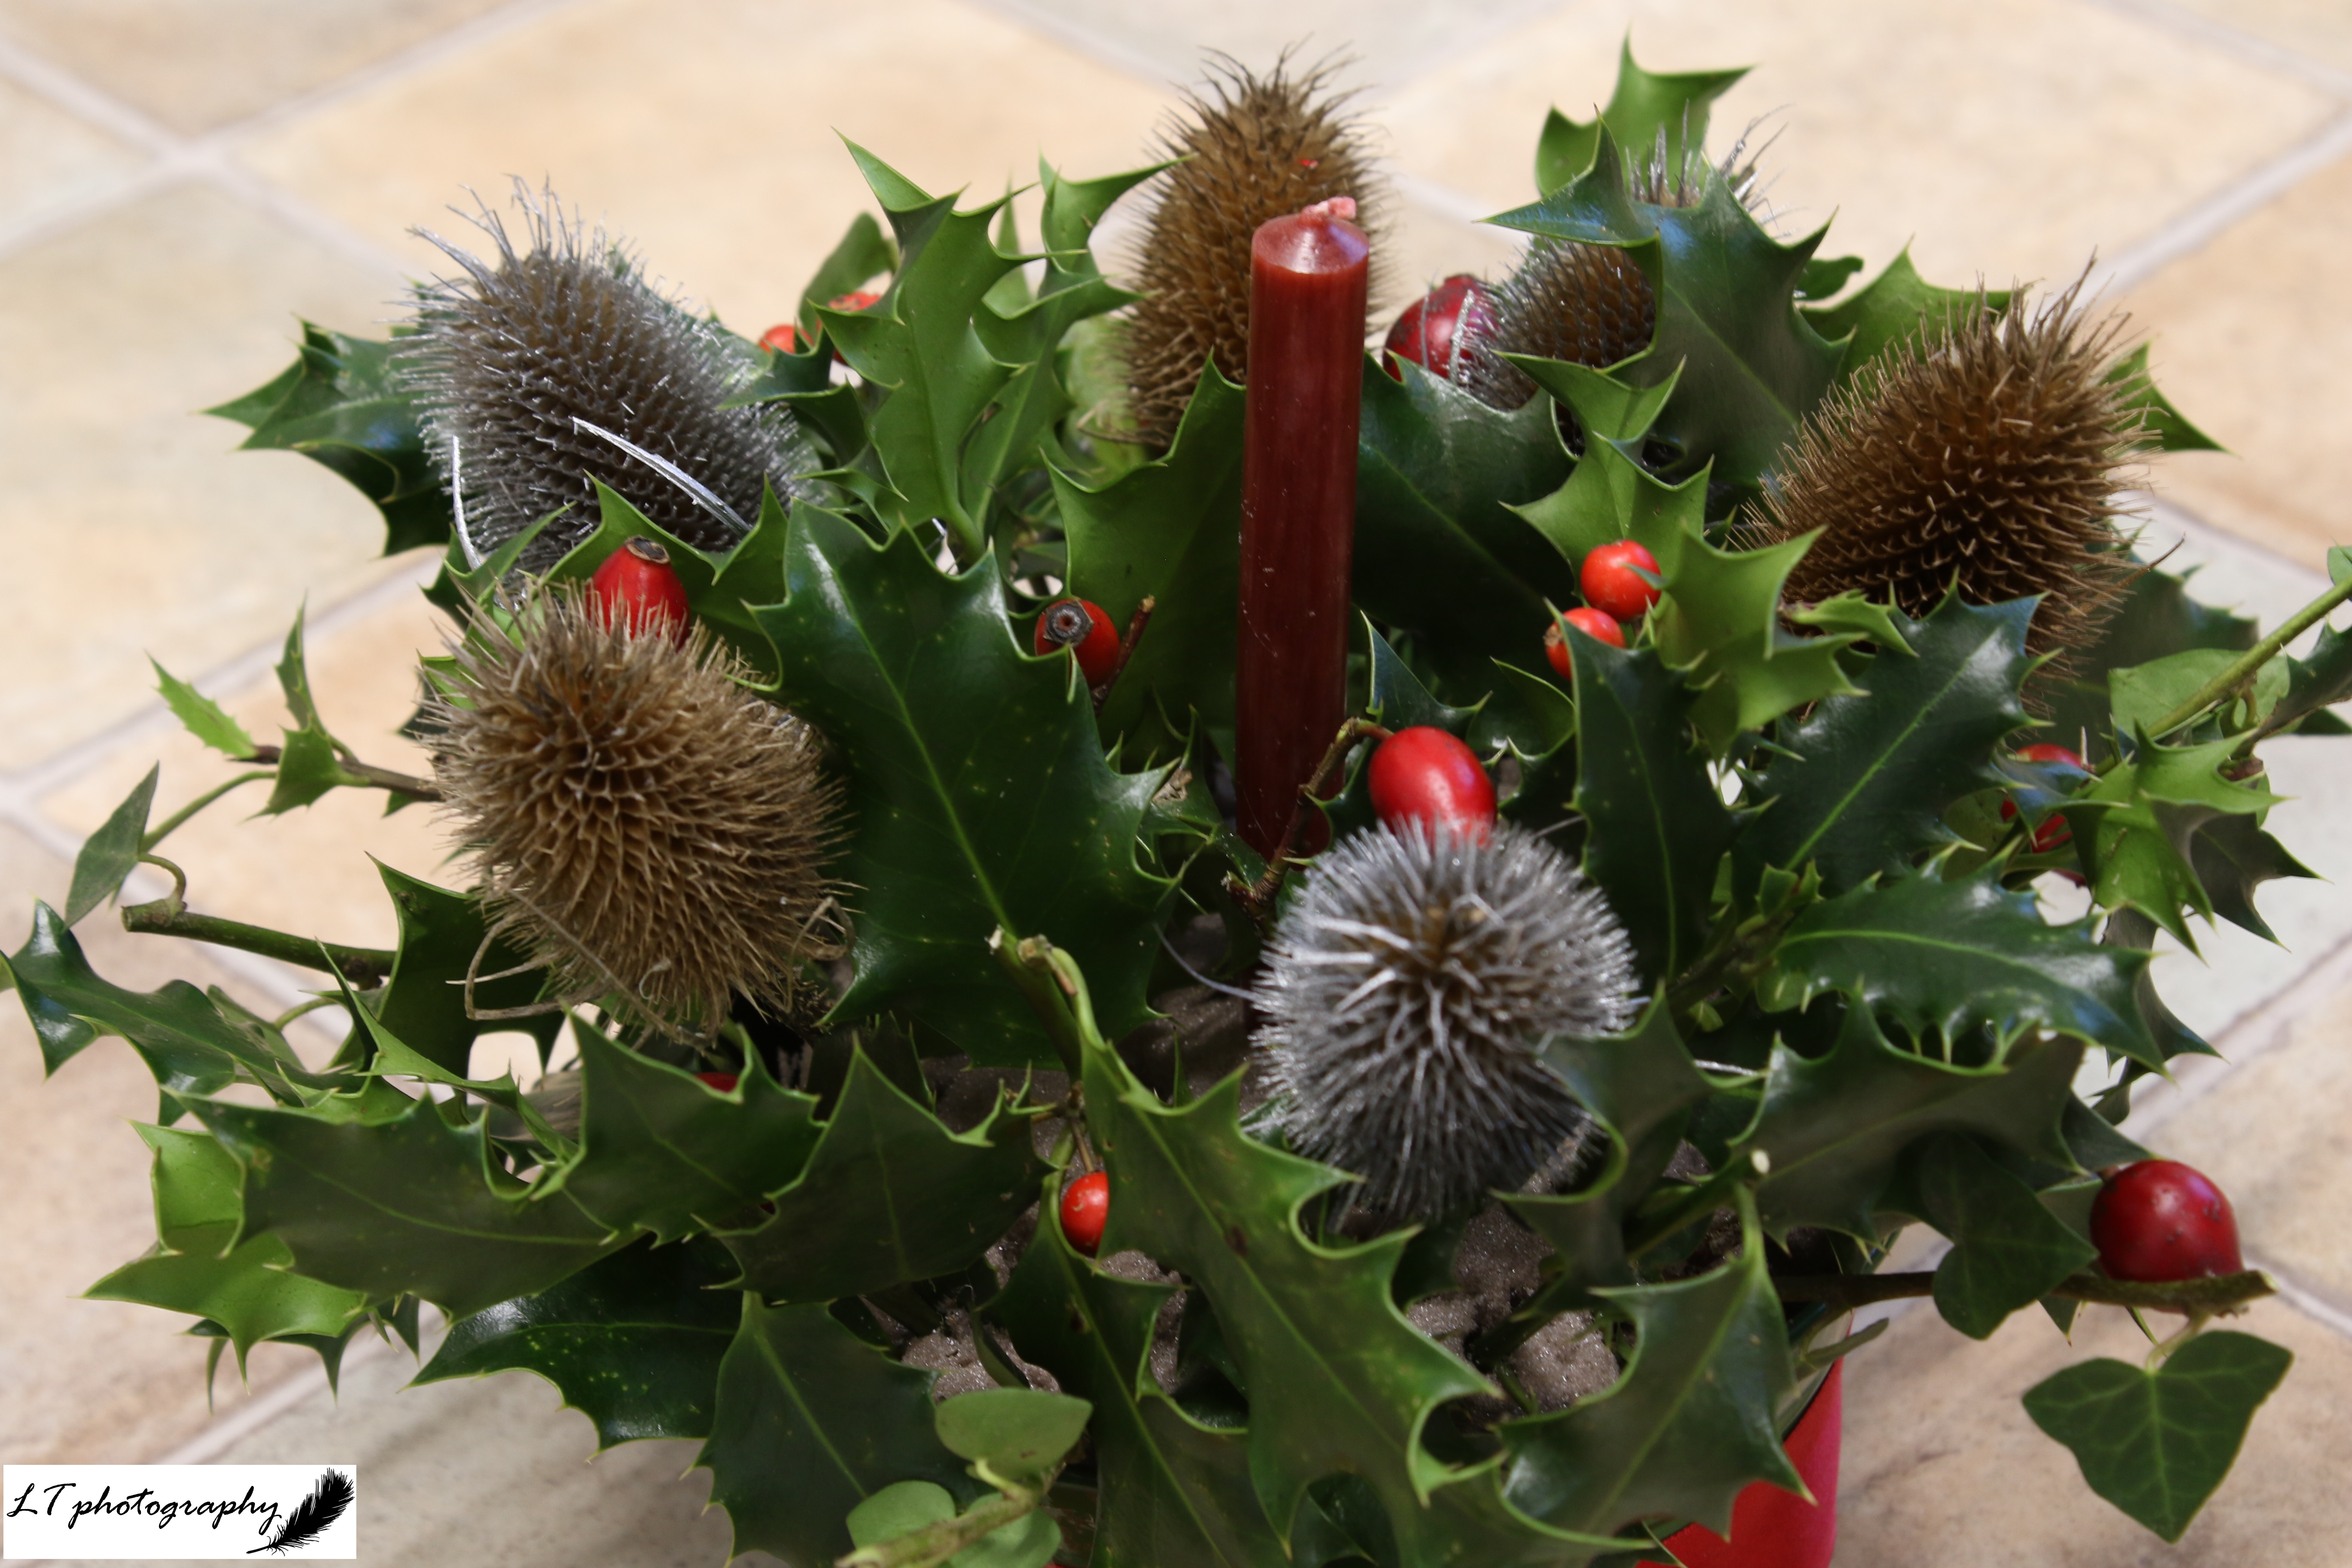
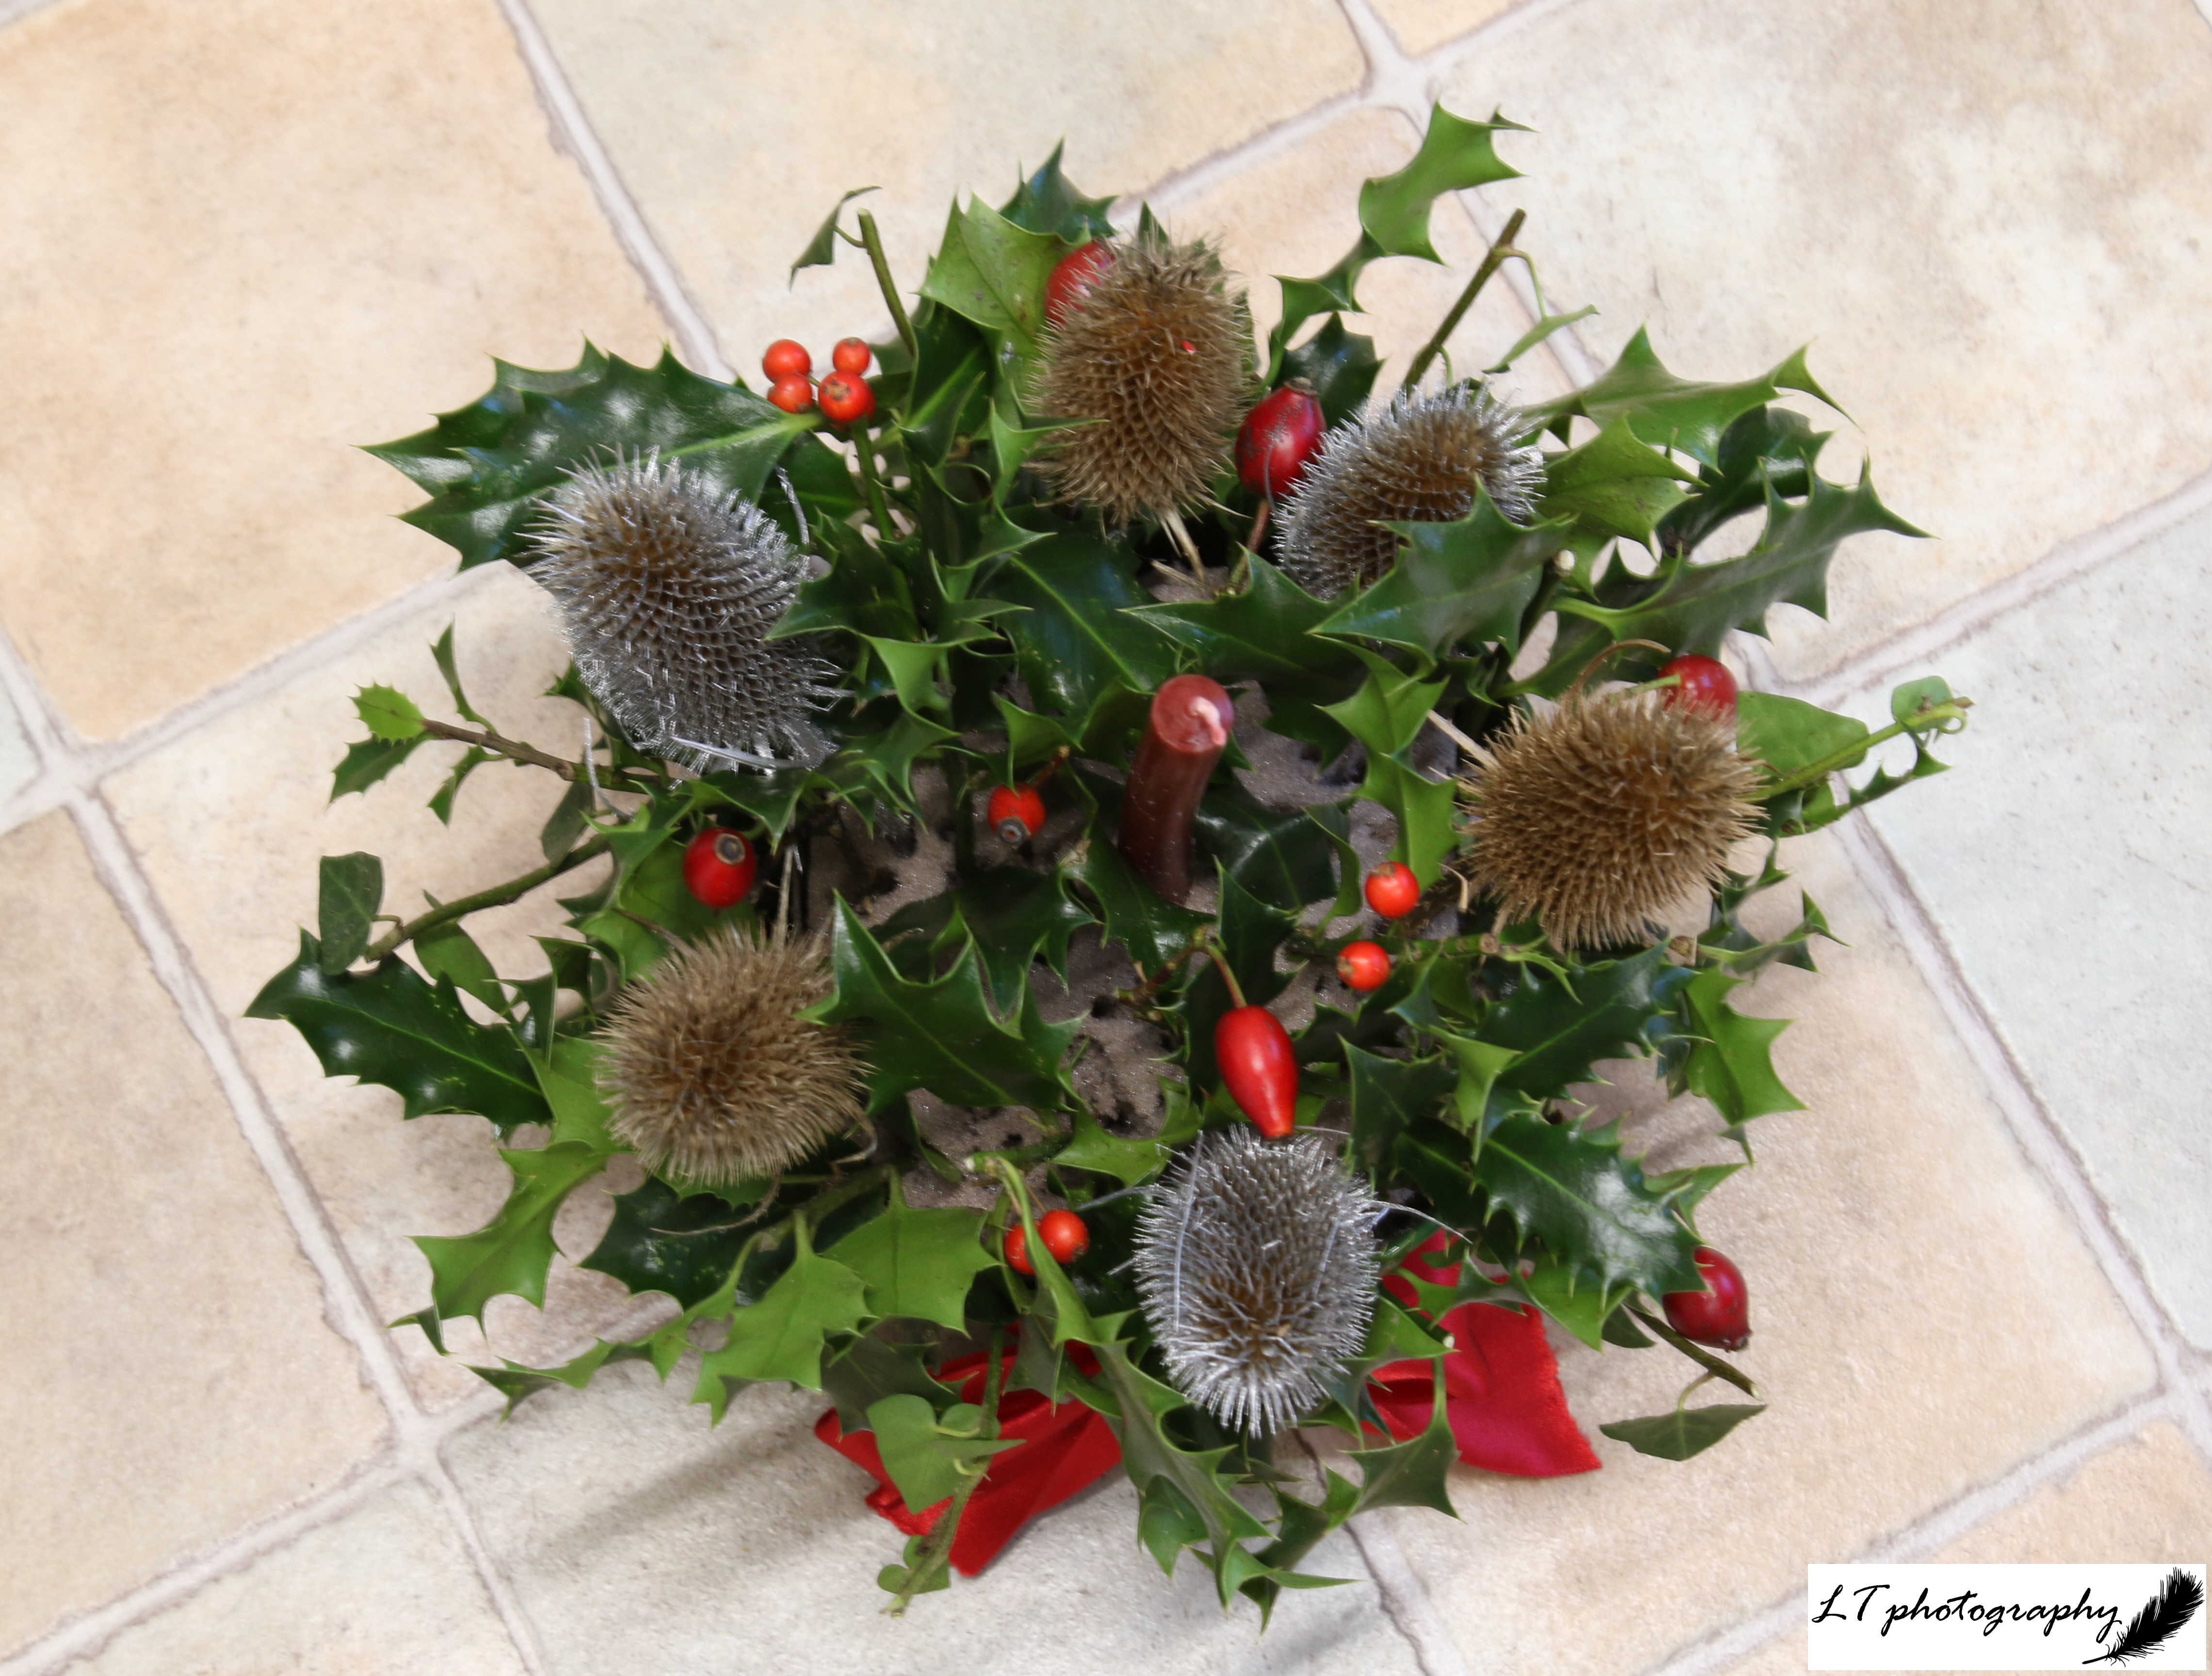
Centrepiece and Mantlepiece Decorations

For my centrepiece and mantelpiece decorations, every year I simply use a couple of small metal buckets with a bit of oasis in them. My squares of oasis are reused again and again each year, so if you are starting out it is better to use a non-toxic, biodegradable alternative that will not harm the environment.

To begin putting together one of my Christmas arrangements, I start with placing a candle at the centre (though it is simply for decoration). I then build up from there, beginning with a few Teasels around or behind the candle, then adding Holly with and without berries, Rose hips, and Ivy. You can arrange the greenery however you want and add what you like. It is a bit of fun of course!
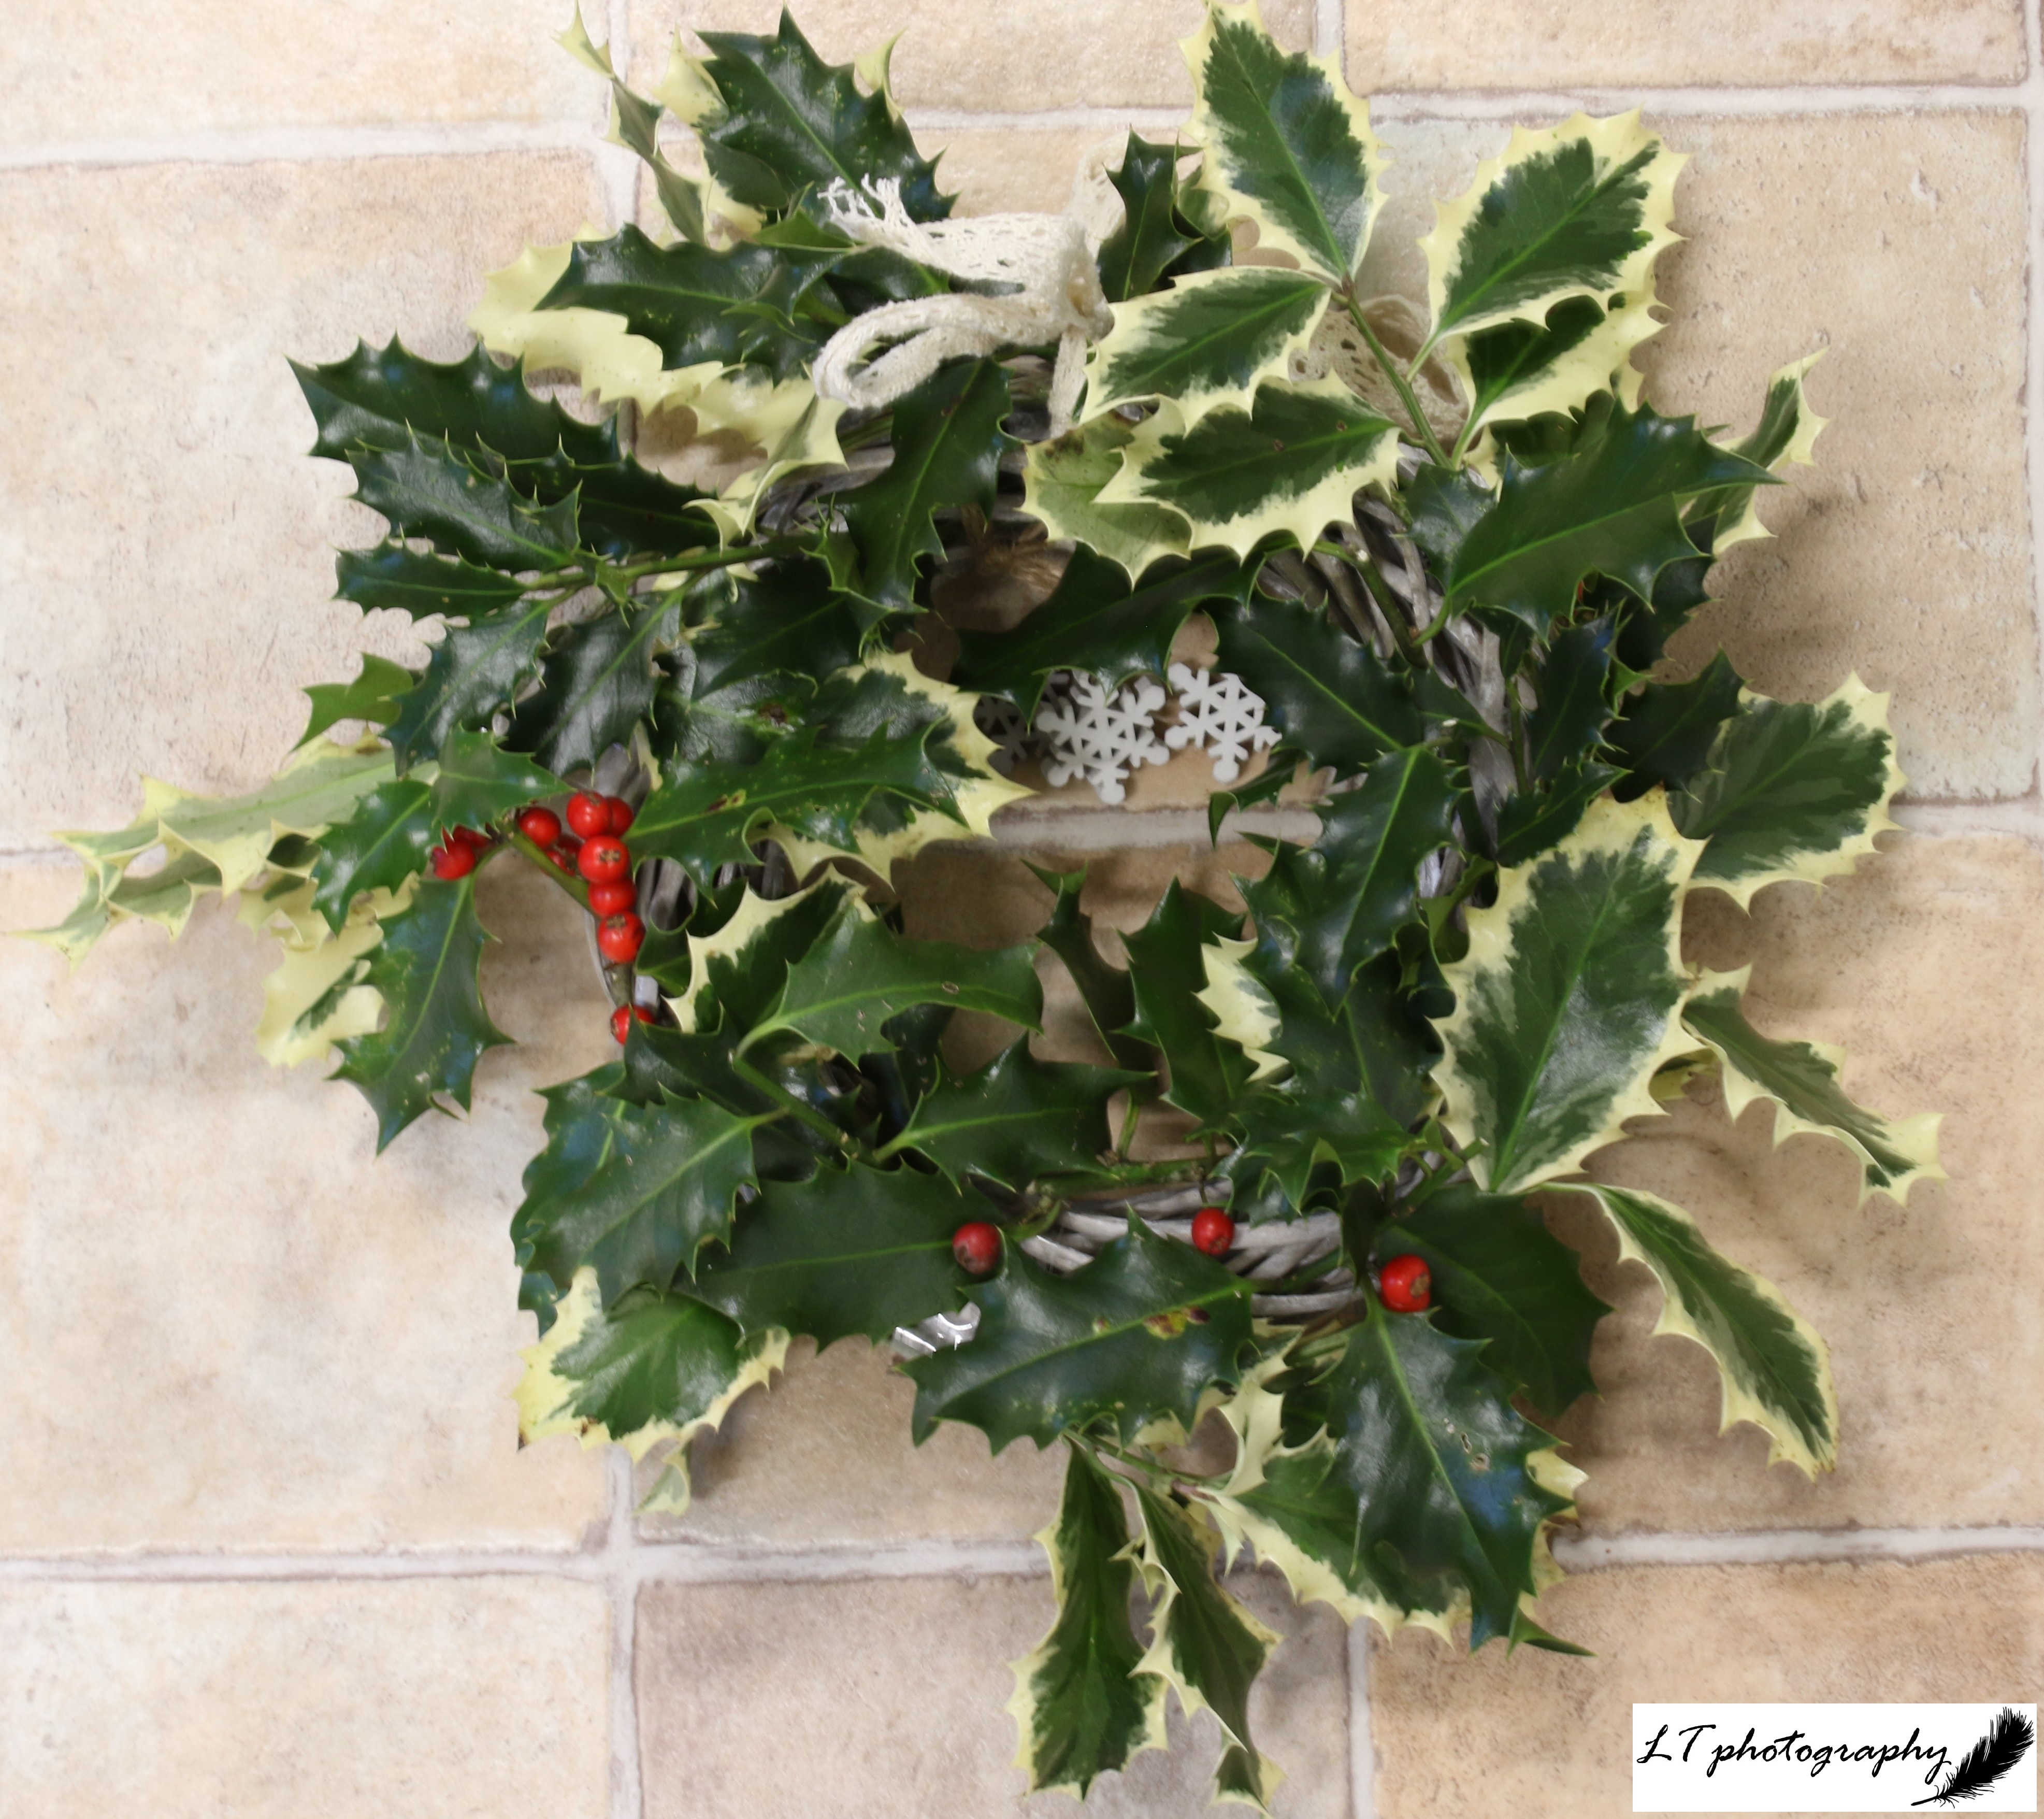
Basic Wreath

A wreath’s circular shape has long been seen as a symbol of eternal love and rebirth. They can first be traced back to early Roman times, where wreaths were made and given during the festival of Saturnalia each year (check out my blog post: The Twists of Christmas Traditions for more information).

To begin my wreath, I use a basic wooden wreath as my base and work from there. I usually start by wrapping Holly around the base and adding extra Holly with and without berries. This year I was happy with just Holly, but other years I have added Ivy and other greenery, and decorations such as ribbon. Less is more though, and watch out for the Holly’s spiky prickles!

Vase Arrangements

To finish my Christmas decorations, I like to use whatever greenery I have left to create some simple vase arrangements in fun vases. Teasels and Ivy are a great mix for this, adding a little colour and decoration to any room.

Warning

When collecting your greenery, pick only what you need, especially when picking plants with berries, such as Holly. These berries are a source of food for animals during the winter, so it is important that we leave some for them too.

Stay safe and Merry Christmas!

How to… Make Your Own Bird Nest Box

As our summer visitors, such as Swallows and Willow Warblers, leave us for sunnier shores, and we wait for our winter returnees, such as Redwings, the world outside our doors is slowing down and wildlife is preparing for the colder times to come. Autumn is a time for extraordinary spectacles, storing up food and changing colours, but also a time for us to do our bit, to help our wild neighbours with their preparations, and to prepare for a new year to come. This can range from cleaning ponds and putting out food, to planting trees and creating wood piles. It is also importantly a time to provide new homes for nature.

Previously, in spring/summer I posted on my blog about how to make a home for nature in the form of a bee hotel (see How to… Make Your Own Bee Hotel). A bee hotel is aimed at providing solitary bees (90% of UK bee species) with a place to nest, and for my blog I made a bee hotel that has now had some success. There are other forms of homes that we can make for wildlife though, for example for different species of bird.

In the UK, more than a quarter of all bird species are of the highest conservation concern, with a decline in breeding birds (44 million) between 1967 and 2009. This means that conserving and creating habitat for birds is an important issue, and something we can all get involved in. One example of an easy way is to put up nest boxes, which mimic natural habitat. They create an effective artificial cavity for birds, providing an accessible alternative for species that are currently experiencing the loss of breeding habitat and winter roosting sites.

Nest boxes come in a variety of shapes, sizes and designs, which will depend on the species of choice and the purpose they need to fulfill. Though you can put up a nest box at any time of year, the best time is right now, ready to be used as a roosting site throughout winter and for breeding in the spring. This way you can increase the chance of your nest box being a success next year. There are no set rules though, so why not try making your own today!

How to Make a Bird Nest Box

What you need:

  • A plank or offcuts of untreated wood, about 15mm thick for insulation
  • Tape measure & pencil
  • Hand or power saw
  • Drill & different sized drill bits
  • Sand paper
  • Hammer & nails
  • Screws
  • Sealant, a piece of rubber or something similar
  • Optional: Hole plate

Step by Step Guide:

  1. Decide on your nest box design. Your nest box will most likely be aimed at a certain species, such as Robins or House Sparrows. You can also choose particular design features, such as a flat or apex roof. For the purpose of this guide though, I will provide instructions to make a standard Tit nest box.
  1. Use a tape measure and pencil to mark out the wood you need, either by creating templates out of paper or cardboard, or by drawing straight onto the wood. For this design you will need 6 pieces: a back (45cm x 15cm); a base (11cm x 15cm); a front (21cm x 15cm); a roof (20cm x 15cm); and 2 side panels (25cm high at the back, 20cm high at the front, and 11cm wide). Use a hand or power saw to cut the wood into the 6 pieces needed.
  1. Next, take the front panel and use a wide drill bit to make a hole towards the top of the panel, at least 125mm up, which the birds will use to enter the nest box. The size of the hole will vary between different species, but for my nest box I made a 25mm hole, aimed at Blue Tits and similar Tit species.
  1. Use sand paper to sand down any rough or uneven edges of the wood, that otherwise could cause problems for birds using the box.
  1. Use a hammer and as many nails as you need to make the back, base, sides and front fit together forming the main body of the nest box. It is often best to mark where the nails will go first and partially drive each nail through the first piece of wood first (e.g. the back), which will make nailing the pieces together easier and help avoid splitting the wood.
  1. Attach the roof to the box using screws that you can later remove when needing to clean the nest box out. Seal the gap between the roof and the back of the nest box with either flexible sealant or an attached flap of recycled rubber.

Optional editions: Add a nest box hole plate to the front of the box to prevent predators from enlarging the nest box hole and larger bird species using the box. Also, you could apply a water-based wood preservative product to the outside of the box to prolong its life and help to repel water.

Tips on putting your nest box up

  • Unless there is shade during the day, position the nest box facing between north and east to avoid strong sunlight.
  • Choose a location which is 2-4 metres above ground level, out of reach of predators, and away from constant disturbance.
  • Make sure there is a clear flight path to the entrance of the nest box and that there is shelter from bad weather.
  • Place your box away from the location of any other nest boxes to reduce the chances of competition.
  • Avoid using nails to attach the box to a tree, as they may cause harm. Instead try to tie the box to the trunk or hang it, or otherwise use stainless steel screws or nails that do not rust.

Enjoy!

How to… Make Your Own Bee Hotel

As the planet continues to experience the loss of plants and animals on an unprecedented scale, it is now increasingly important that we all try and do our bit for nature. Though it can be disheartening and tough to know what to do sometimes, making one small step could be a real start to making a difference. For example, one easy thing you could do, is to provide a home for wildlife, such as a wildflower area, pond, or even a bee hotel.

The increasingly popular bee hotel is a home that is made for solitary bees, which include Leafcutter and Mason bees, and are those that live on their own rather than in colonies, make up about 90% of UK bee species, and are very important pollinators. With the loss of 97% of wildflower meadows since the Second World War, along with other factors such as pesticides and intensive farming practices, solitary bees are now heavily under threat, with less suitable habitat currently available to them.

One way we can help, is to produce nesting sites in the form of bee hotels. These structures are made up of a frame filled with tubes mimicking the natural cavities solitary bees use to nest in, which are typically tunnels in dead wood or hard soil. From spring to summer, different species will build inside these tubes, lay their eggs, add a supply of nectar and pollen, and block up the entrance. The eggs will then hatch, feed, and pupate, before emerging the following spring.

Though spring is the best time to make and put up a bee hotel, you can make one anytime you wish. There are also no set rules on how to make or use a bee hotel, as they are a relatively new phenomenon and advice on them is changing all the time. For now though, here’s some guidance I can give to help you make your very own bee hotel. They can take some time to make, but are very rewarding, and are also a great activity to currently do as part of your 30 Days Wild challenge!

Cherry Blossom

How to make a bee hotelWooden Planks

Examples of considerations include:

  • Simple or aesthetically pleasing and complex design?
  • Vertical or horizontal?
  • Sloped or flat, overhanging roof?
  • For your garden or a small space e.g. a window sill?
  • Use only recycled and reclaimed resources?

Always think of the bees when making your decisions though!

What you need:

  • Offcuts of planks of untreated wood, about 1.5cm thick
  • Tape measure and pencilSaw
  • Saw
  • Hammer and nails
  • Sand paper
  • Tubes varying in size from about 2-12mm, with a length of at least 10mm, though ideally about 16mm. For example: bamboo canes, hollow plant stems such as sunflower stems, or bespoke bee tubes
  • Chunks of untreated hardwood or Hammerlogs
  • Drill
  • Bits to hang up the bee hotel e.g. T bracket, screws, screw driver, Rawlplug wall plugs

T Bracket


Step by step guide:

  1. Decide on your bee hotel design. Bear in mind, that smaller is better to be able to easily move the bee hotel around and to encourage bees to nest at lower densities
  2. Use a tape measure and pencil to mark out the pieces of wood you need; the most simple designs have 5 pieces. Then use a saw to cut your wood, and sand paper to sand down any rough or uneven edges

  3. Use a hammer and as many nails as you need, to create the frame of your bee hotel
  4. Cut your chosen tubes to the right length to fit into the frame of your bee hotel, and sand paper off any rough ends. By using several different sizes of tubes, you increase the chance of attracting a wider range of bee species, due to variation in their preference for nest tunnel size. You can also drill holes into chunks of untreated hardwood or logs to create some more variety in your bee hotel
  5. Carefully build up your frame with your tubes and drilled wood, until it is filled. I suggest lying your bee hotel on a tilted surface to make this easier to do

  6. Decide on a suitable location for your bee hotel. It is important to place it in full sunlight, for example facing south or south-east, at least 1 metre above the ground, and not covered by vegetation
  7. Hang your bee hotel up. For mine I used a t bracket, screws, screw driver, drill and rawlplug wall plugs to attach it to the south side of my house
  8. Then wait for the bees to come to you!

Tips

  • The smaller the bee hotel is, the more effective it will be!
  • Create an overhang to give the bee hotel tubes some better protection from the rain
  • Every autumn take down your bee hotel and store it in a cool and dry location, to reduce risks such as of fungal infections
  • For best results, clean the bee hotel out every year, including removing, cleaning and preparing any pupae for release the following year

The bee hotel I made is far from perfect, but I hope it gives you some inspiration to help make yourself an even better bee hotel!