12 Days of Laura’s Wild Photos 2023

For the last couple of years I have accompanied the 12 Days of Christmas, up to Twelfth Night, with my own 12 Days of Laura’s Wild Photos. On these 12 days I share one photo a day on my social media platforms from the collection of photos that I have taken over the proceeding year out in nature with my camera, camera trap or phone. With these photos I aim to share glimpses of the beauty of nature, share some of my favourites from the year that have yet to take centre stage, and to simply put a smile on people’s faces.

This last christmas I embarked on my 12 Days of Laura’s Wild Photos challenge once again and had a lovely response to my collection of photos with my landscape photos being the main favourites. As I look forward to more wild adventures to come in 2024, here’s my 12 Days of Laura’s Wild Photos for 2023.

12 Photos

Day 1 – I began my 12 Days with a bang on Christmas Day as this photo of a snowy woods in misty sunlight ended up being the most popular photo of the 12 days. It’s a family favourite and was also described as ‘could be a painting’ which I was extremely happy to hear. Maybe it has a future beyond these 12 days!

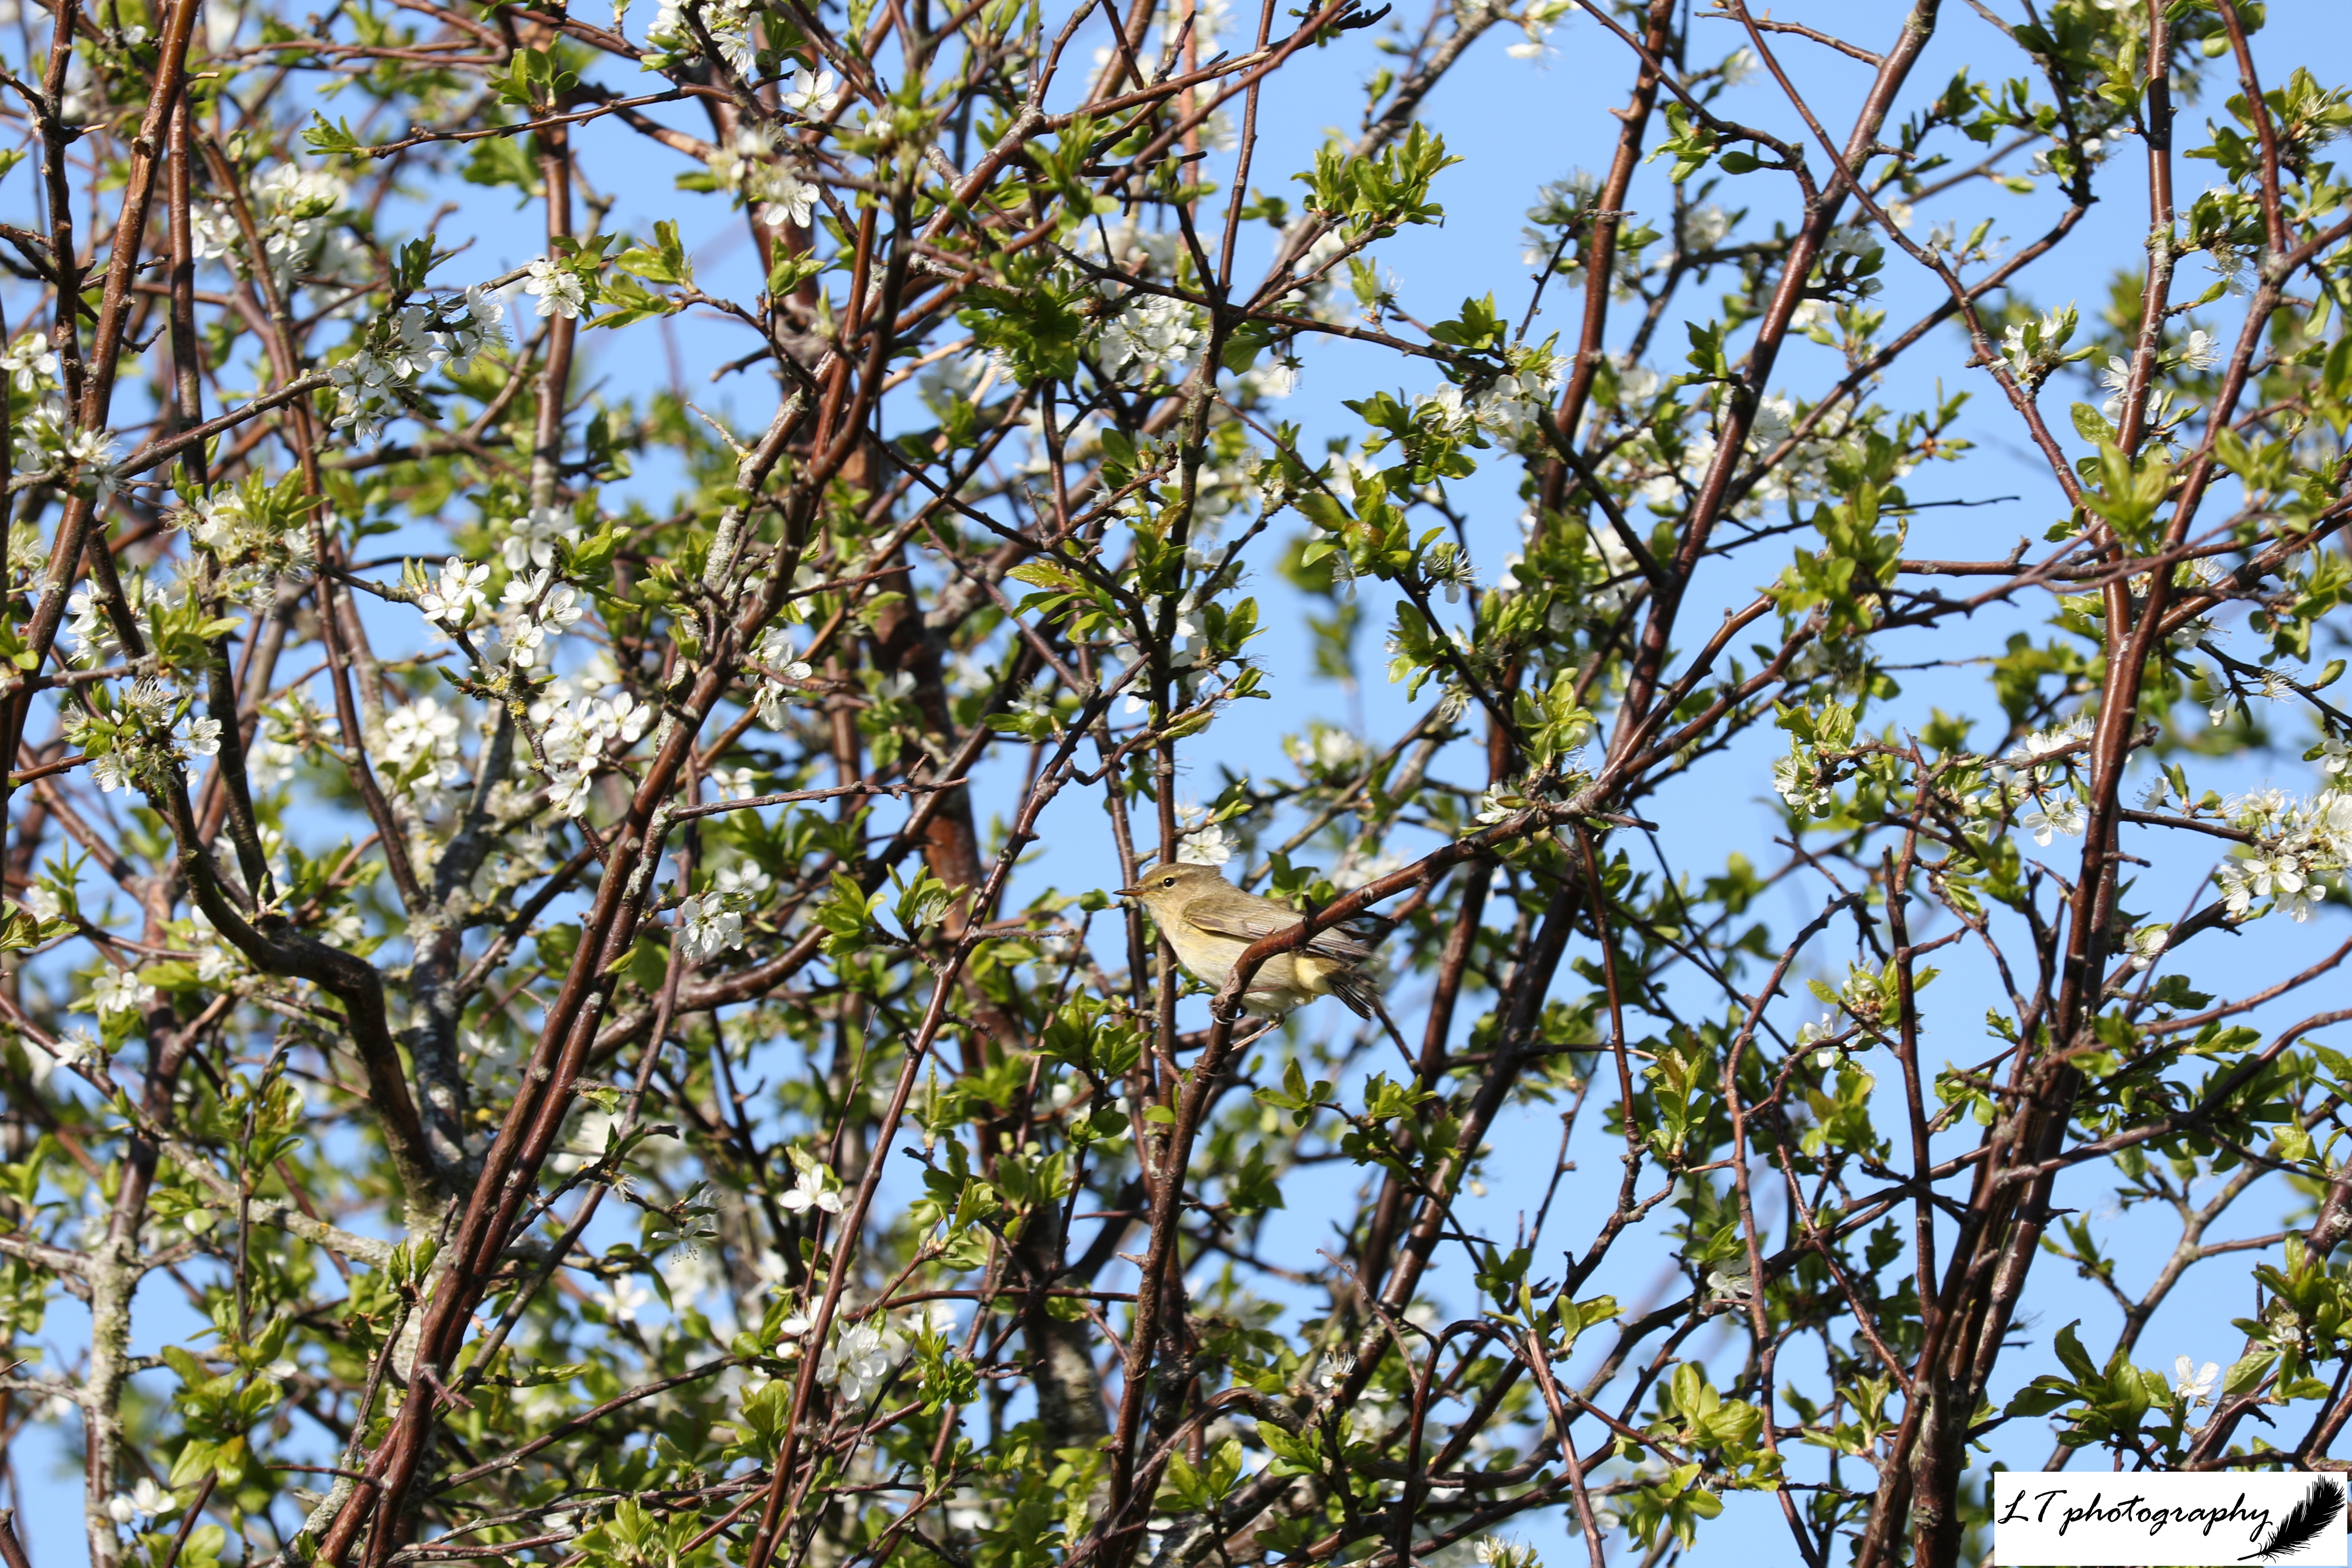
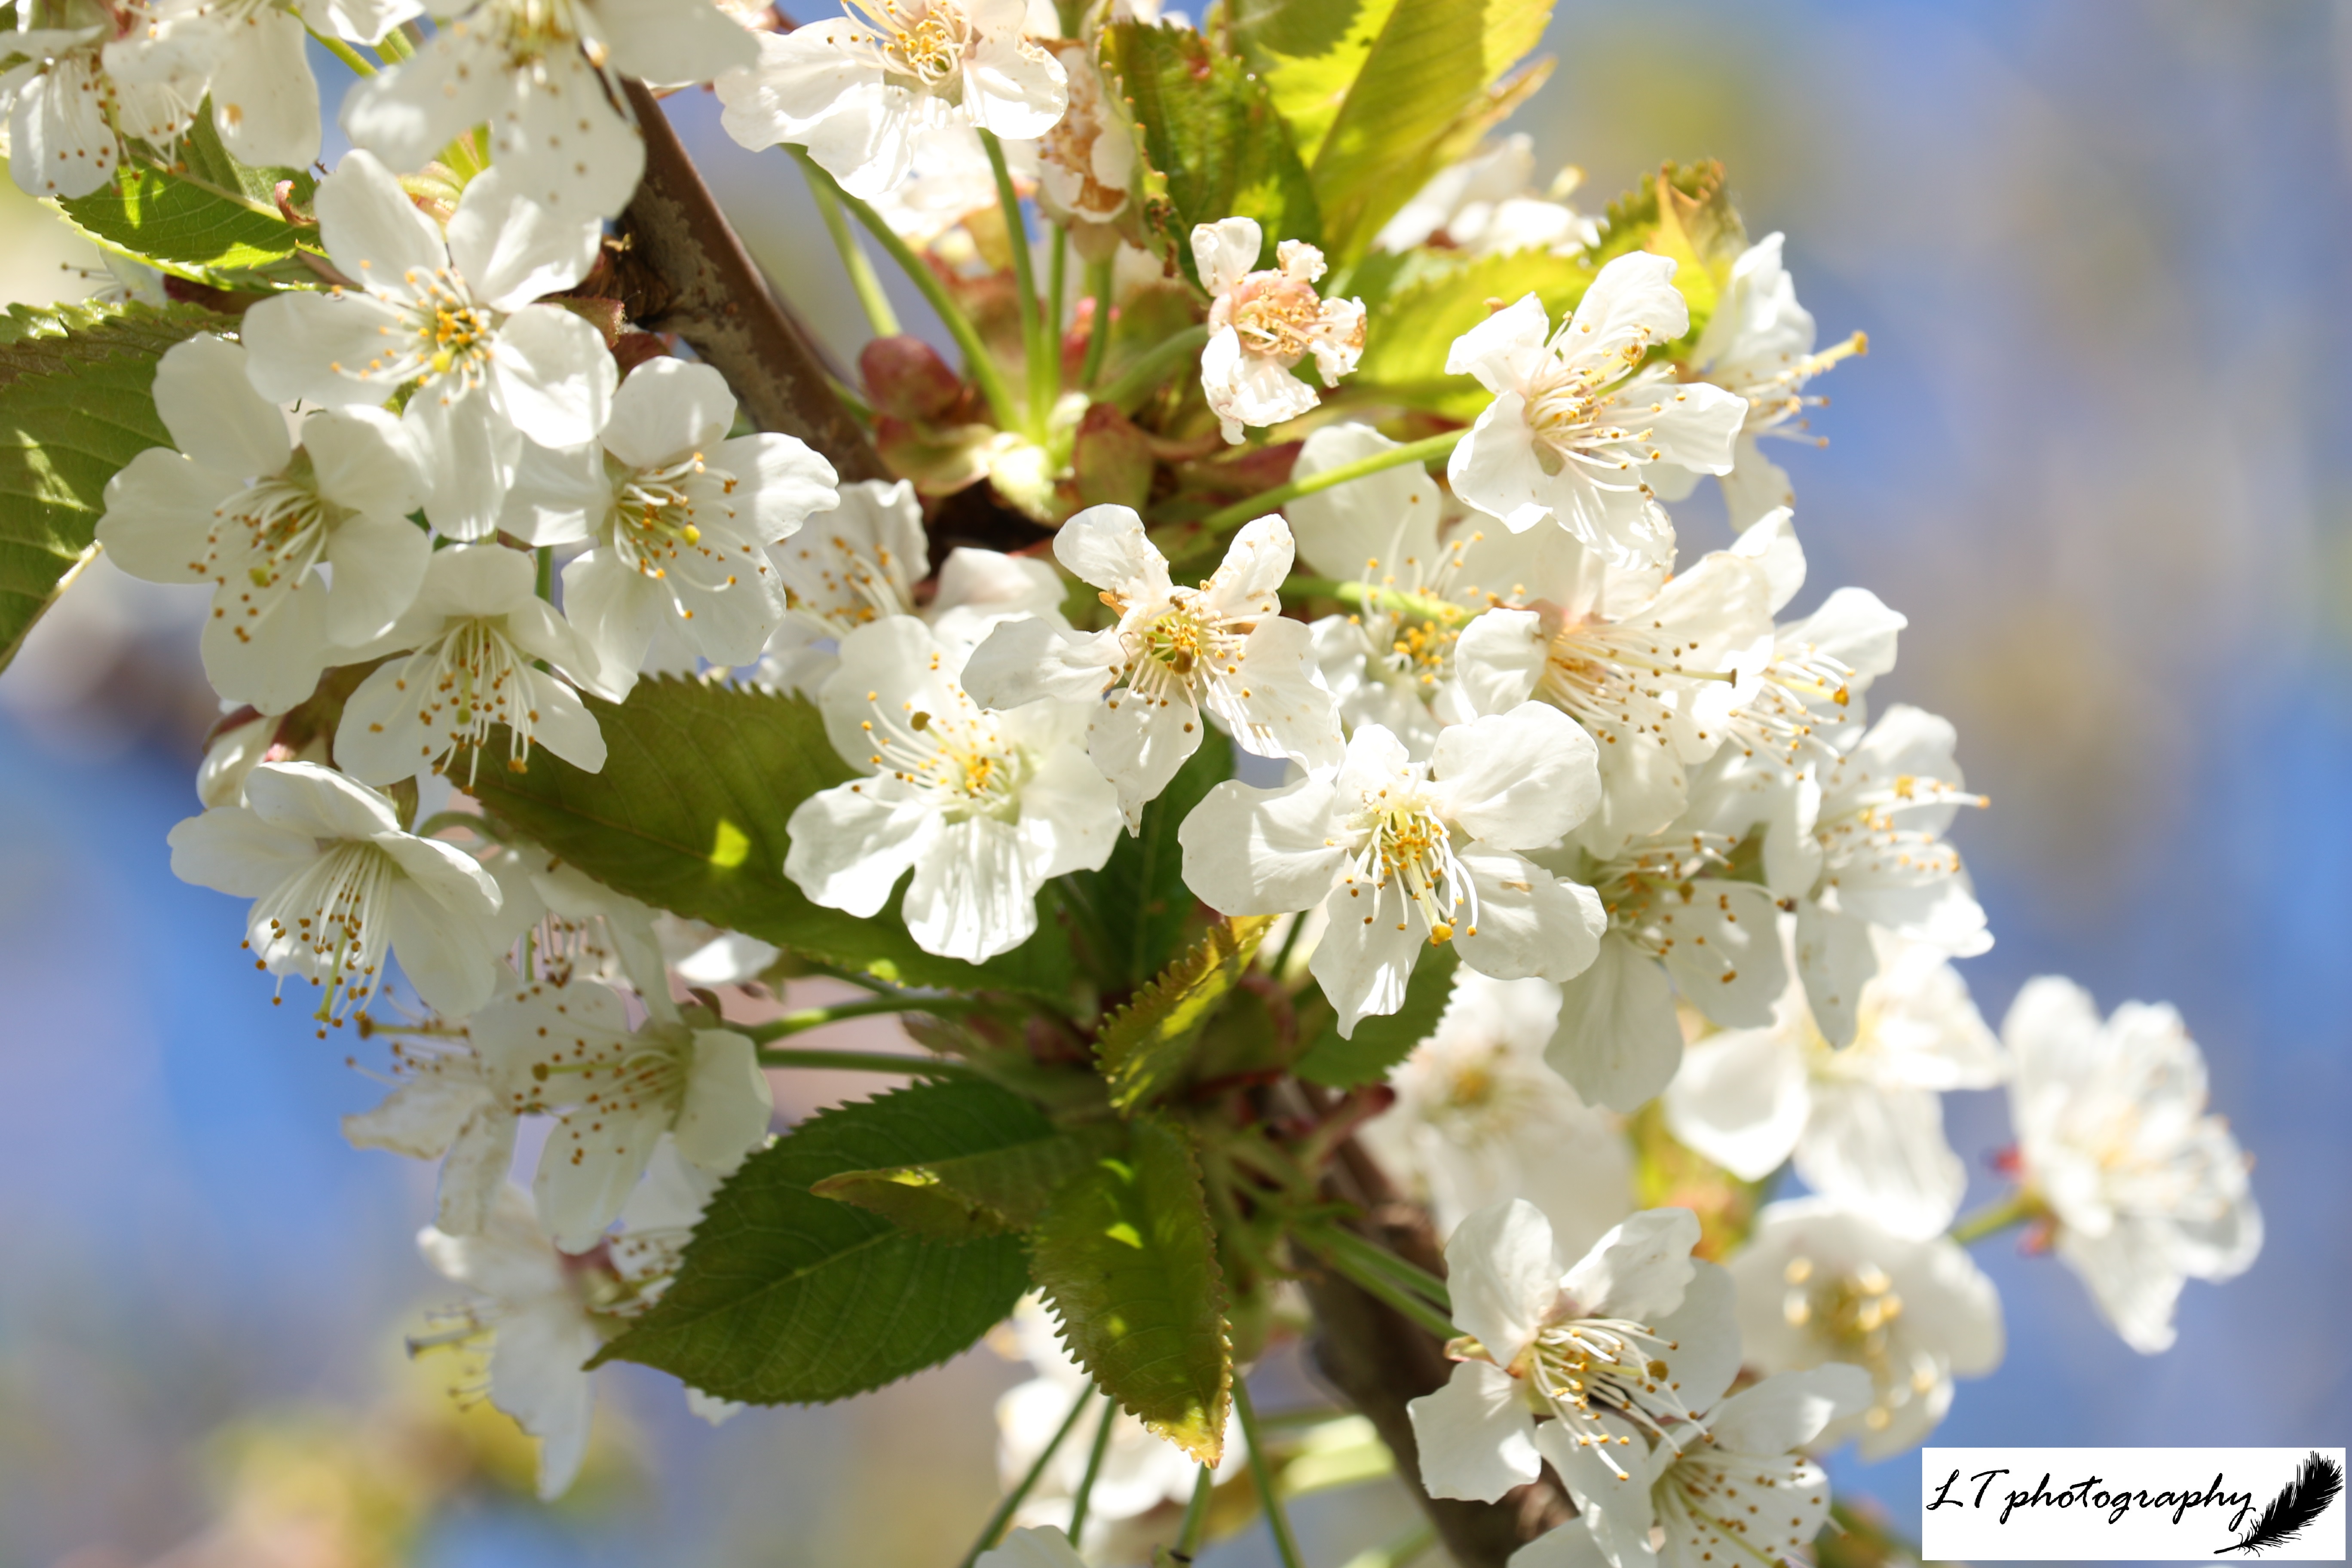
Day 2 – For the second day, I wanted to share 2 classics of spring combined in one photo: a Chiffchaff and Blackthorn. A season of hope, joy and new beginnings, spring is my favourite time to get out with a camera and this photo captures that start when the landscape is just coming back to life.

Day 3 – As I continued on through the days, day 3 had been a very stormy one in the UK, thanks to Storm Gerrit, and so I wanted to bring some warmth to people’s homes. Here is suckler calf Blueberry Muffin, who in January last year, was still living outside with her mother as the ground had stayed drier than this winter!

Day 4 – Drawing our focus down to the ground, this photo takes us back to the days of spring with lush woodlands and glades with soft light filtering through unfurling leaves. A sign of ancient woodland, the wood anemone is also said to bring good luck!

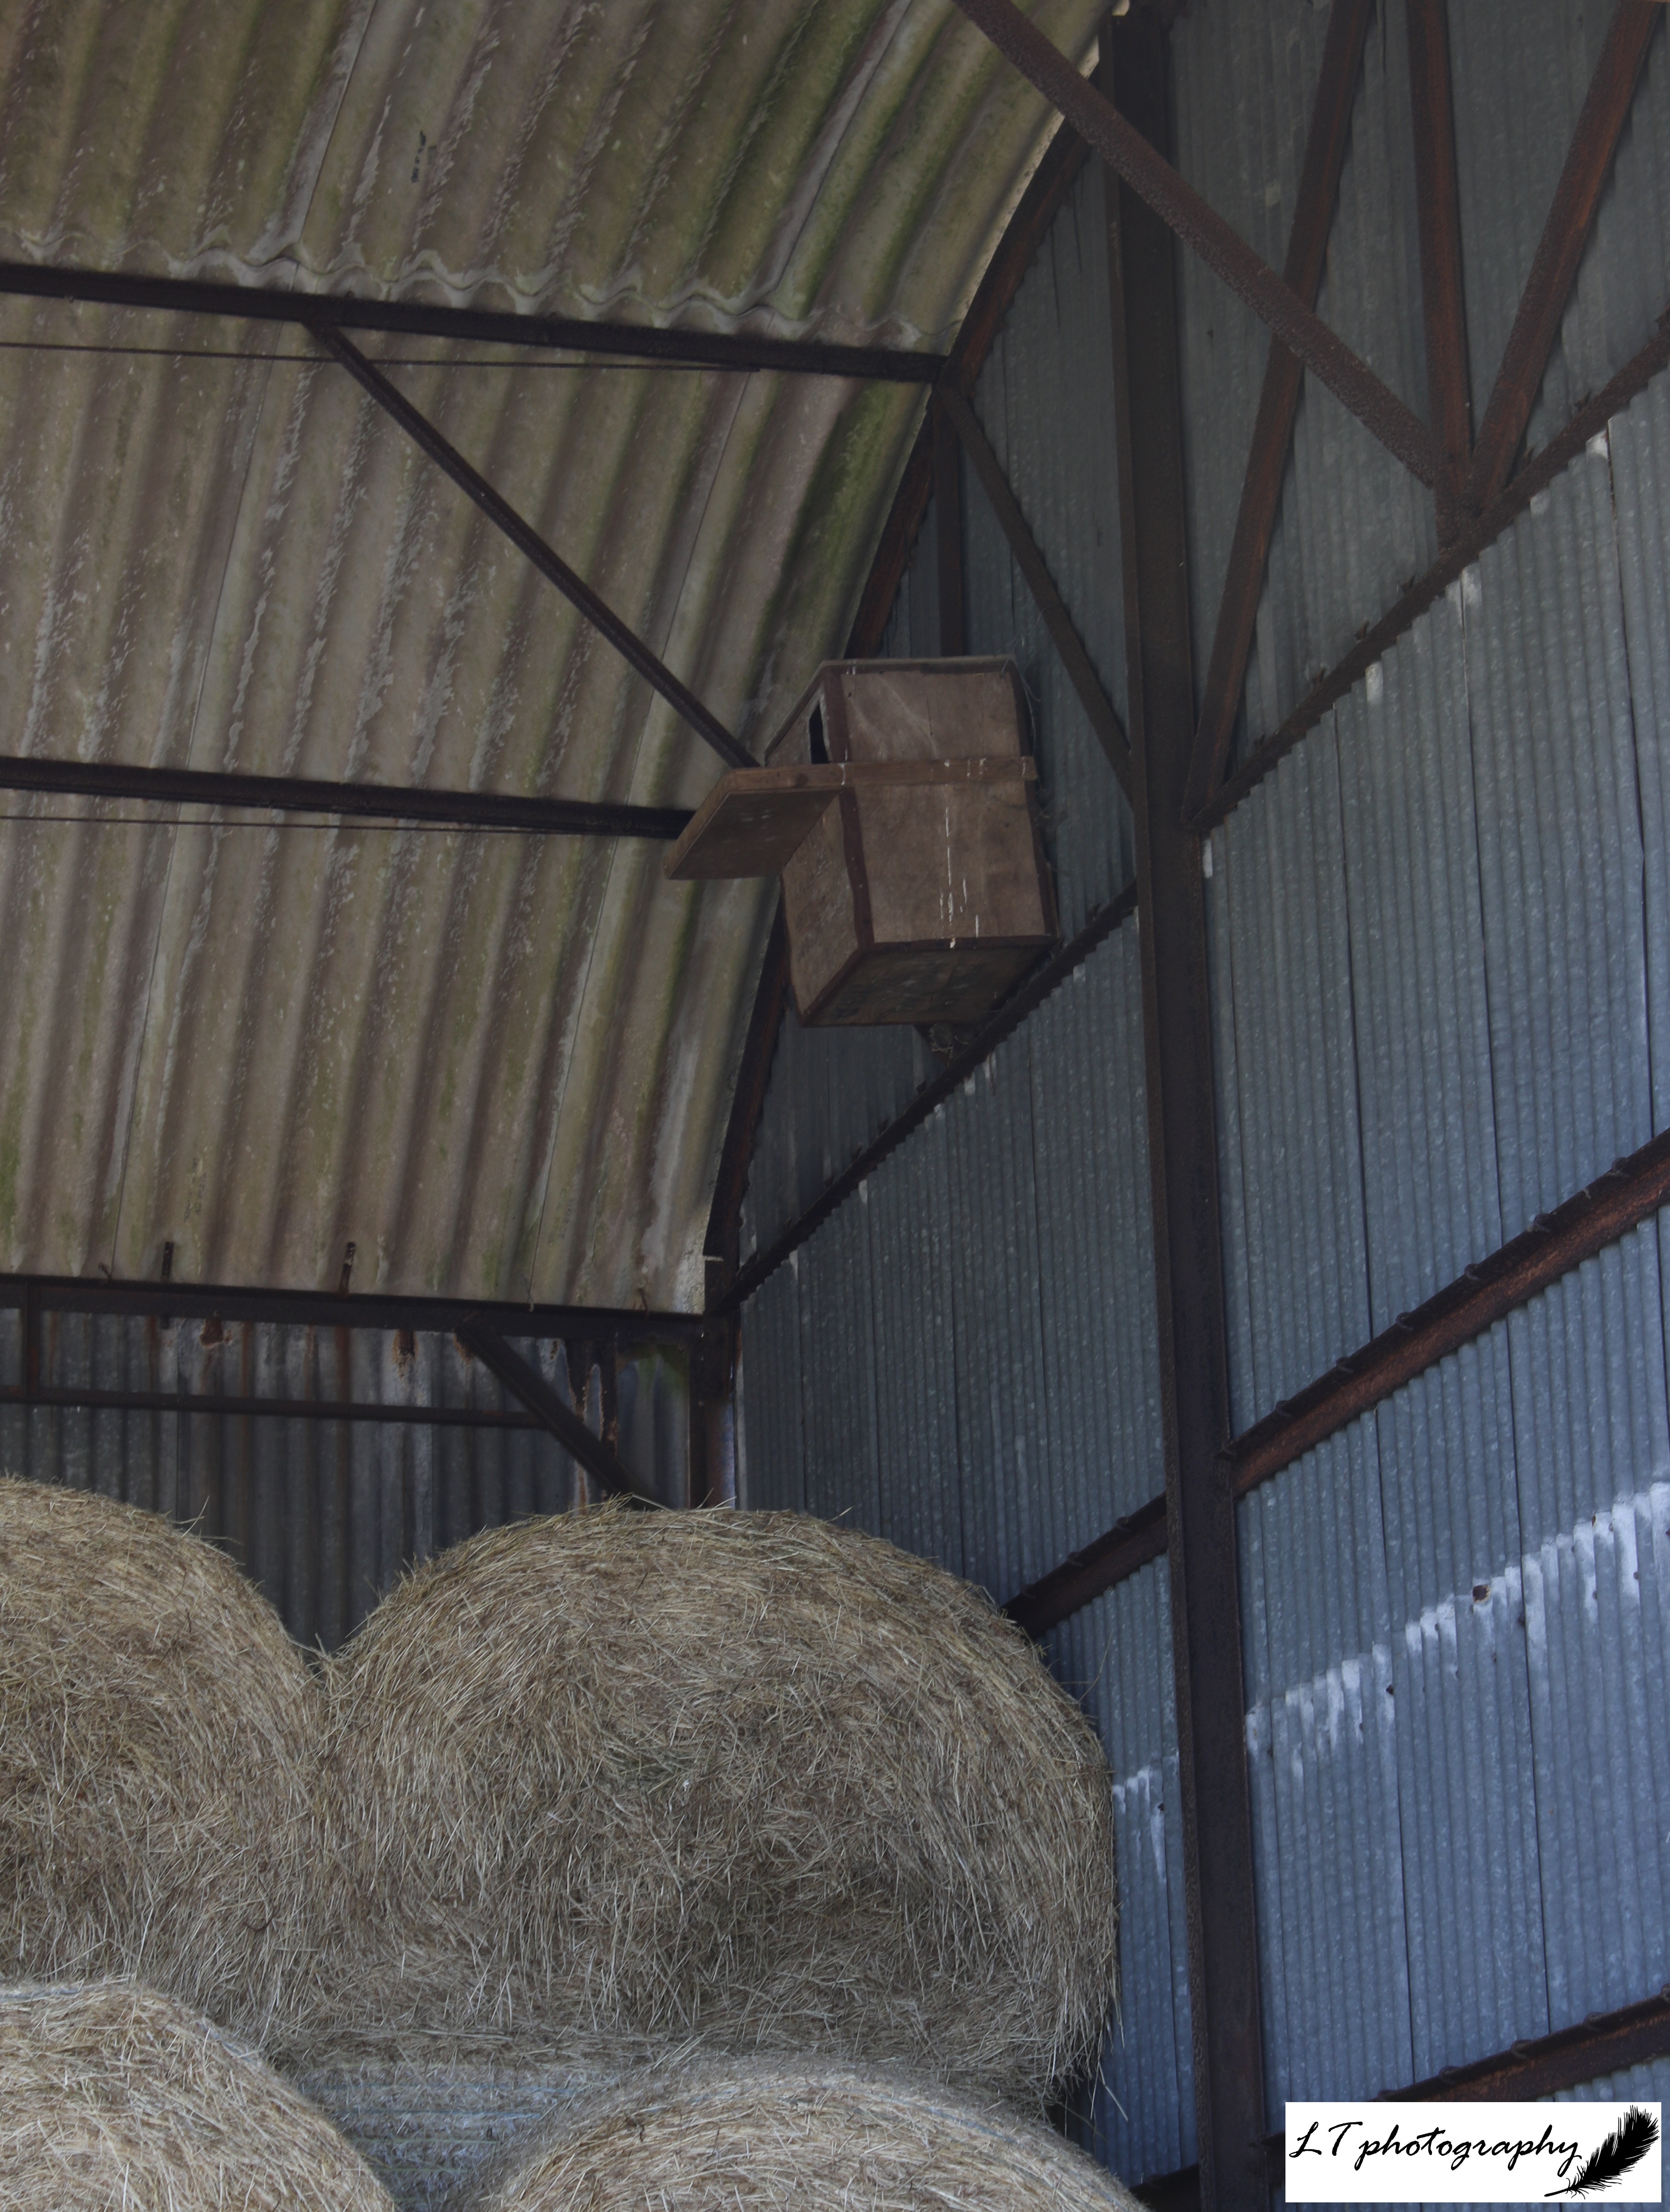
Day 5 – This year I was licensed for the first time to handle and ring Barn Owl chicks on my own, as part of the vital work going on to conserve protected Barn Owls in Dorset and further afield, including on Dorset County Council farms. Some very special moments were had this year and lots still to be learnt! (Disclaimer: Barn Owl Chicks were handled following specific protocols by trained ringers and under a Schedule 1 license)

Day 6 – When we are in the clutches of winter and the landscape is bare, the snowdrop is a wonderful symbol of the end of winter to come, creating carpets of pure white wherever you go. It will not be long now until the first white heads can be seen nodding in the wind once again, and a feeling of hope and strength will return.

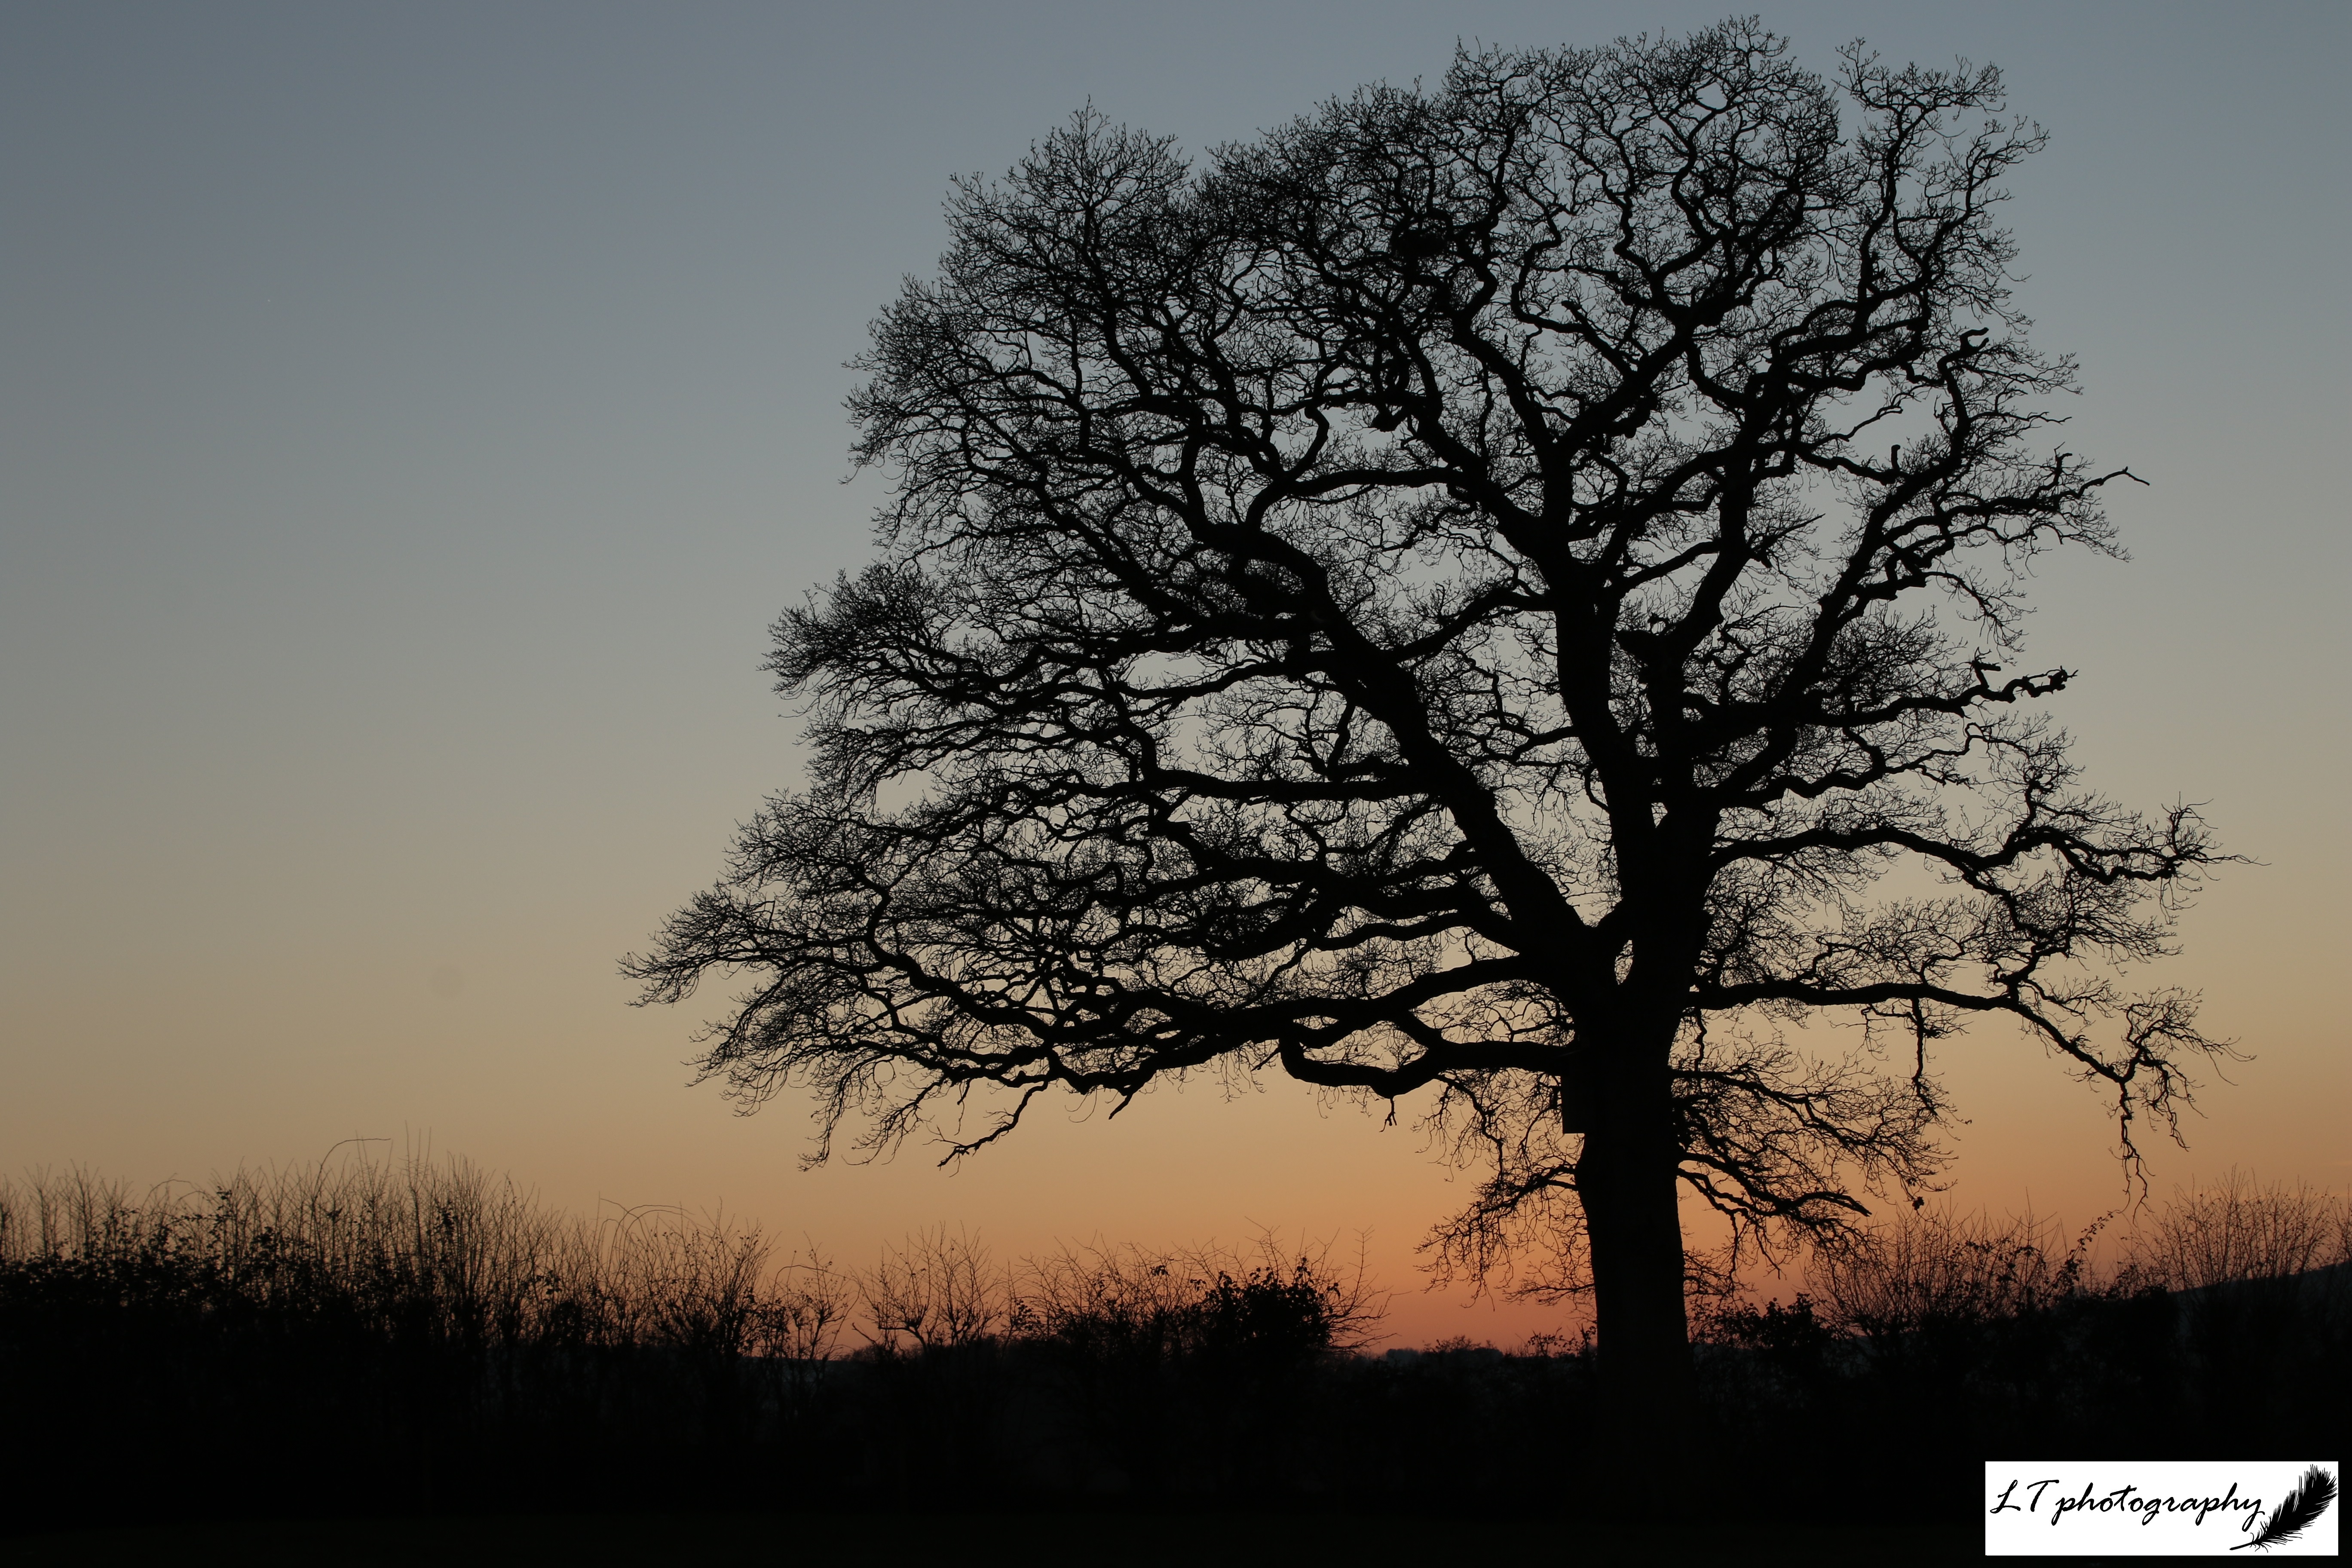
Day 7 – The 7th day marked the arrival of New Year’s Eve and the ending of another year. I thought this photo of a magnificent oak tree resplendent in its skeletal form in front of a warm winter sunset was a perfect way to match the feeling of the light falling on 2023.

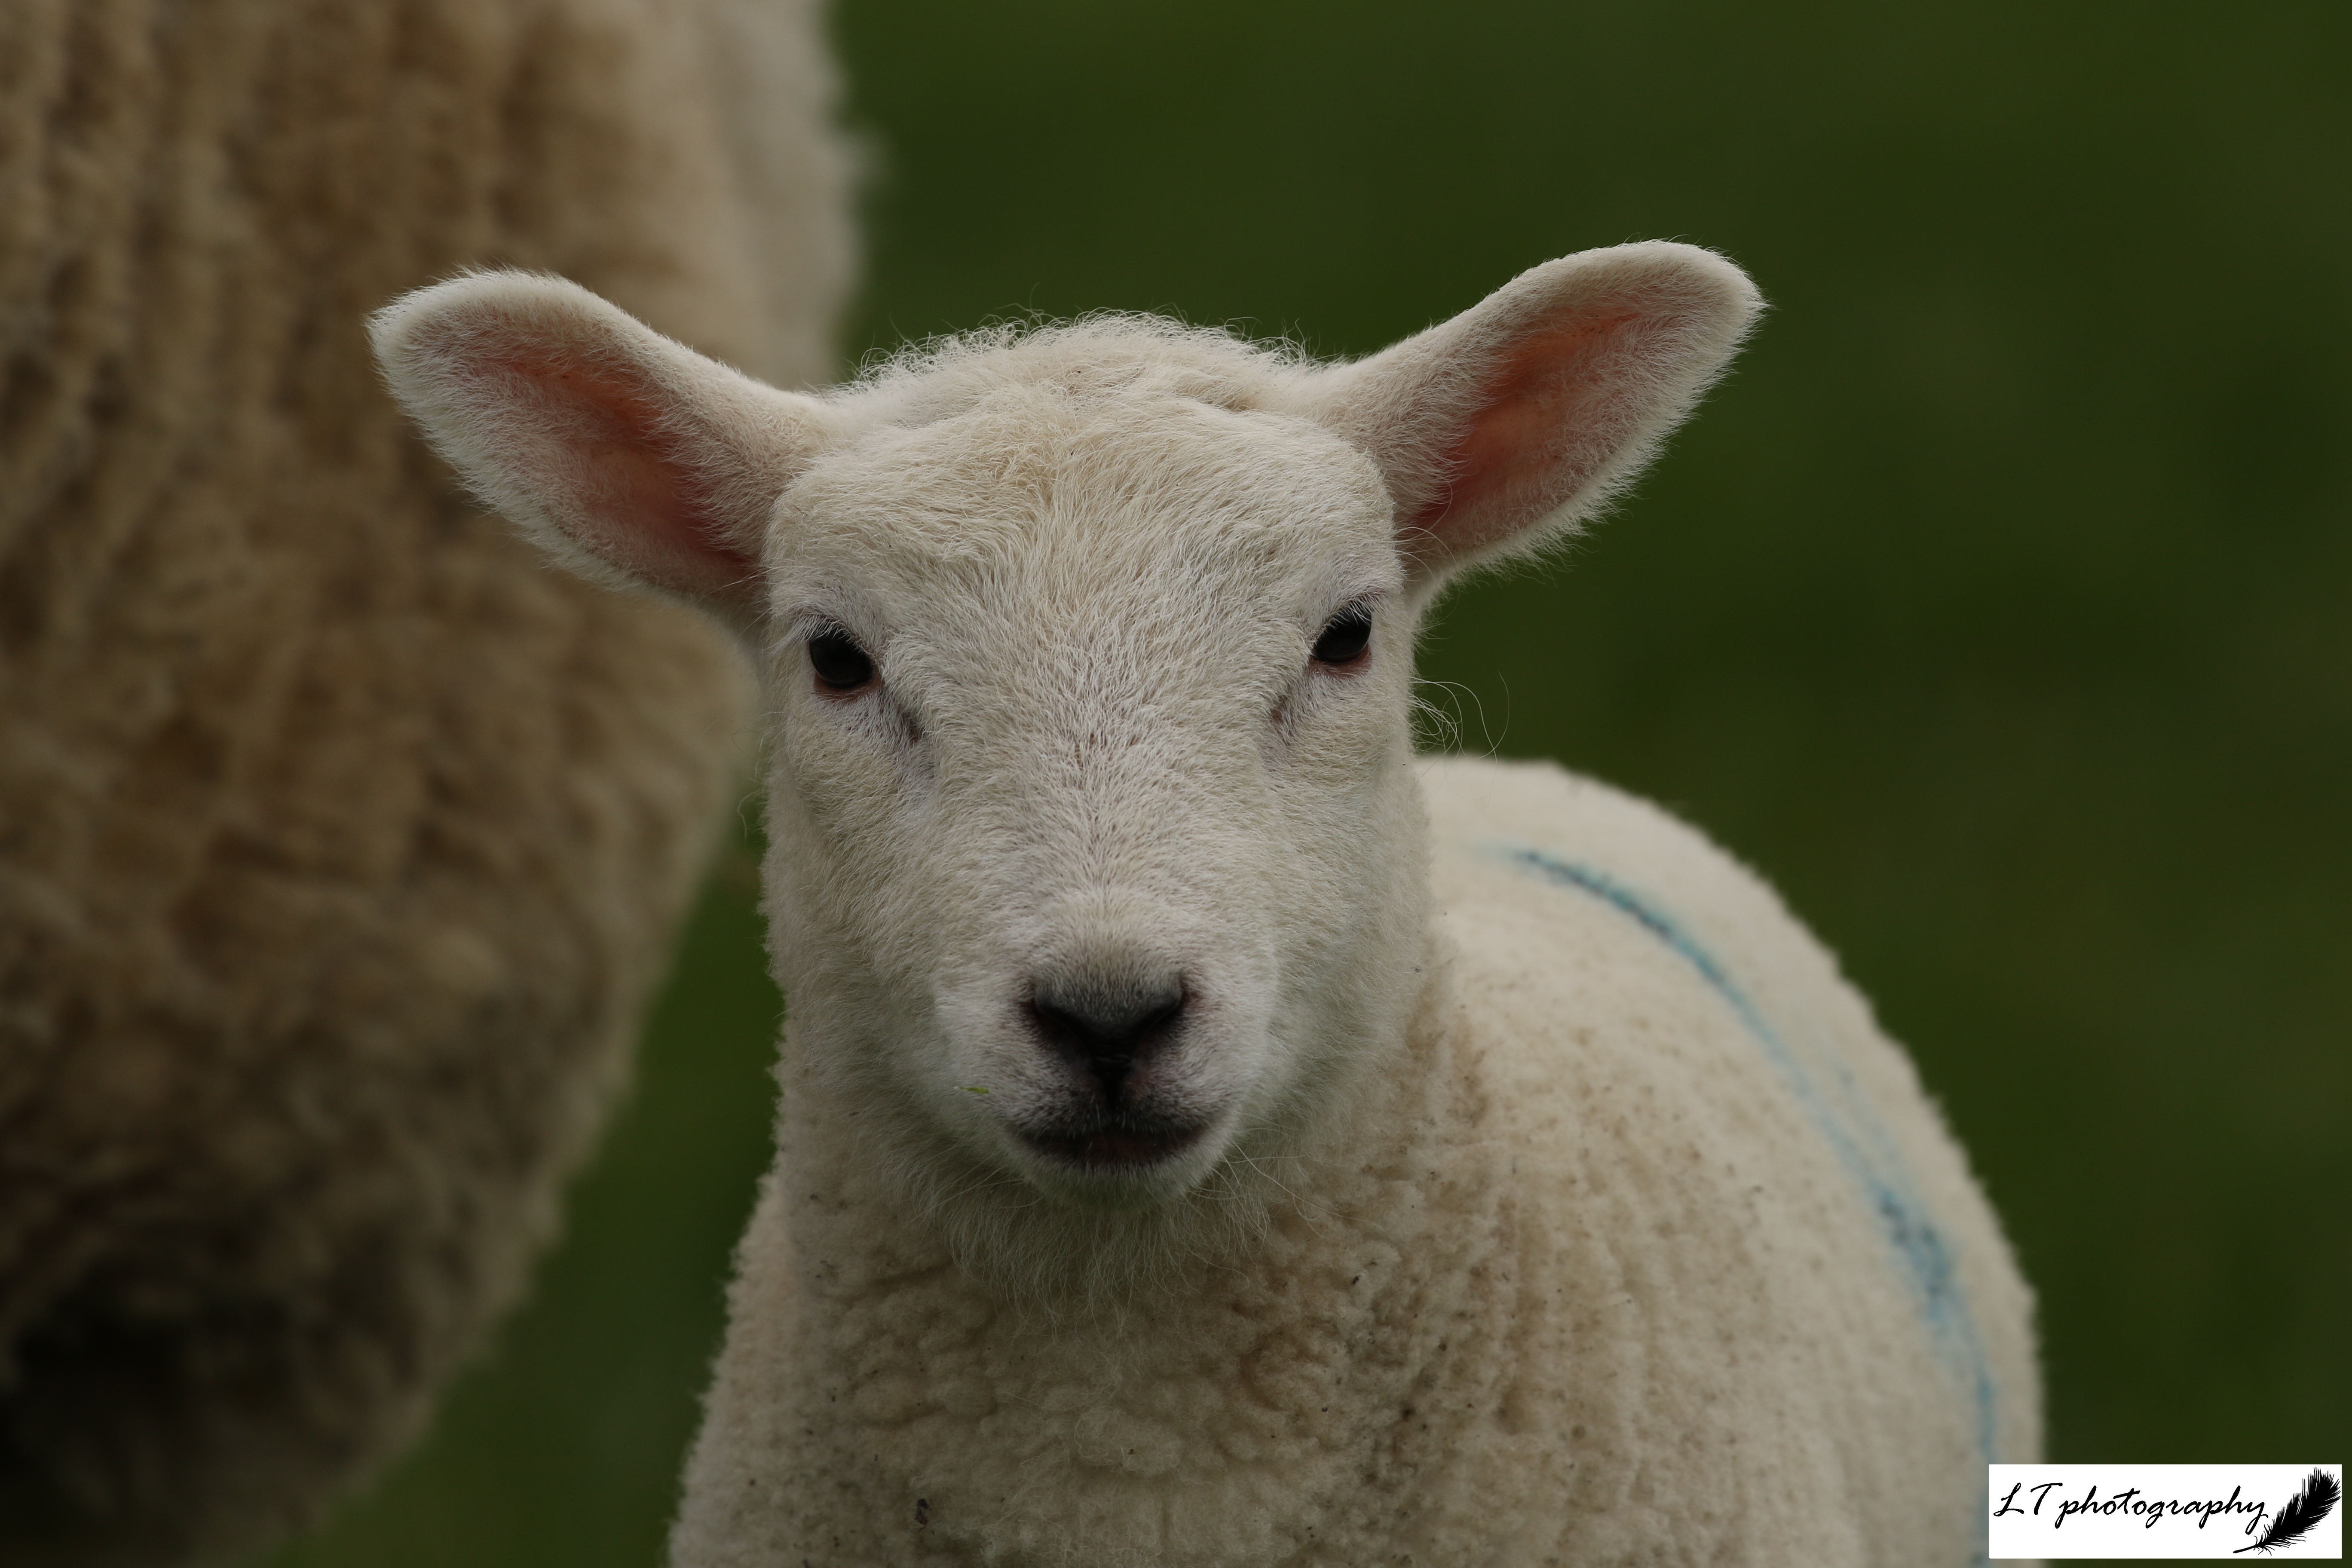
Day 8 – This year I finally bought my first super telephoto lens and so to practise I made use of our very last baby lambs born in spring 2023. It is a wonderful sight to now see subjects up close through a lens without having to be really close. Here’s to more fun in 2024!

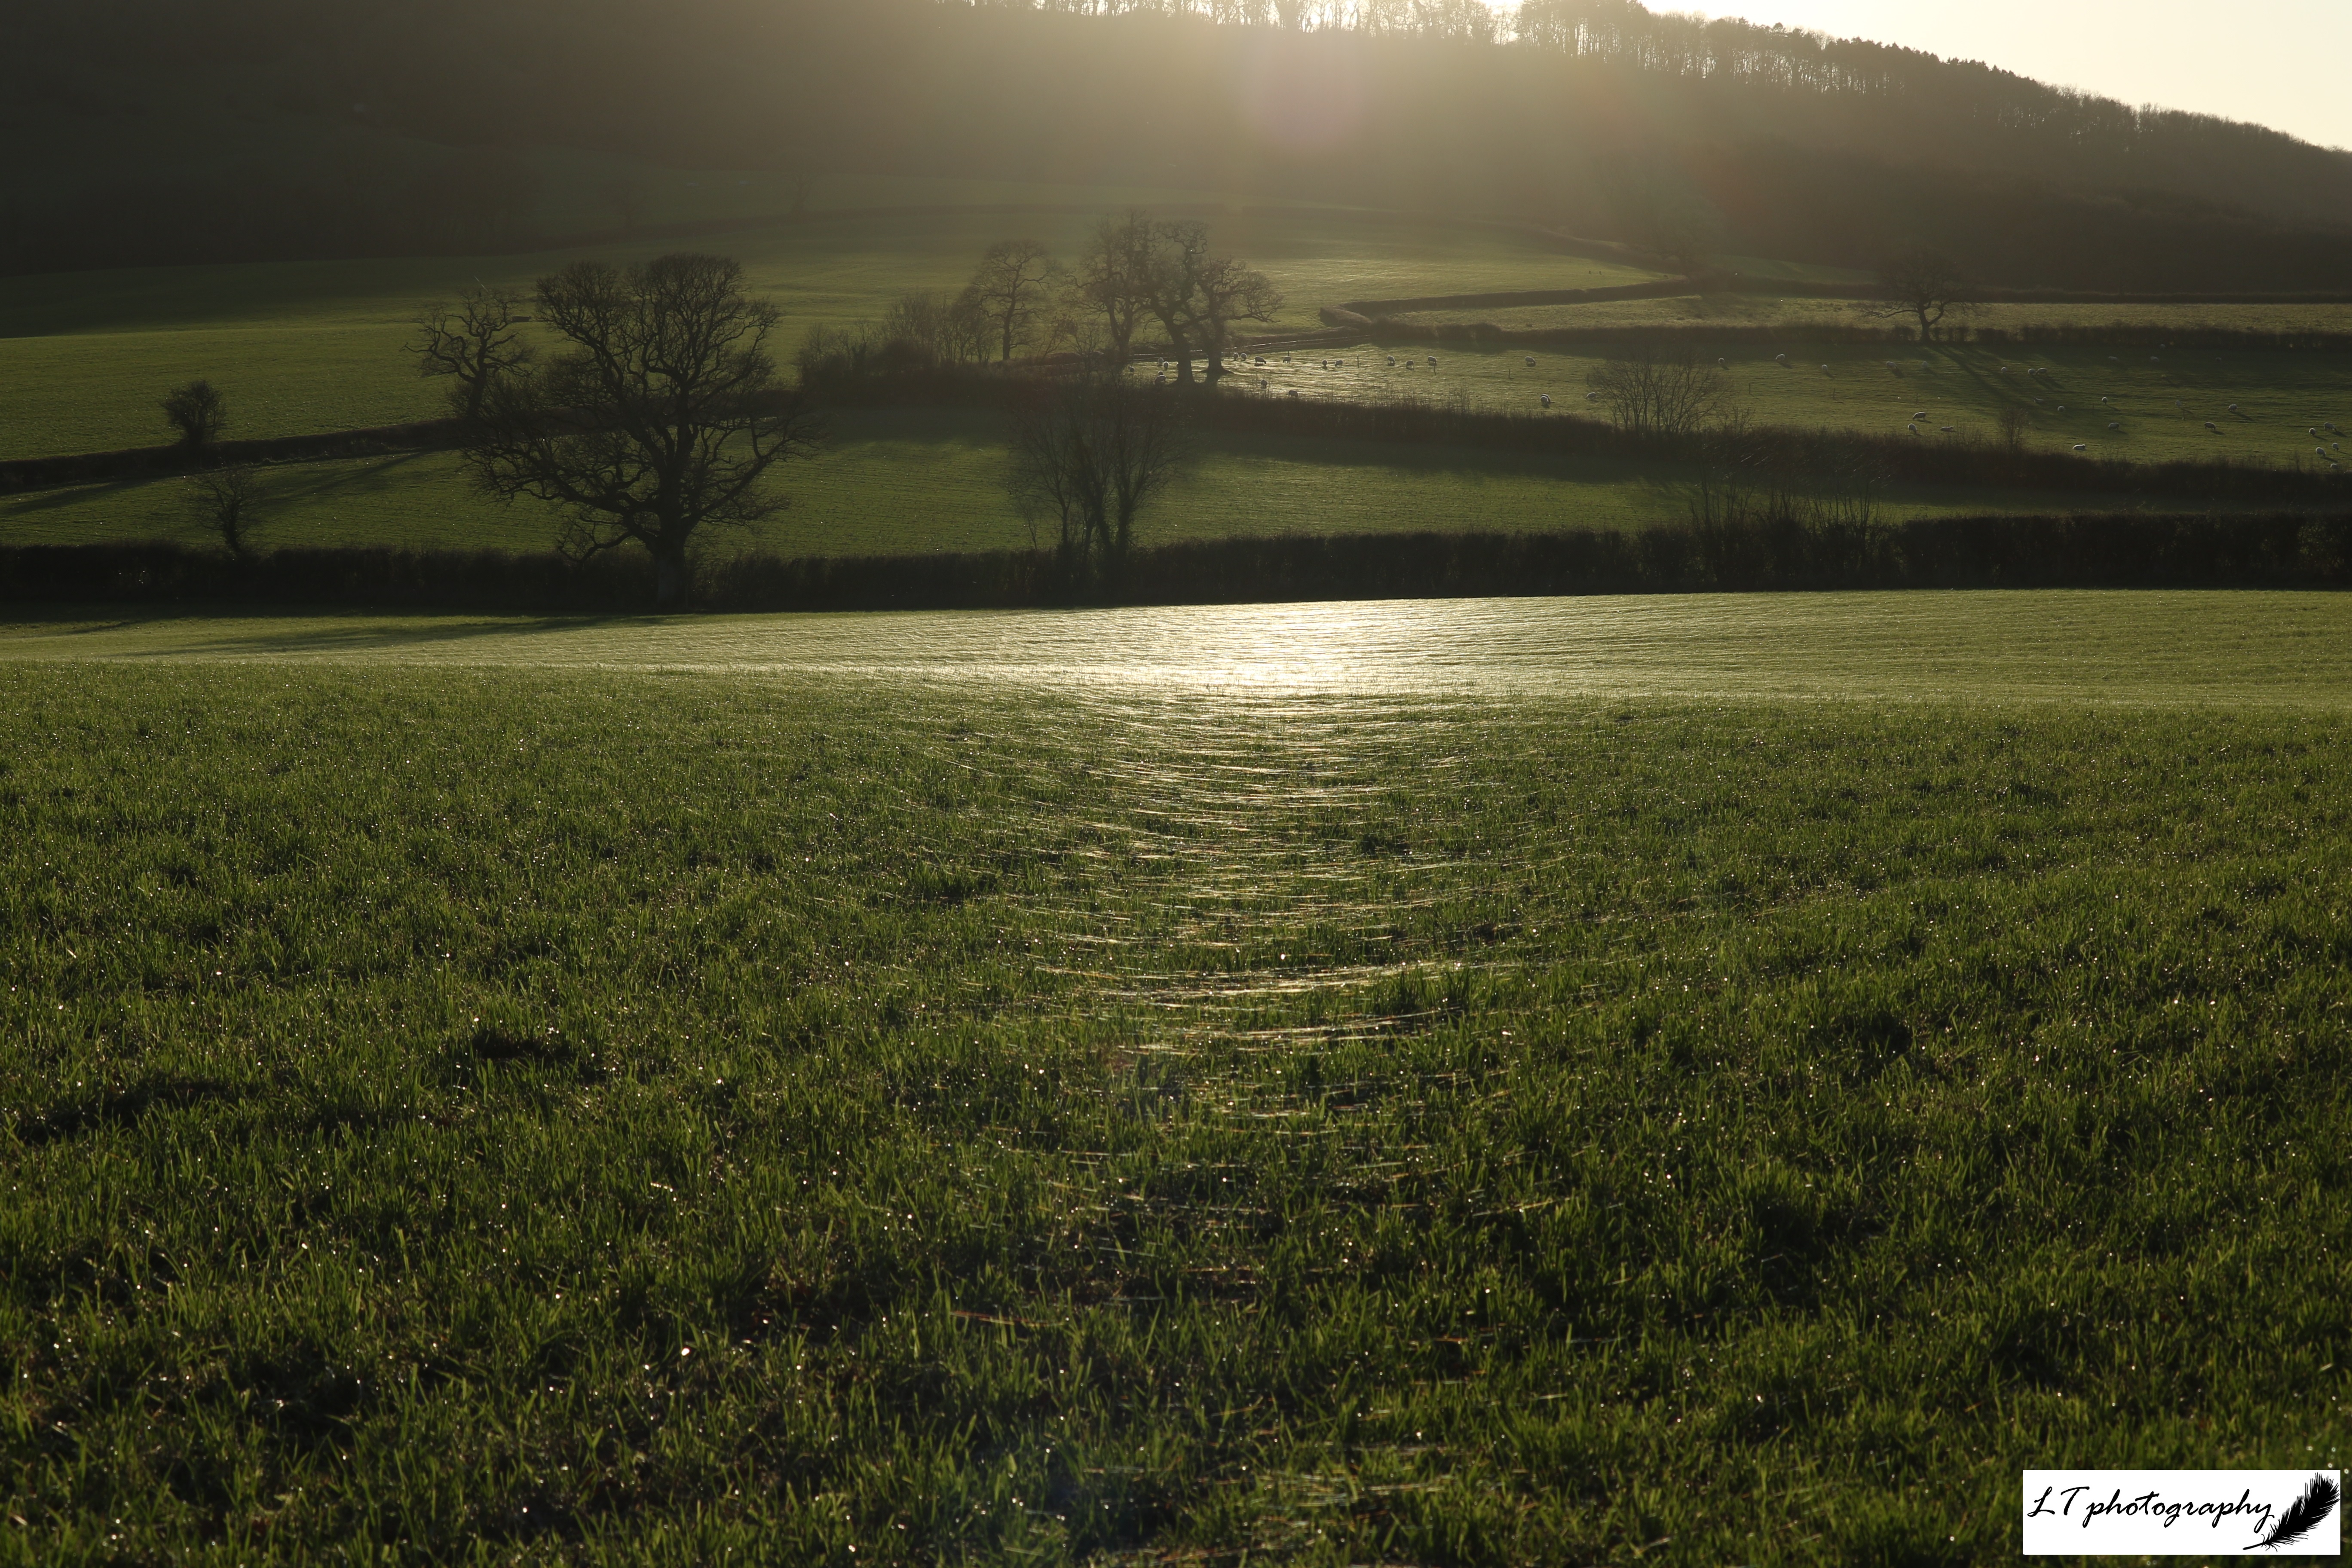
Day 9 – For the 9th day of my challenge, I decided to focus on the effectiveness of simple photos. My example is a photo from last year when soft winter sunshine could be seen glistening off cobwebs completely blanketing a field. A quite simple and spectacular phenomenon!

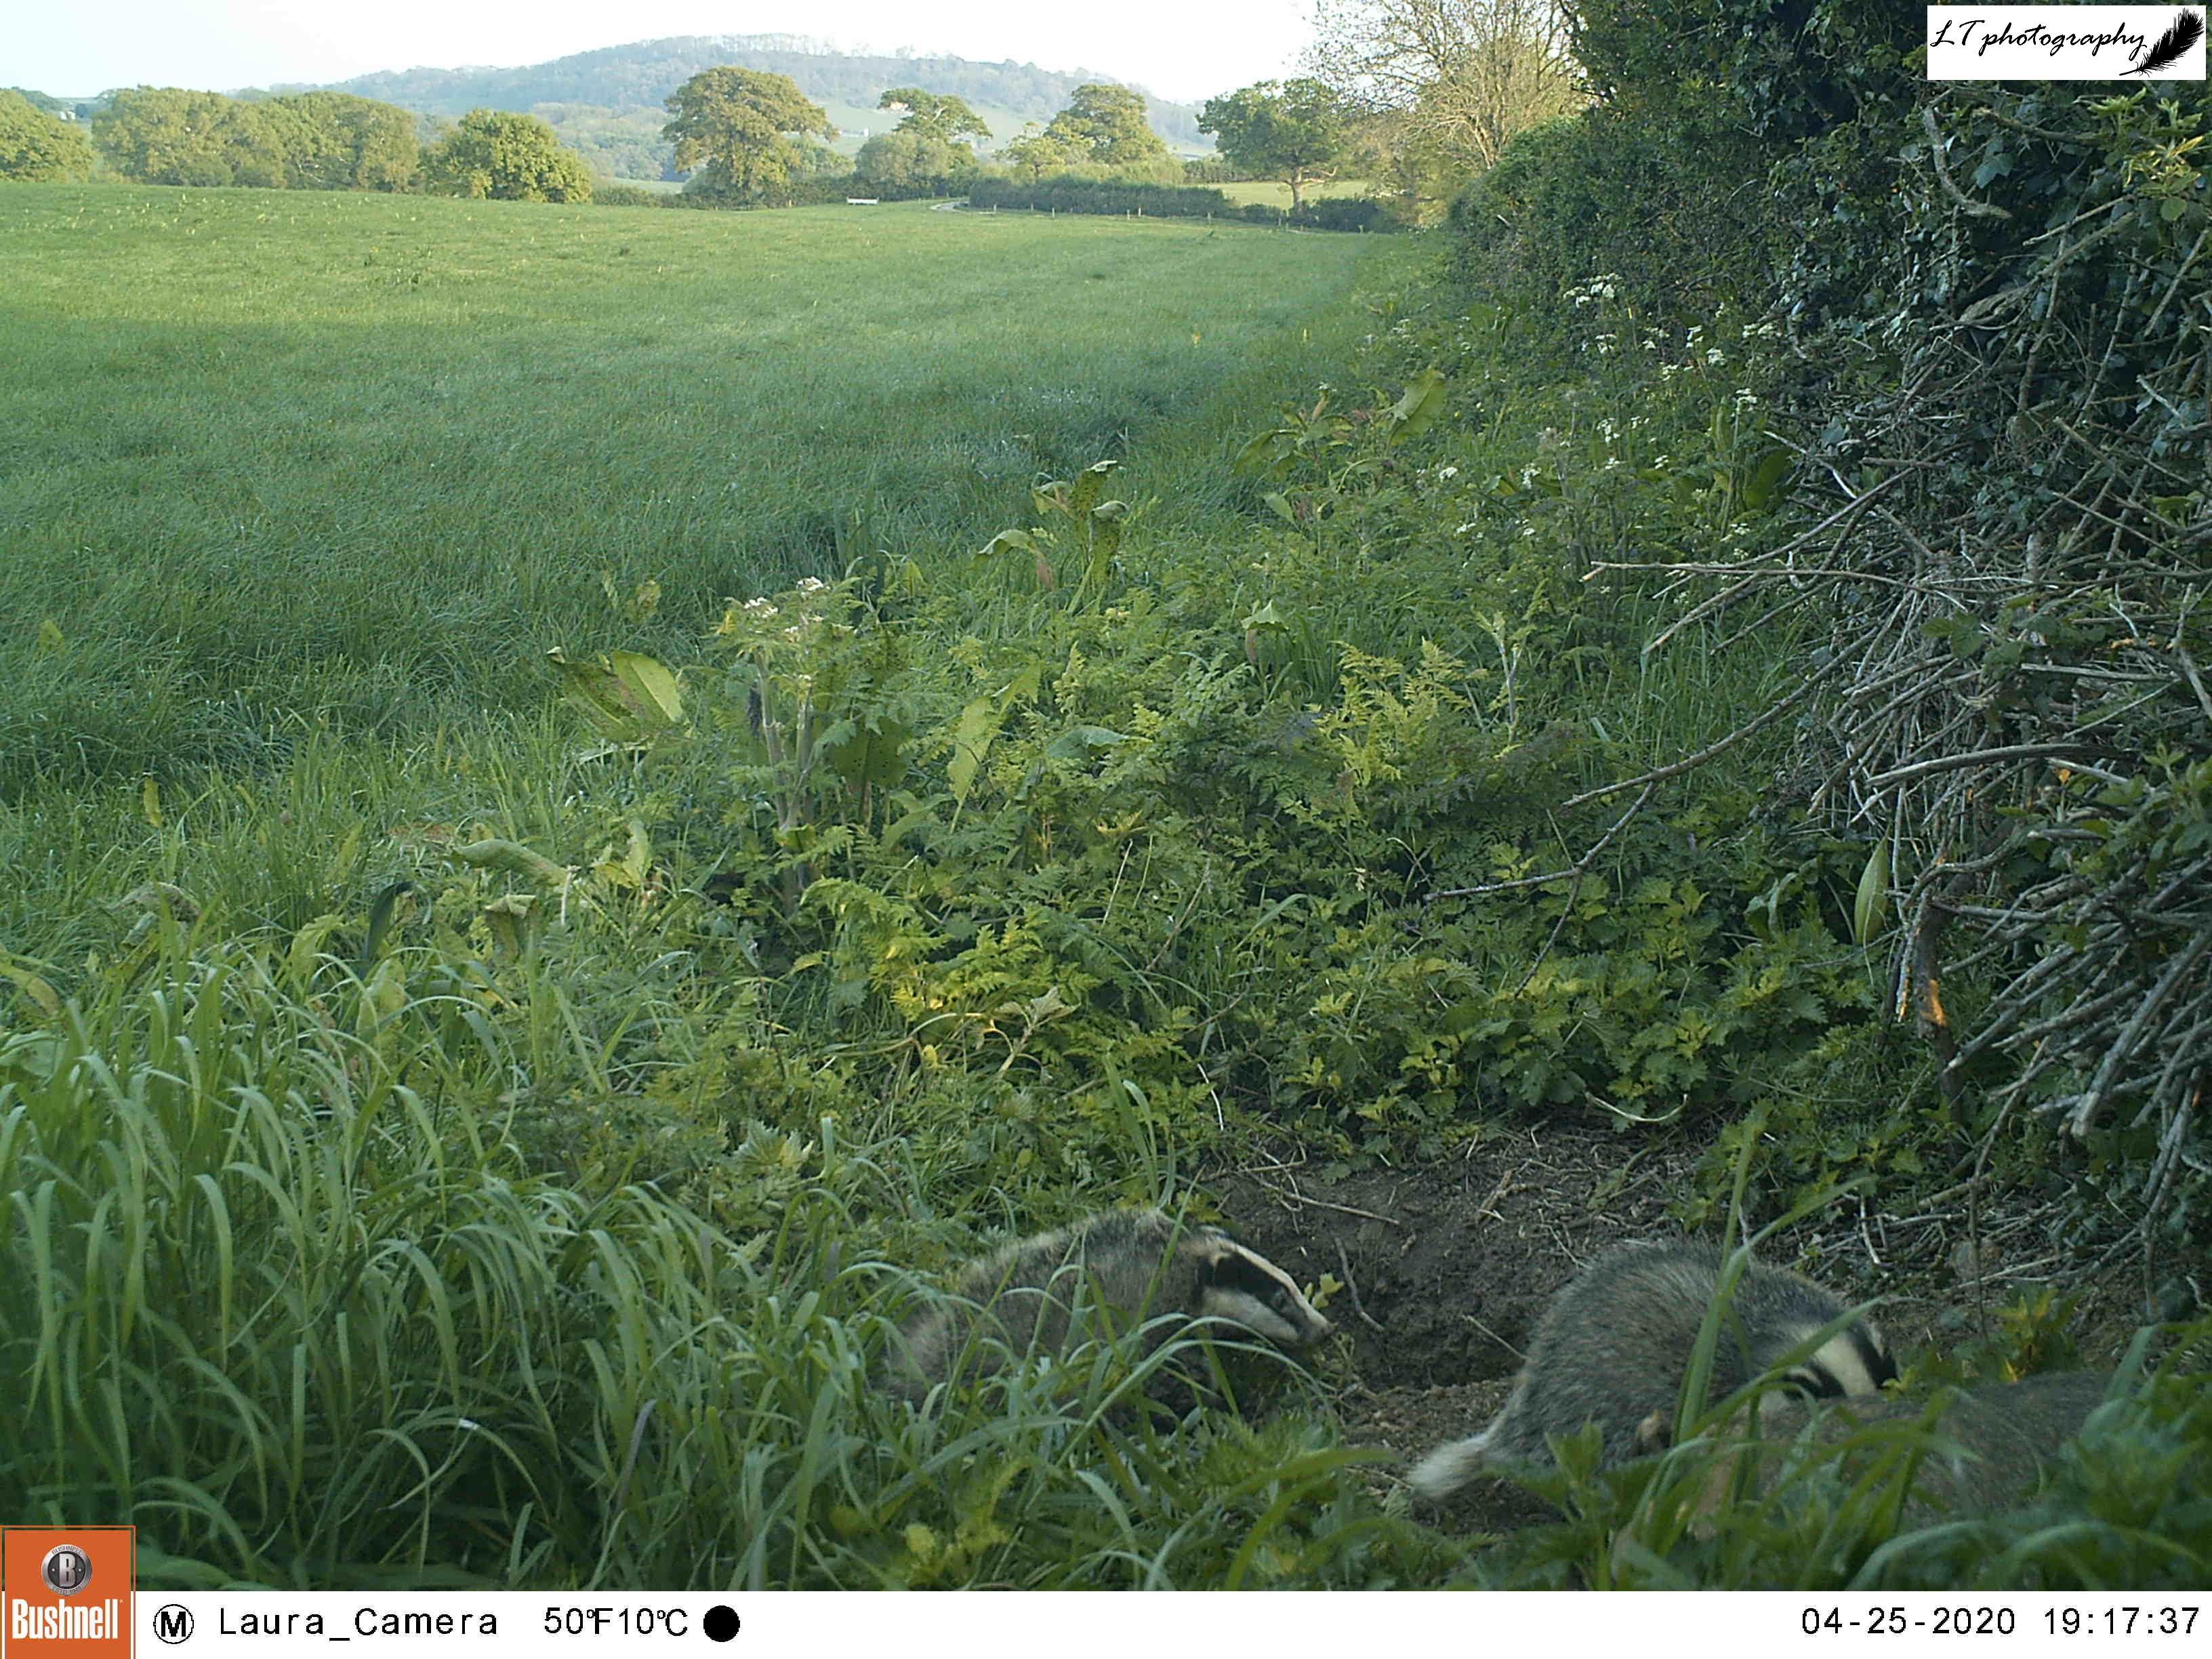
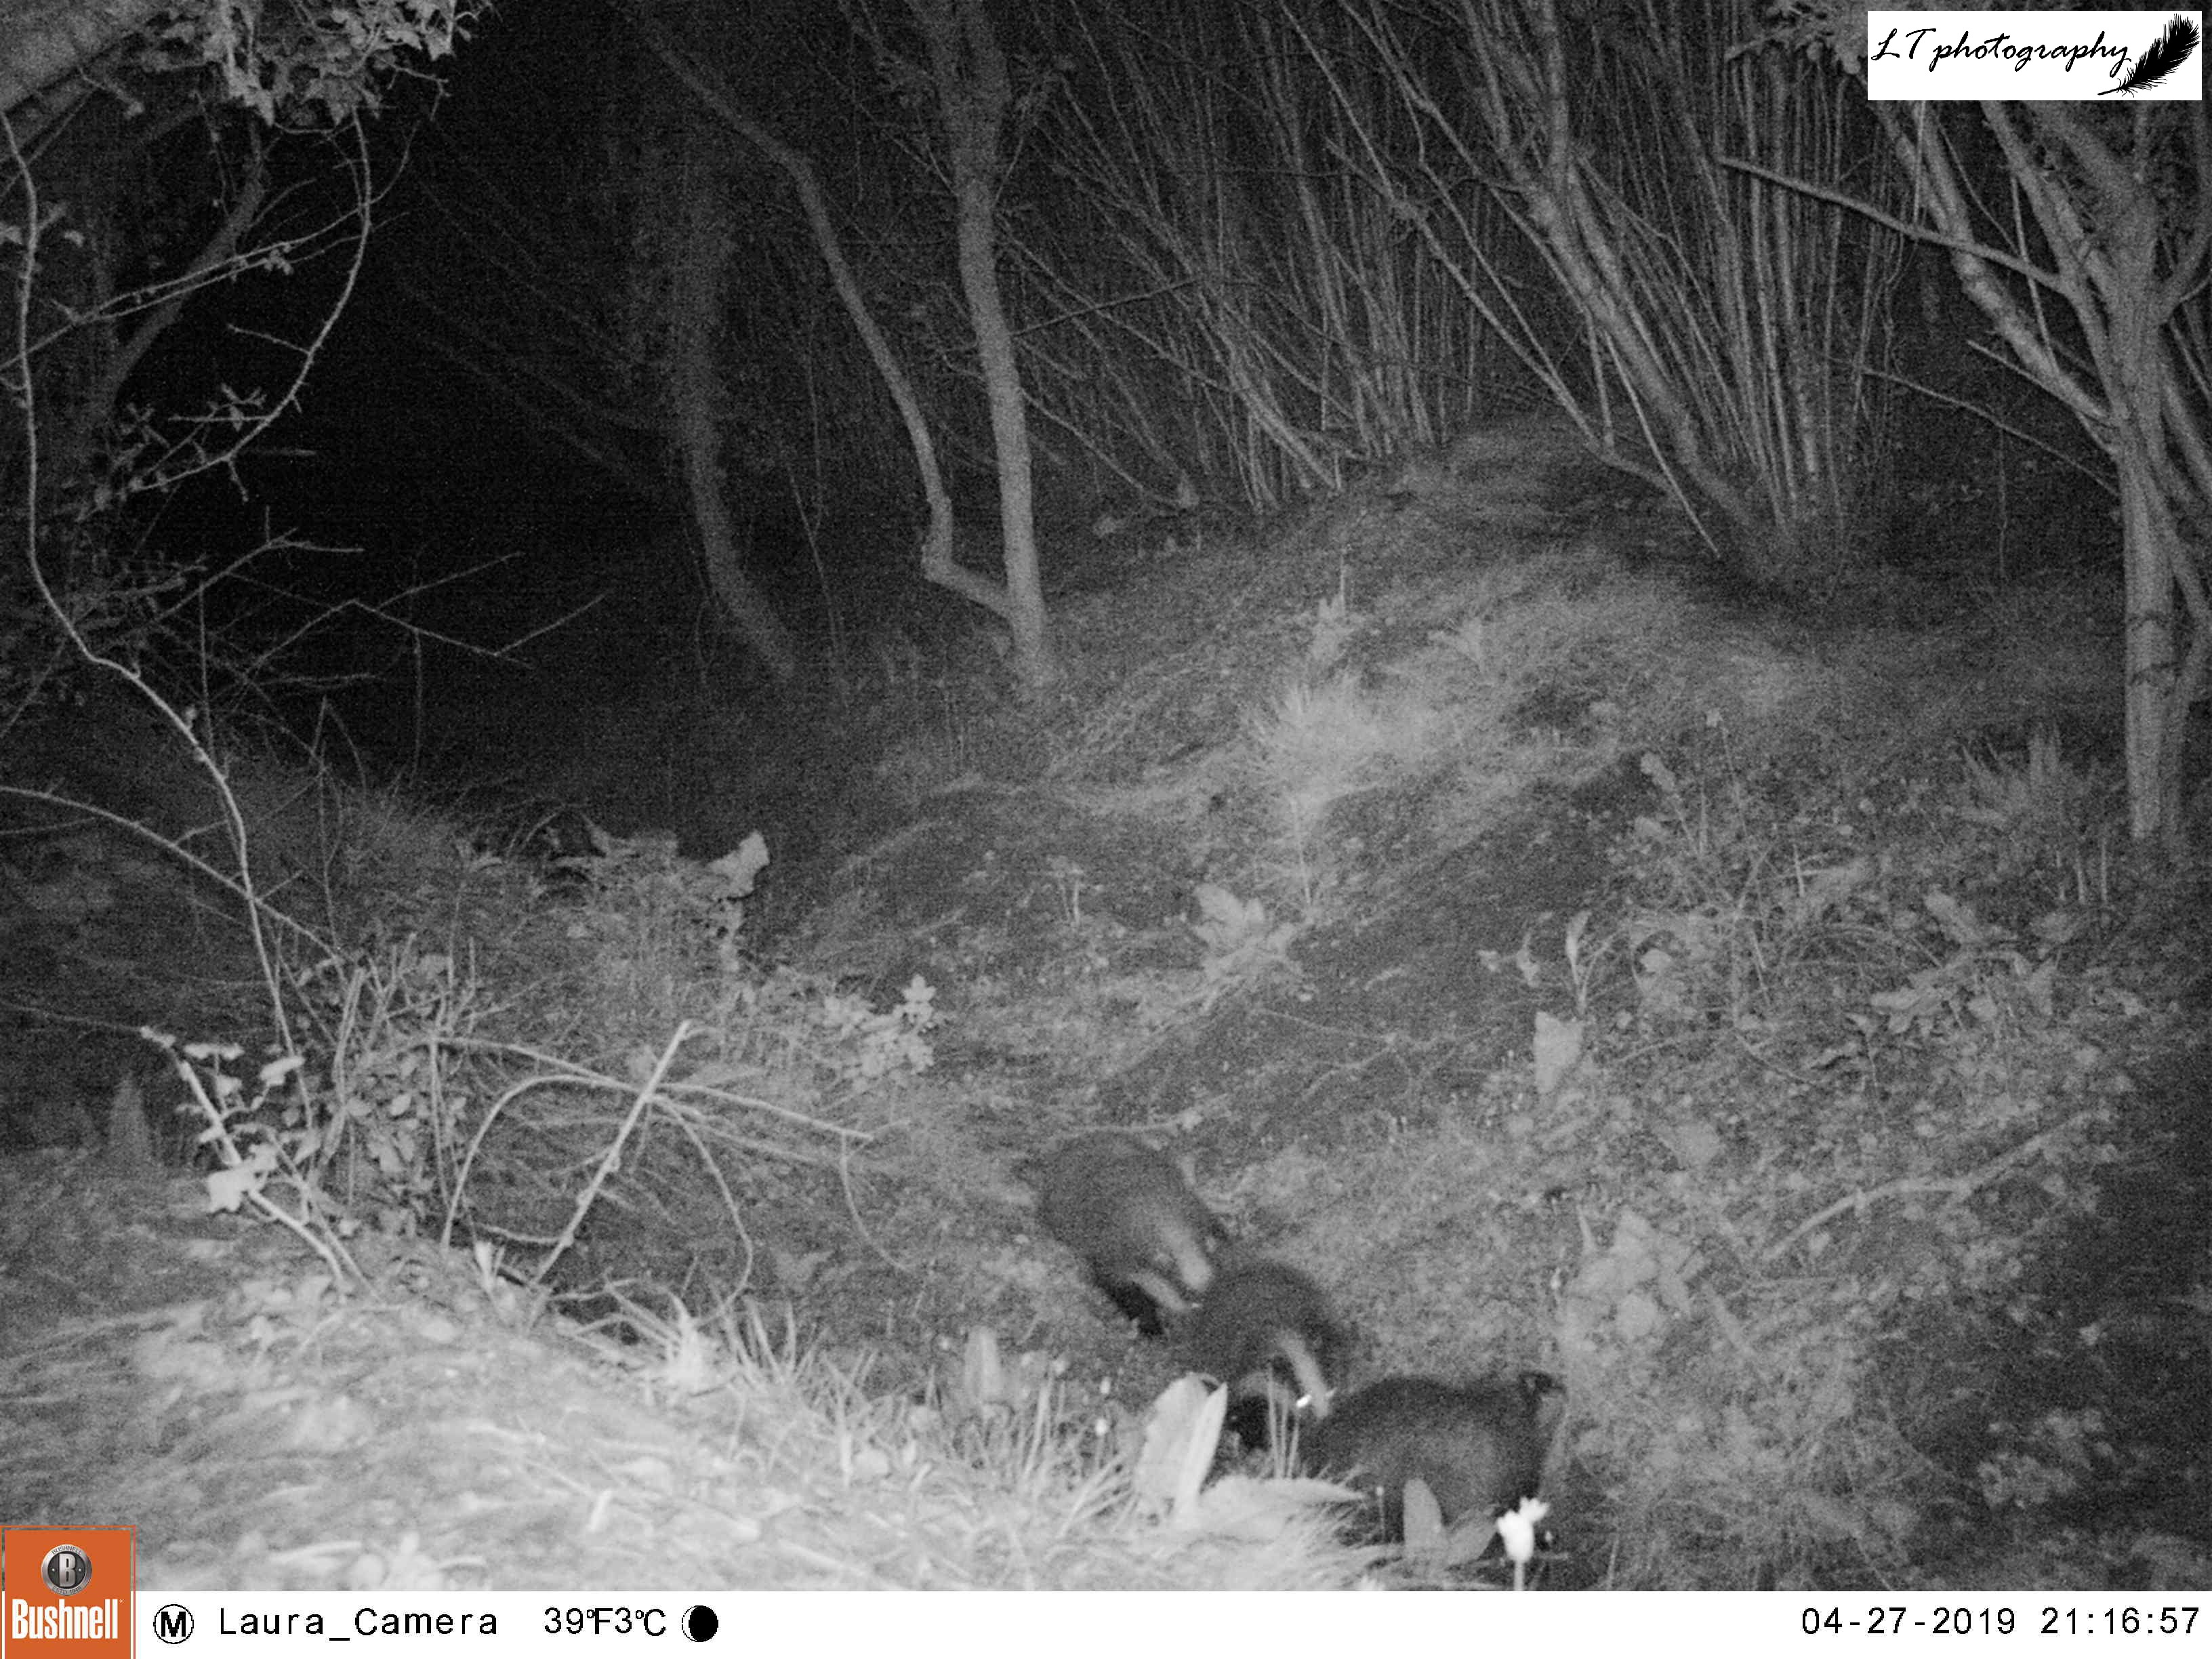
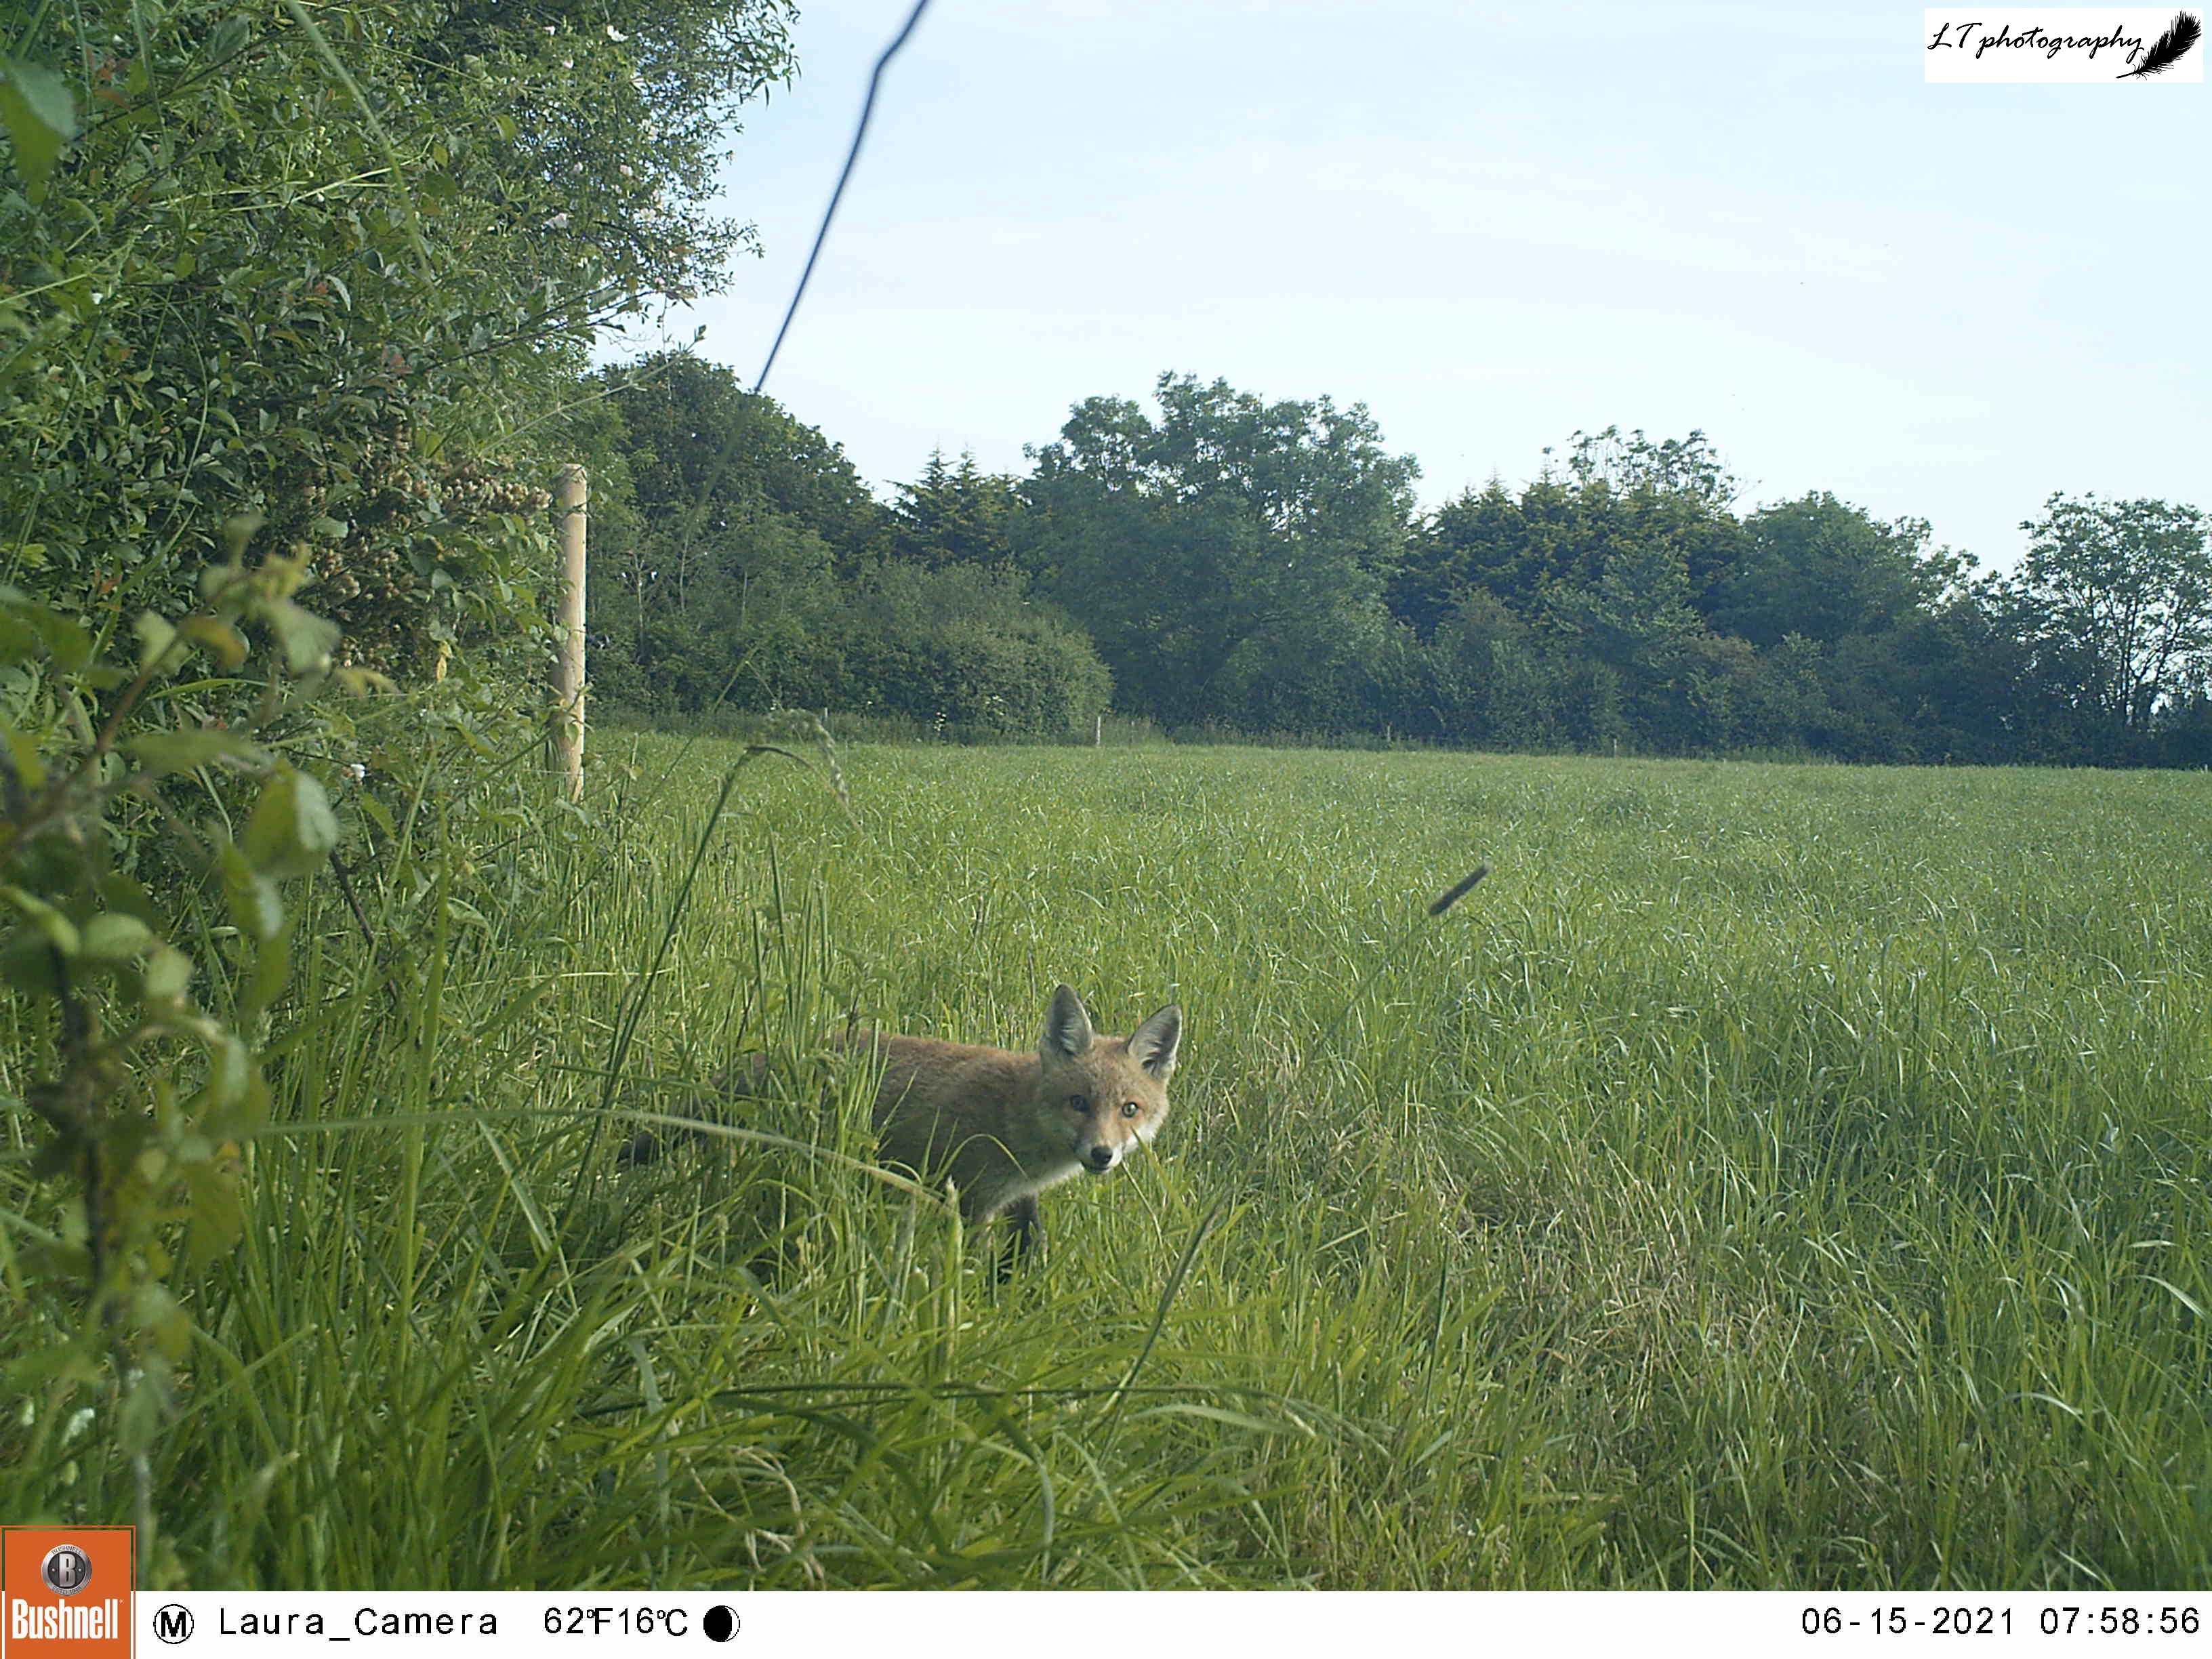
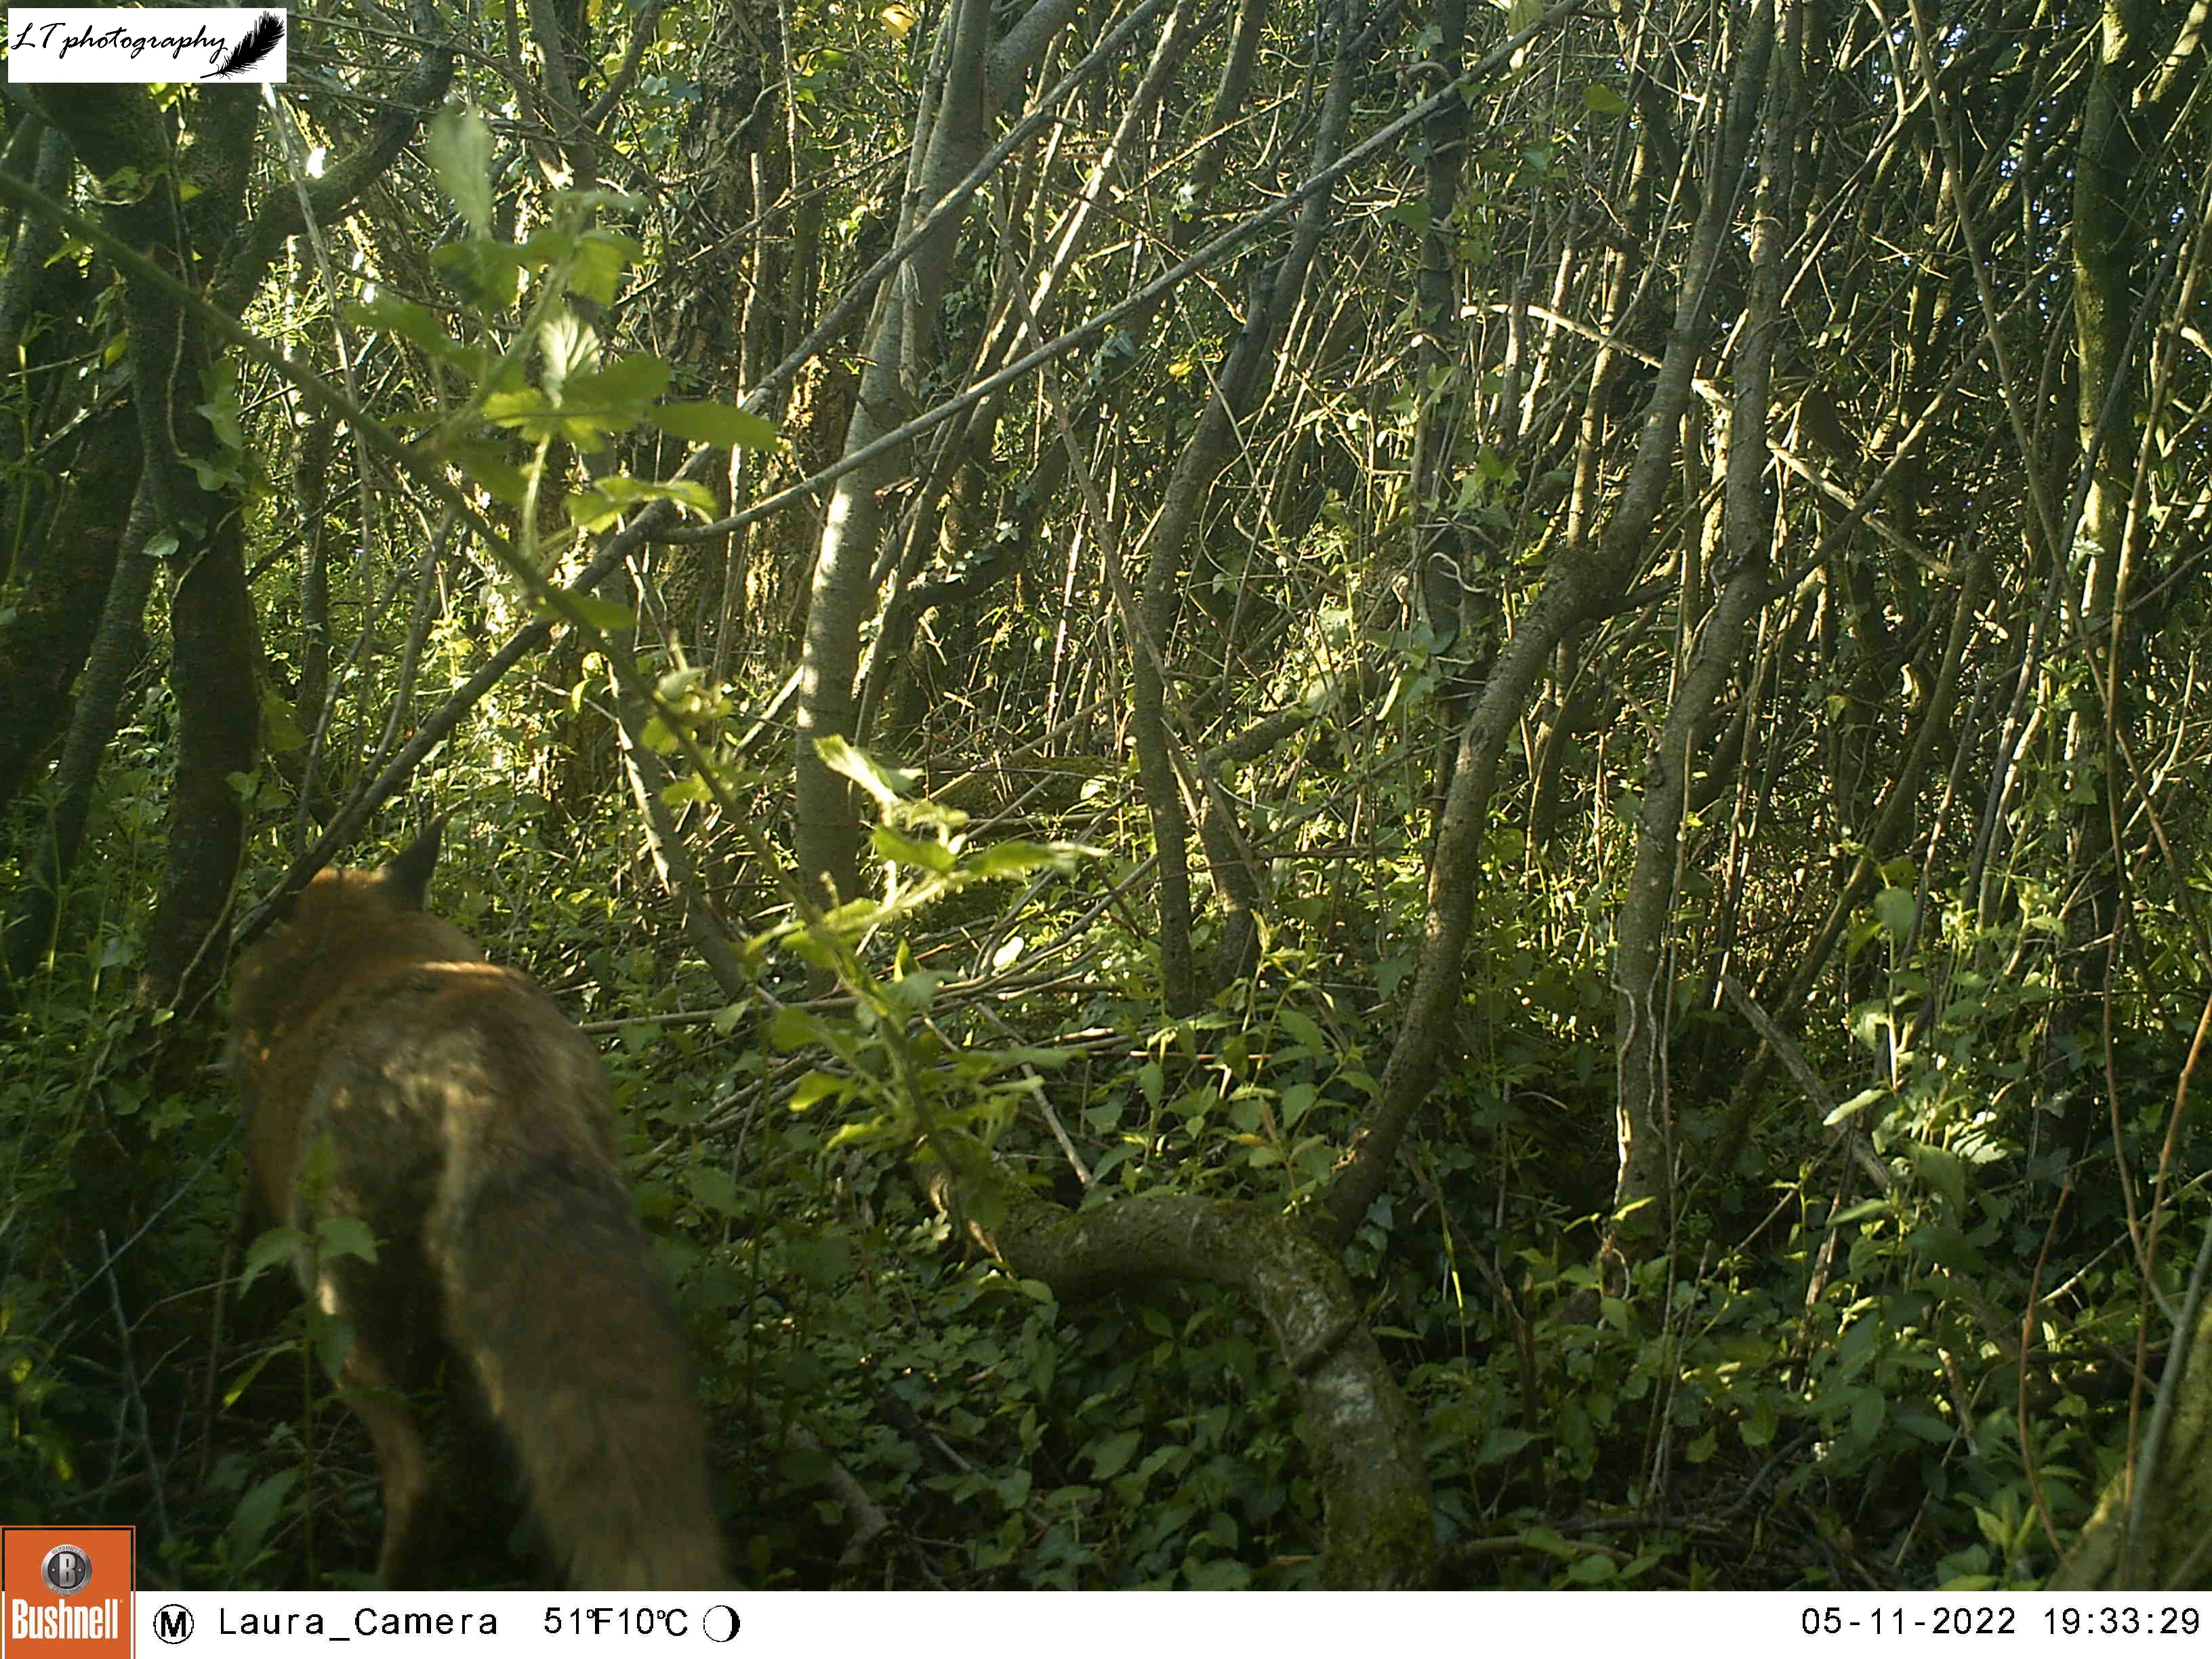
Day 10 – I got to experience lots of fantastic wildlife during 2023 with my two camera traps, and one highlight species was definitely the fox. Here is the first glimpse I got of a family foxes with four very young cubs, that I went on to watch grow up to become independent themselves. Fantastic! (For more check out my blog post Spring Dorset Camera Trapping Part 2.: Fabulous Foxes).

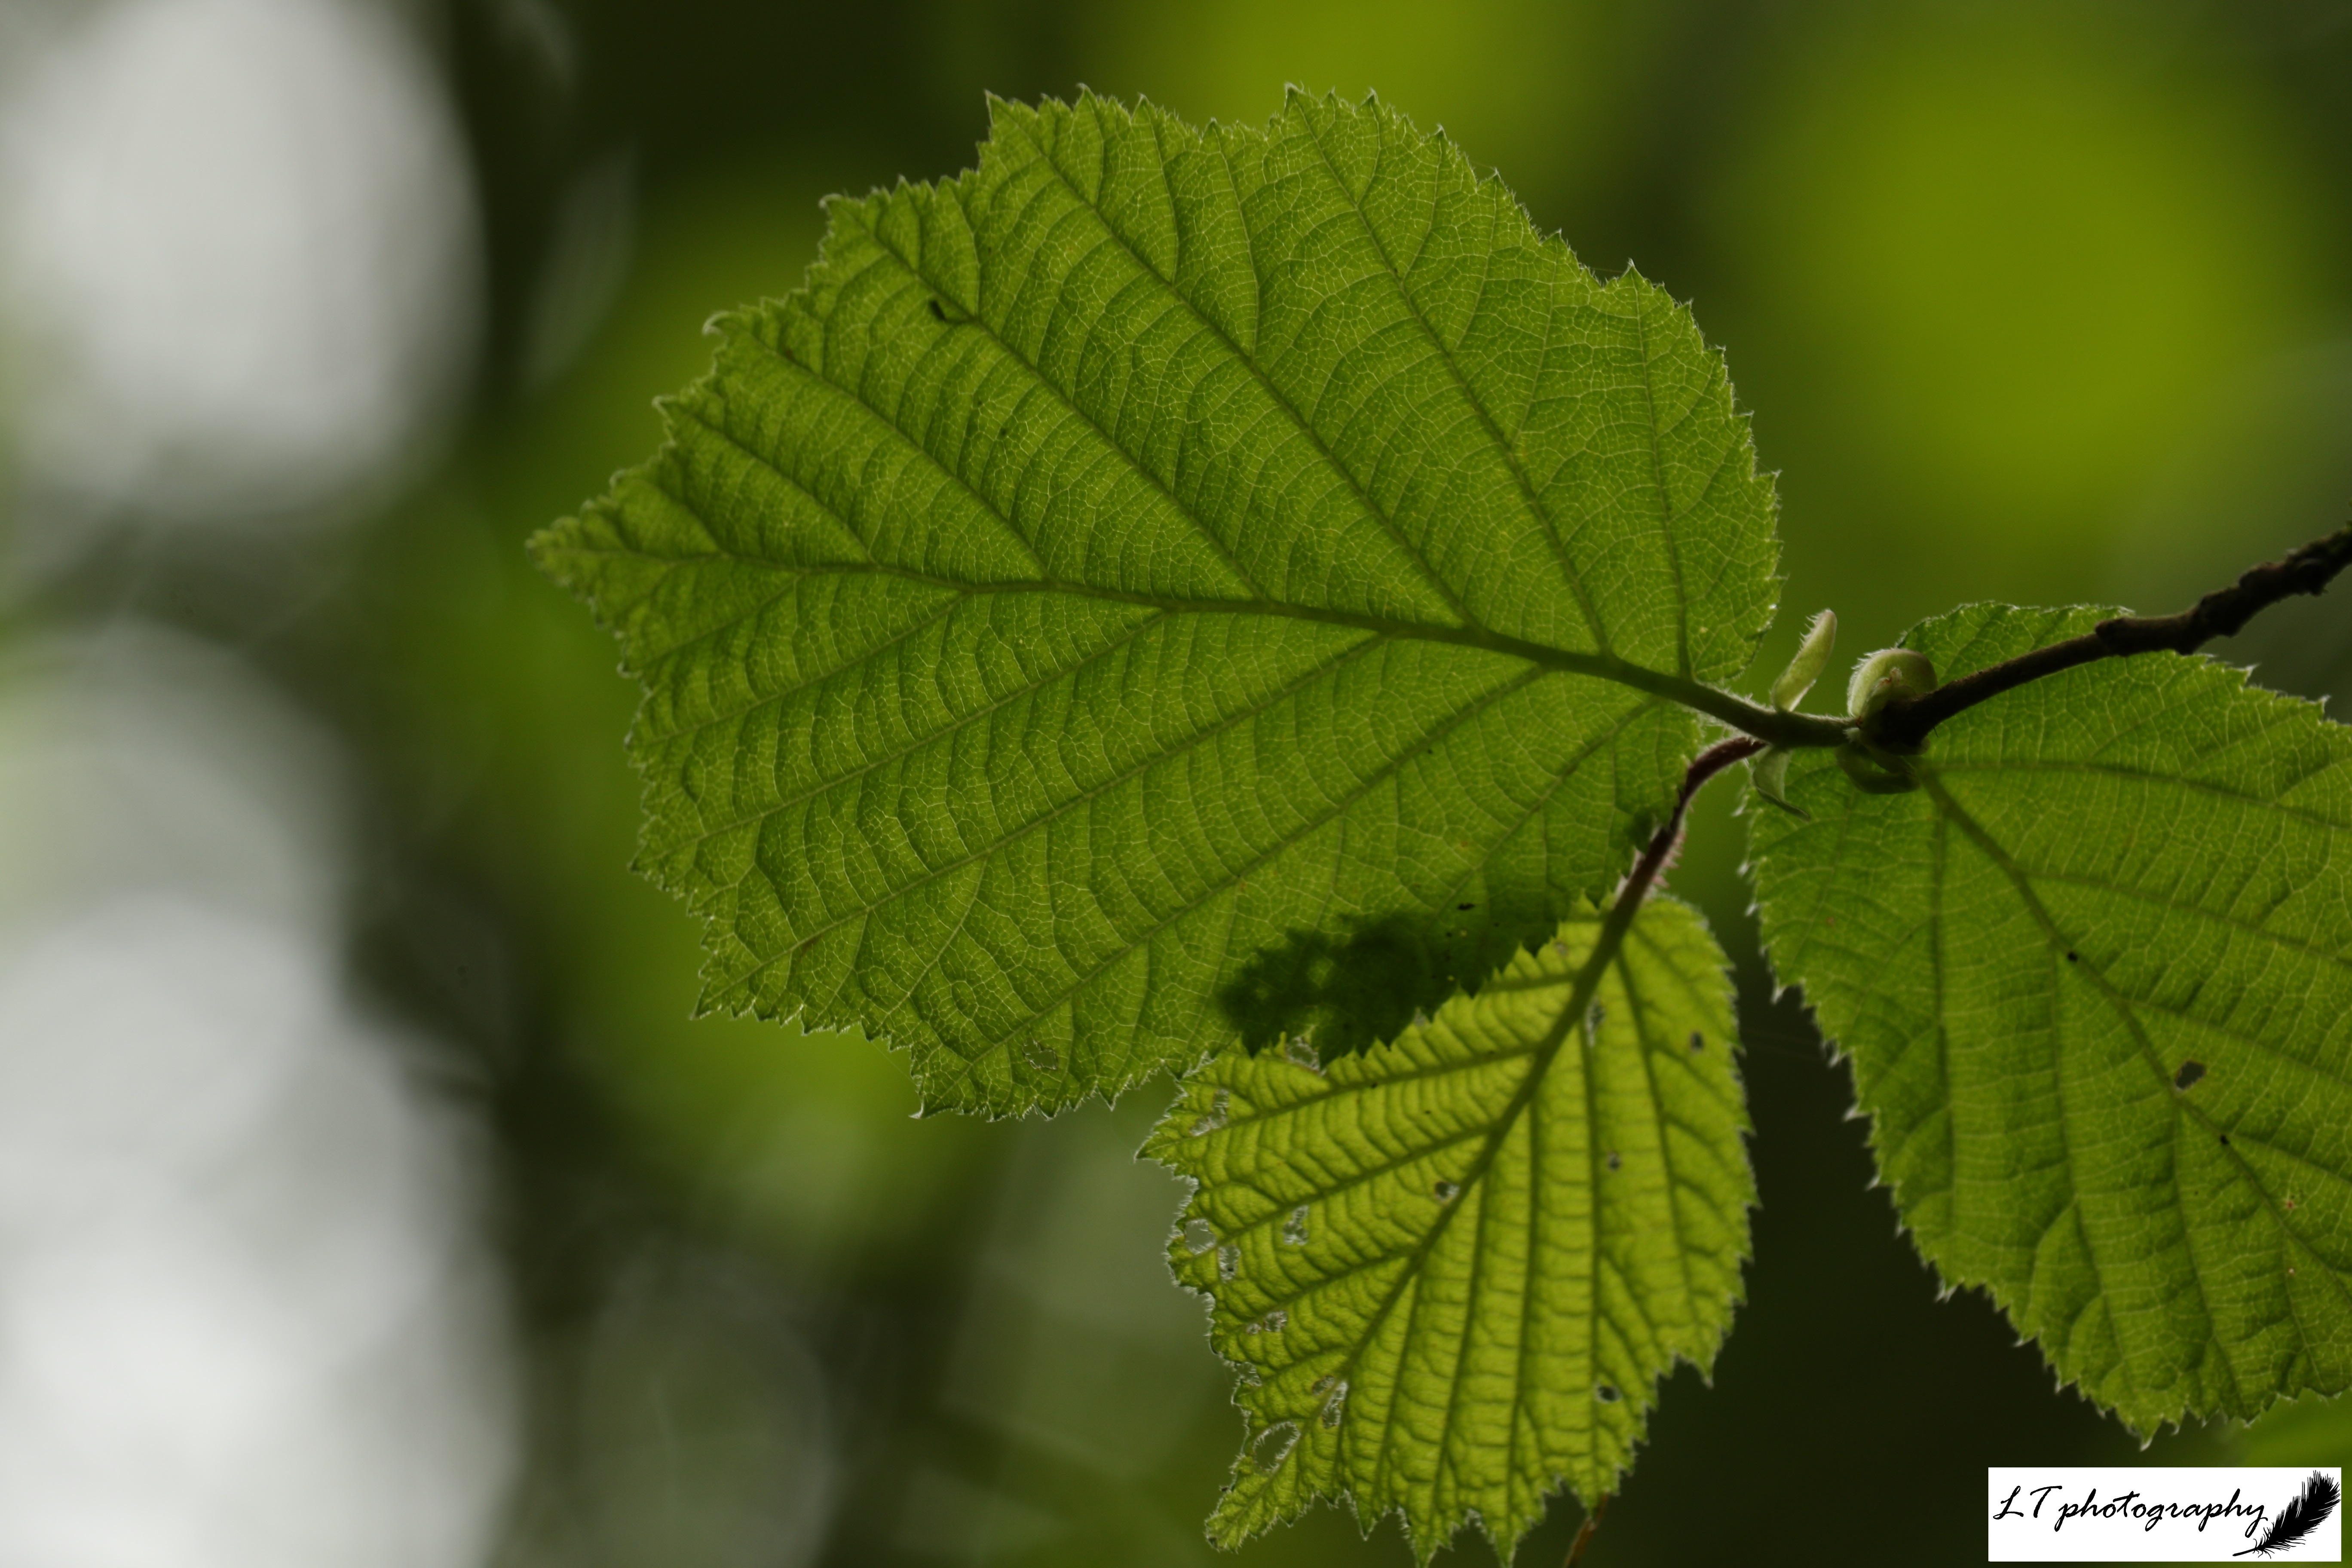
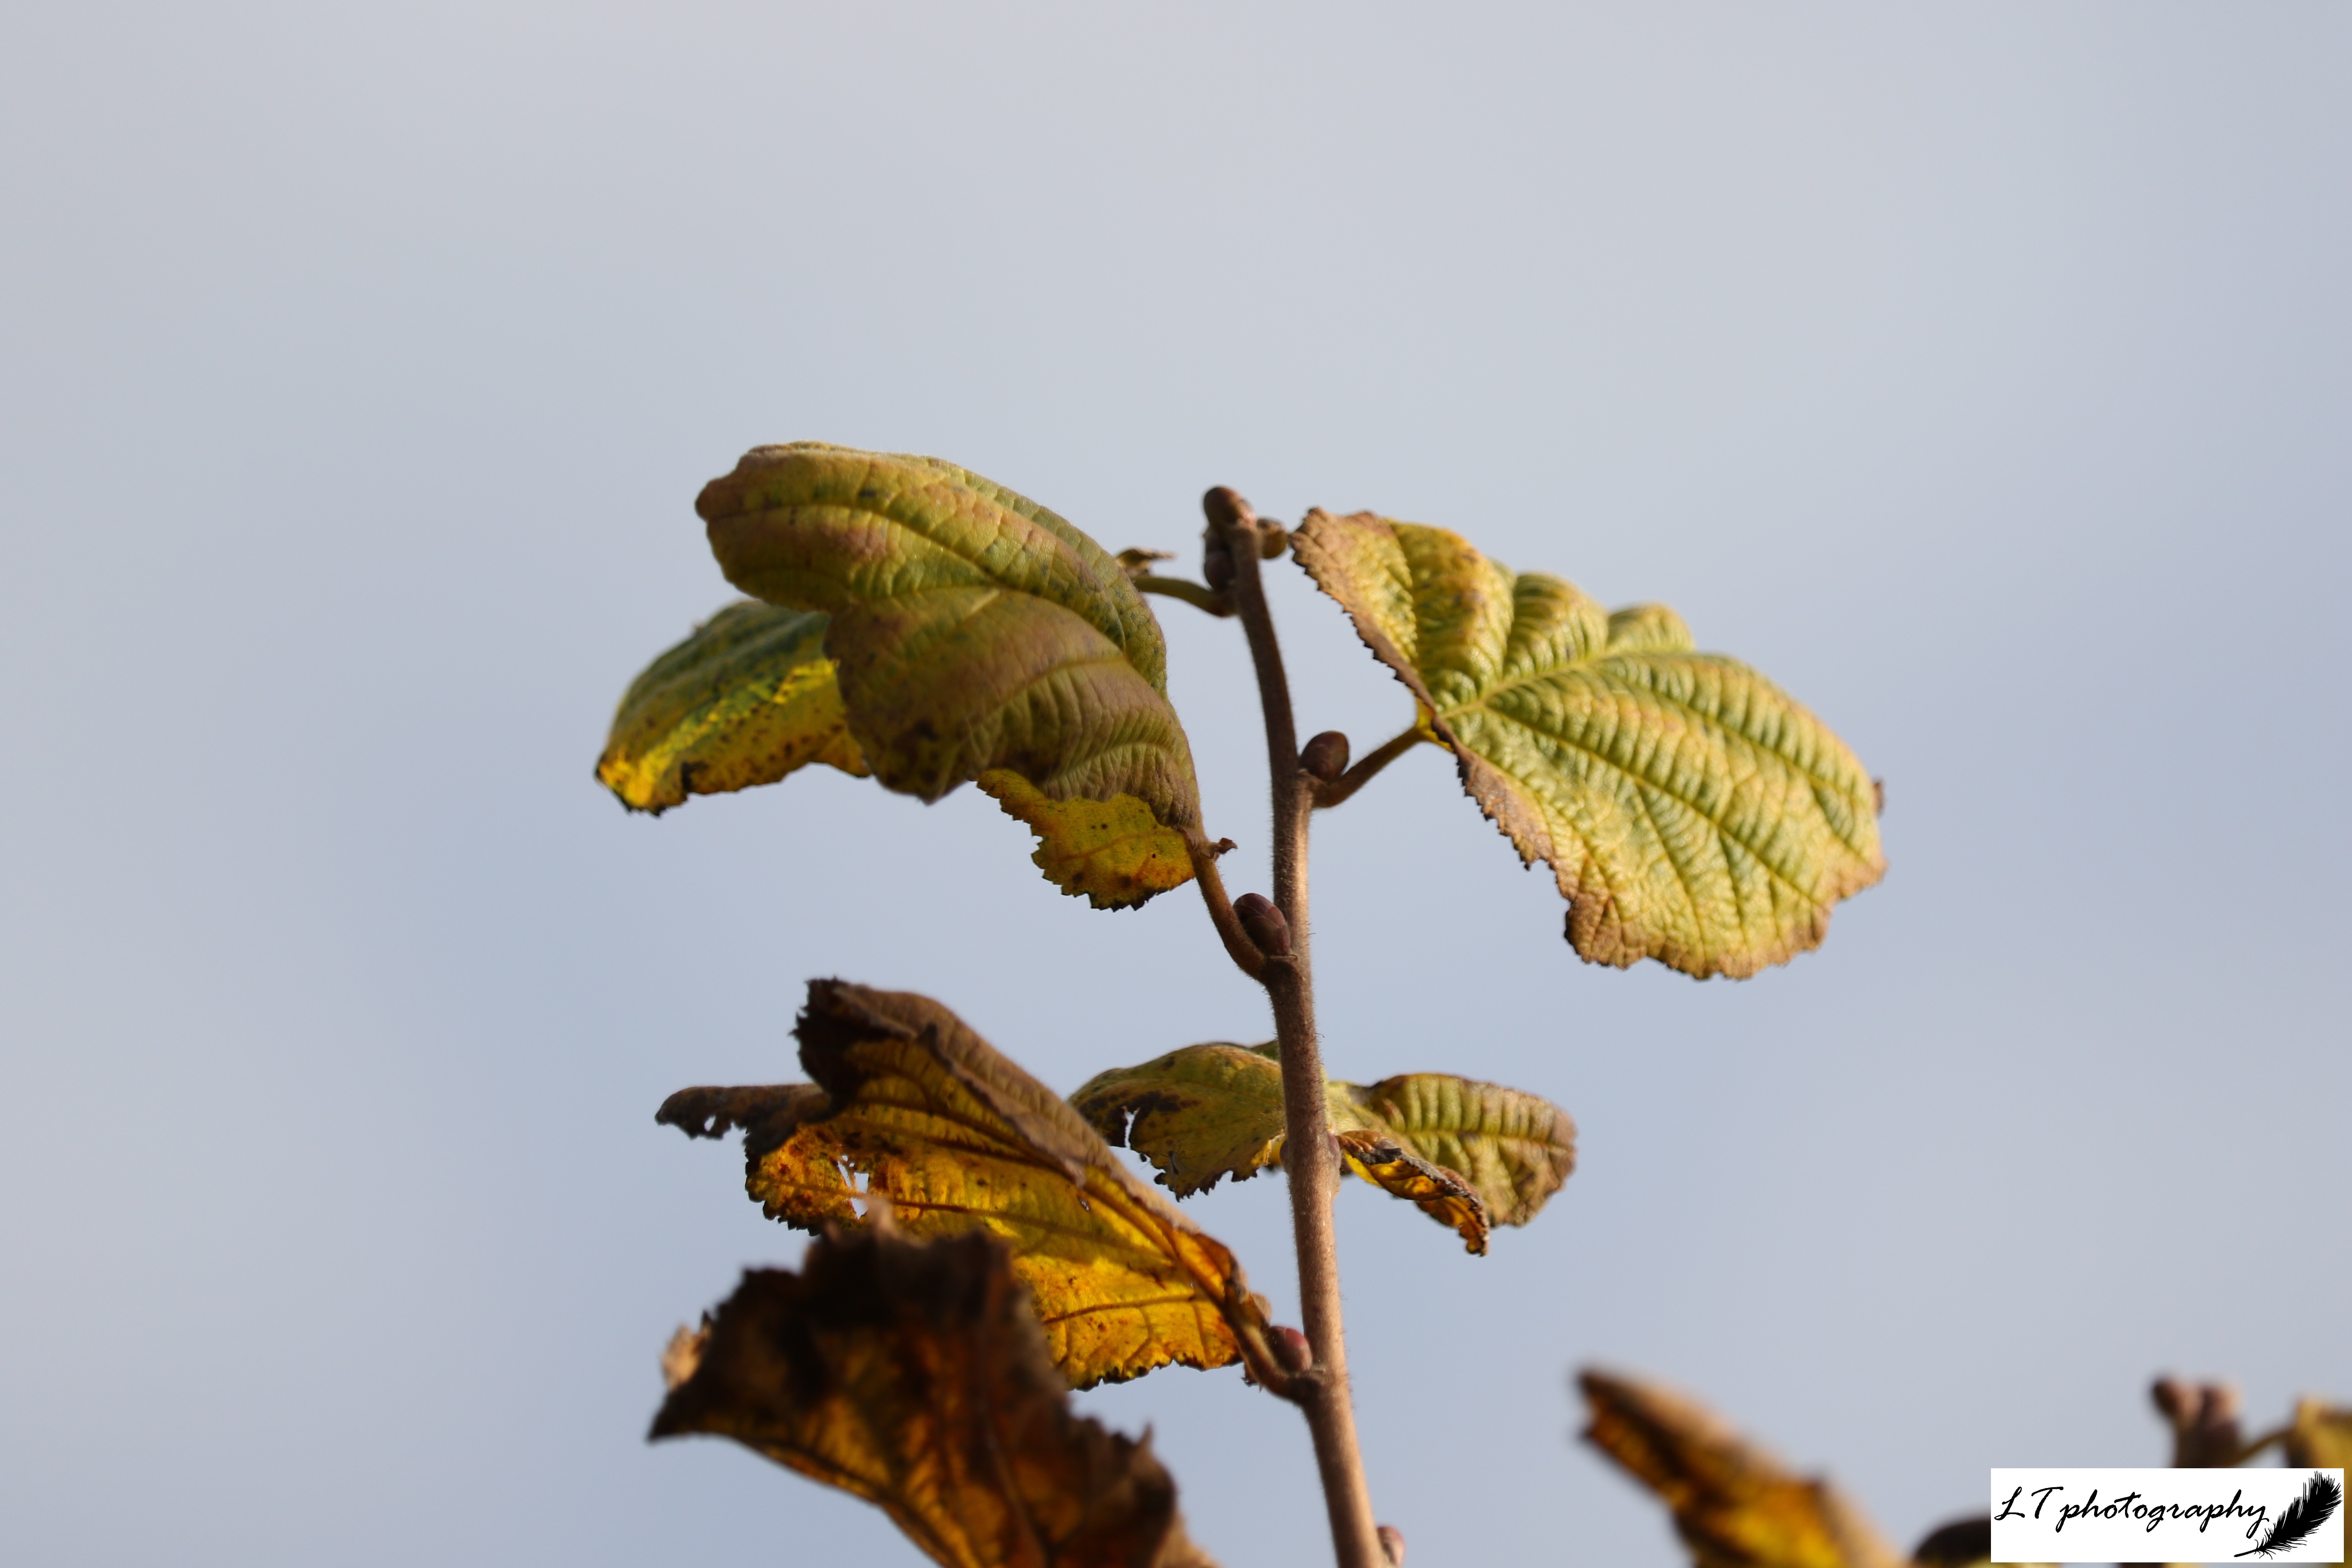
Day 11 – For my penultiate day, I picked this photo as I enjoy how the light delicately falls through this hazel leaf, highlighting the veins stretching out across its surface. Thus, I look forward to the return of green leaves when spring rolls round once again.

Day 12 – For my finale, I decided to head back into the woodlands during late spring. Under boughs of hazel here, a lone early purple orchid can be found standing watch over a well trodden animal track, calling the observer deeper into the trees.

For now it is time to look to the present and to make the most of the winter months still to come!

Spring Dorset Camera Trapping 2022 – Pt. 1: The Farm

“The camera is an instrument that teaches people how to see without a camera” – Dorothea Lange

“The two most engaging powers of a photograph are to make new things familiar and familiar things new” – William Thackeray

As each year passes, and spring rolls around once again, I set out with my trusty camera trap to record the wildlife that call my family’s Dorset farm home. Remote cameras are a great way to delve into and explore the hidden worlds of the wildlife that live alongside us, without causing disturbance. You never know what you may discover, and so there is nothing quite like the excitement I feel each time I check my cameras.

For the last few years I have spent an increasing amount of time using my camera traps to explore and survey my area of Dorset, and each year the results have got better and better. Species recorded range from small mammals and birds up to larger more iconic mammal species, such as badgers. These adventures have allowed me to open my eyes to the species that goes unnoticed on the farm each day, and to help my family forge a deeper connection with the wildlife we strive to manage and protect. Check out my blog posts from 2019, 2020, and 2021 for more!

This year I have visited 8 locations on my family’s farm, using both my old camera trap and brand new model to see what I could discover (check out next week’s blog post for the 8th location). Last year 6 locations were used that were all visited this year also. Some of these sites were used with a set purpose and question to answer, whereas others are just great sites to use for exploring wildlife. This year 9 species were recorded, with 1 new one to add to the collection. Read on to find out what my camera traps found!

Camera Trapping 2022

Little Wood Field

This year I set up my camera trap 12 days earlier than last year, beginning with a new site. I had spotted an interesting tree at the edge of a small field, where a hole had been dug between its roots, and I wanted to know who may have dug it. So I set up my camera watching the track in the field leading to the hole, and left it from 22nd-26th March to see what I could find.

It was a good start to spring camera trapping, but with mixed results. Different arrangements of male and female pheasants made an appearance every day, birds in the form of magpies, a woodpigeon, and a carrion crow were seen, and potential home owners came in the form of a fox and a badger. Though the badger may have possibly been using the hole, in the end I came to the conclusion that the hole was not currently in use.

Monkwood Field

For my next site, I returned to a new site from last year, a small abandoned satellite badger sett that had been home to a family of foxes. When I went to put out my camera, I could see that a new hole had been dug in the sett, so I set my camera to watch the track heading from the field directly to this new hole over 2 nights (26th-27th March), due to stormy weather.

In the short time it was operating, my camera trap was productive, with a displaying male pheasant, a fox passing through (maybe the same from Little Wood?), and the sett’s current resident. My camera was able to show that the new hole belonged to a lone badger, most probably a male.

Later on in the season I decided to see where the fox may have been coming from, and returned to Monkwood Field. I chose to set my camera trap in the corner of the field on a tree trunk within the hedge, looking at the animal tracks that run through it. I did not know what results I would get, but after nearly a week (8th-13th May), my camera actually did quite well, despite not pinpointing where the fox may have been coming from. I caught sight of the fox a few times, and got some nice photos of a territorial male bullfinch and territorial male blackbird.

Quarry Field Badger Sett

For the last 3 years running, I returned my camera trap to my highly successful site at the active Quarry Field badger sett. Each year I have set my camera up on a fence post in an open space within a hedge lying directly above the sett, pointing in one of 2 directions. Previously, it has been a great site to capture the resident badger family and the other animals sharing the sett, in particular fox families. Last year, in this way, I got to watch the antics of 2 fox cubs living in the sett.

For a week during April (16th-23rd), my camera trap watched this site. During this time, rabbits were a common sight every day, day and night, along with a busy badger every night. So far there was no sign of any foxes at the sett, as in past years.

As this site still seemed to be a productive one, I returned to the sett with my camera trap for a second round once some time had passed. For 2 weeks (6th-20th June), my camera was very busy, capturing rabbits, male and female roe deer, a territorial male blackbird, and at least one fox passing through. The best photos though came in the form of the sett’s resident badgers, and two small editions. An active family, it was amazing to watch the cubs and adults feeding, grooming and playing each day.

Gill Hill Copse

This copse has been another of my regular camera trapping sites over the past 3 years. At this site, I tend to set my camera up on a tree, as with this year where I set it watching an animal track passing through the copse.

This year, over 6 days (23rd-29th April), my camera was not particularly busy, but did capture one of the many male pheasants in the area, as well as a fox passing through.

Dorset County Council Wood

The small piece of wood close to my home is another site that I have used over the last 3 years, situated next to this year’s new Little Wood site. This year, I first visited the wood at the beginning of May, setting up my camera on a tree to face an animal track coming off a quiet road into the wood. After a week (2nd-8th May), my camera had caught photos of a one off woodpigeon and a regular badger.

As spring passed away, I decided to give my camera trap one last go in the wood, over 4 days between 20th and 24th June. This time I set up my camera further within the little wood, facing a clearing. Though the only animal photographed during this time was a fox, I was still excited to see the charismatic species passing through.

Badger Field Badger Sett

My oldest camera trap site is an active badger sett in a hedgerow between two fields. Over the years this sett has given me badgers, fox cubs, and even a field mouse. This year I returned and set my camera up in its usual spot on the trunk of a small tree in the open space within the hedge above the sett. Within a week (13th-21st May), I caught sight of a blackbird, a fox, and a badger. Though no fox cubs, this active sett excitingly had badger cubs again, like the Quarry Field sett.

Cowleighs Paddock

Towards the end of my spring camera trapping, I tried another new site in the hope of capturing sight of a particular species. This year has been a very good year for foxes on our farm, for example with 3 potential breeding females living along the same connecting hedgeline. Though at the beginning of spring I had discovered one litter of fox cubs (check out next week’s blog post), I had yet to find any others. I had a hunch about one den though, potentially situated in a ditch alongside a small paddock. I set up my camera trap and waited 2 weeks to see what I would find (22nd May-4th June).

My camera trap did not fail me. Alongside a showy male pheasant, my camera caught the photos I had hoped for. At least one fox cub can be seen playing and exploring in the long grass in the paddock outside the ditch, along with photos of an adult female bringing food to the same spot. Though from these photos I cannot confirm how many fox cubs are in this litter, it is great to know that they are there and doing well! A great spring this year!

How to… Make Your Own Bird Nest Box

As our summer visitors, such as Swallows and Willow Warblers, leave us for sunnier shores, and we wait for our winter returnees, such as Redwings, the world outside our doors is slowing down and wildlife is preparing for the colder times to come. Autumn is a time for extraordinary spectacles, storing up food and changing colours, but also a time for us to do our bit, to help our wild neighbours with their preparations, and to prepare for a new year to come. This can range from cleaning ponds and putting out food, to planting trees and creating wood piles. It is also importantly a time to provide new homes for nature.

Previously, in spring/summer I posted on my blog about how to make a home for nature in the form of a bee hotel (see How to… Make Your Own Bee Hotel). A bee hotel is aimed at providing solitary bees (90% of UK bee species) with a place to nest, and for my blog I made a bee hotel that has now had some success. There are other forms of homes that we can make for wildlife though, for example for different species of bird.

In the UK, more than a quarter of all bird species are of the highest conservation concern, with a decline in breeding birds (44 million) between 1967 and 2009. This means that conserving and creating habitat for birds is an important issue, and something we can all get involved in. One example of an easy way is to put up nest boxes, which mimic natural habitat. They create an effective artificial cavity for birds, providing an accessible alternative for species that are currently experiencing the loss of breeding habitat and winter roosting sites.

Nest boxes come in a variety of shapes, sizes and designs, which will depend on the species of choice and the purpose they need to fulfill. Though you can put up a nest box at any time of year, the best time is right now, ready to be used as a roosting site throughout winter and for breeding in the spring. This way you can increase the chance of your nest box being a success next year. There are no set rules though, so why not try making your own today!

How to Make a Bird Nest Box

What you need:

  • A plank or offcuts of untreated wood, about 15mm thick for insulation
  • Tape measure & pencil
  • Hand or power saw
  • Drill & different sized drill bits
  • Sand paper
  • Hammer & nails
  • Screws
  • Sealant, a piece of rubber or something similar
  • Optional: Hole plate

Step by Step Guide:

  1. Decide on your nest box design. Your nest box will most likely be aimed at a certain species, such as Robins or House Sparrows. You can also choose particular design features, such as a flat or apex roof. For the purpose of this guide though, I will provide instructions to make a standard Tit nest box.
  1. Use a tape measure and pencil to mark out the wood you need, either by creating templates out of paper or cardboard, or by drawing straight onto the wood. For this design you will need 6 pieces: a back (45cm x 15cm); a base (11cm x 15cm); a front (21cm x 15cm); a roof (20cm x 15cm); and 2 side panels (25cm high at the back, 20cm high at the front, and 11cm wide). Use a hand or power saw to cut the wood into the 6 pieces needed.
  1. Next, take the front panel and use a wide drill bit to make a hole towards the top of the panel, at least 125mm up, which the birds will use to enter the nest box. The size of the hole will vary between different species, but for my nest box I made a 25mm hole, aimed at Blue Tits and similar Tit species.
  1. Use sand paper to sand down any rough or uneven edges of the wood, that otherwise could cause problems for birds using the box.
  1. Use a hammer and as many nails as you need to make the back, base, sides and front fit together forming the main body of the nest box. It is often best to mark where the nails will go first and partially drive each nail through the first piece of wood first (e.g. the back), which will make nailing the pieces together easier and help avoid splitting the wood.
  1. Attach the roof to the box using screws that you can later remove when needing to clean the nest box out. Seal the gap between the roof and the back of the nest box with either flexible sealant or an attached flap of recycled rubber.

Optional editions: Add a nest box hole plate to the front of the box to prevent predators from enlarging the nest box hole and larger bird species using the box. Also, you could apply a water-based wood preservative product to the outside of the box to prolong its life and help to repel water.

Tips on putting your nest box up

  • Unless there is shade during the day, position the nest box facing between north and east to avoid strong sunlight.
  • Choose a location which is 2-4 metres above ground level, out of reach of predators, and away from constant disturbance.
  • Make sure there is a clear flight path to the entrance of the nest box and that there is shelter from bad weather.
  • Place your box away from the location of any other nest boxes to reduce the chances of competition.
  • Avoid using nails to attach the box to a tree, as they may cause harm. Instead try to tie the box to the trunk or hang it, or otherwise use stainless steel screws or nails that do not rust.

Enjoy!

How to… Make Your Own Bee Hotel

As the planet continues to experience the loss of plants and animals on an unprecedented scale, it is now increasingly important that we all try and do our bit for nature. Though it can be disheartening and tough to know what to do sometimes, making one small step could be a real start to making a difference. For example, one easy thing you could do, is to provide a home for wildlife, such as a wildflower area, pond, or even a bee hotel.

The increasingly popular bee hotel is a home that is made for solitary bees, which include Leafcutter and Mason bees, and are those that live on their own rather than in colonies, make up about 90% of UK bee species, and are very important pollinators. With the loss of 97% of wildflower meadows since the Second World War, along with other factors such as pesticides and intensive farming practices, solitary bees are now heavily under threat, with less suitable habitat currently available to them.

One way we can help, is to produce nesting sites in the form of bee hotels. These structures are made up of a frame filled with tubes mimicking the natural cavities solitary bees use to nest in, which are typically tunnels in dead wood or hard soil. From spring to summer, different species will build inside these tubes, lay their eggs, add a supply of nectar and pollen, and block up the entrance. The eggs will then hatch, feed, and pupate, before emerging the following spring.

Though spring is the best time to make and put up a bee hotel, you can make one anytime you wish. There are also no set rules on how to make or use a bee hotel, as they are a relatively new phenomenon and advice on them is changing all the time. For now though, here’s some guidance I can give to help you make your very own bee hotel. They can take some time to make, but are very rewarding, and are also a great activity to currently do as part of your 30 Days Wild challenge!

Cherry Blossom

How to make a bee hotelWooden Planks

Examples of considerations include:

  • Simple or aesthetically pleasing and complex design?
  • Vertical or horizontal?
  • Sloped or flat, overhanging roof?
  • For your garden or a small space e.g. a window sill?
  • Use only recycled and reclaimed resources?

Always think of the bees when making your decisions though!

What you need:

  • Offcuts of planks of untreated wood, about 1.5cm thick
  • Tape measure and pencilSaw
  • Saw
  • Hammer and nails
  • Sand paper
  • Tubes varying in size from about 2-12mm, with a length of at least 10mm, though ideally about 16mm. For example: bamboo canes, hollow plant stems such as sunflower stems, or bespoke bee tubes
  • Chunks of untreated hardwood or Hammerlogs
  • Drill
  • Bits to hang up the bee hotel e.g. T bracket, screws, screw driver, Rawlplug wall plugs

T Bracket


Step by step guide:

  1. Decide on your bee hotel design. Bear in mind, that smaller is better to be able to easily move the bee hotel around and to encourage bees to nest at lower densities
  2. Use a tape measure and pencil to mark out the pieces of wood you need; the most simple designs have 5 pieces. Then use a saw to cut your wood, and sand paper to sand down any rough or uneven edges

  3. Use a hammer and as many nails as you need, to create the frame of your bee hotel
  4. Cut your chosen tubes to the right length to fit into the frame of your bee hotel, and sand paper off any rough ends. By using several different sizes of tubes, you increase the chance of attracting a wider range of bee species, due to variation in their preference for nest tunnel size. You can also drill holes into chunks of untreated hardwood or logs to create some more variety in your bee hotel
  5. Carefully build up your frame with your tubes and drilled wood, until it is filled. I suggest lying your bee hotel on a tilted surface to make this easier to do

  6. Decide on a suitable location for your bee hotel. It is important to place it in full sunlight, for example facing south or south-east, at least 1 metre above the ground, and not covered by vegetation
  7. Hang your bee hotel up. For mine I used a t bracket, screws, screw driver, drill and rawlplug wall plugs to attach it to the south side of my house
  8. Then wait for the bees to come to you!

Tips

  • The smaller the bee hotel is, the more effective it will be!
  • Create an overhang to give the bee hotel tubes some better protection from the rain
  • Every autumn take down your bee hotel and store it in a cool and dry location, to reduce risks such as of fungal infections
  • For best results, clean the bee hotel out every year, including removing, cleaning and preparing any pupae for release the following year

The bee hotel I made is far from perfect, but I hope it gives you some inspiration to help make yourself an even better bee hotel!